


MO Tested: No-Mar Classic HD Motorcycle Tire Changer Review
Easy to use and pays for itself over time


As motorcycles become more reliable and maintenance intervals get more spread out, one consumable remains on a fairly frequent interval for motorcycles. Tires have made tremendous advances in the last decade, but they are still the most frequent maintenance items for motorcyclists. With the rates for mounting and balancing tires going through the roof (My local shop charges $60 for a pair of tires with the wheels off the bike.), buying a tire changer makes a lot of sense. I’d been eyeing No-Mar Tire Changers for quite a while before pulling the trigger and installing one in my garage. In less than a month and after changing a dozen tires, we’d have already spent about 35% of the cost of the No-Mar Classic HD Motorcycle Tire Changer at our local motorcycle shop, but what’s most important is how convenient it is having a tire changer in my garage available when I need it. I no longer have to load my wheels into my truck, drive to my local shop, wait an hour (or more) for them to be ready, and finally take them home to reinstall on my bike.
In the bad old days, I used to change my own tires on the floor of my garage. However, I got sick of the bloody knuckles and scratched rims caused by using tire irons to pop street tires off rims. Eventually, I decided that I disliked changing tires so much that it overcame my distaste for the ridiculous cost of having a shop do it. The thing is, I usually love wrenching on my bike. So, it continued to eat at me, ultimately leading me to my search for a tire changer.
No-Mar Classic HD Motorcycle Tire Changer

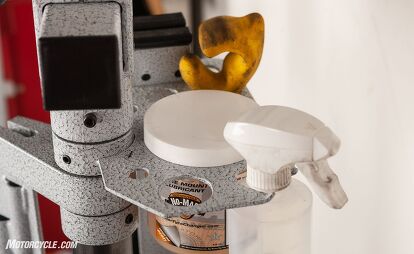
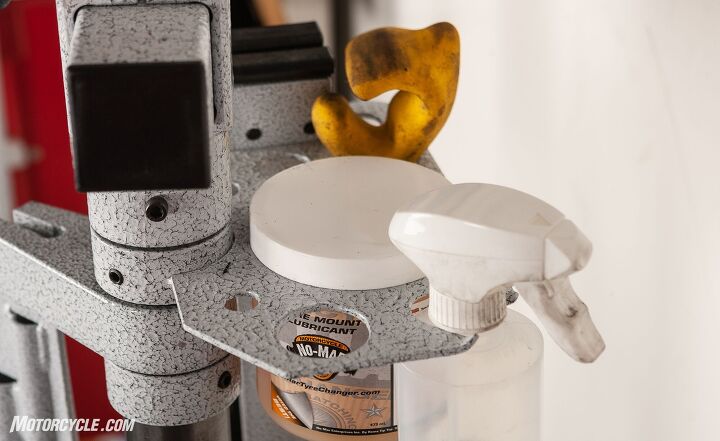
No-Mar manufactures all of its wide range of tire changers at its production center in St. Louis, MO. In fact, the breadth of tire changers offered by No-Mar prompted me to call them to discuss what changer would be the best for my (and MO’s) predicted use. In the end, they put together a package, including some accessories to address my specific needs – and so far the suggestions have been spot on. The package consisted of a No-Mar Classic HD Motorcycle Tire Changer, a set of Posi-Clamps (for changing dirt bike tires, big cruiser tires, or tires mounted to spoked wheels), a pair of Spoonbar 16” Non-Marring Tire Spoon/Iron Set (for large displacement cruisers, ADV bikes, and touring bikes), and a Yellow Thing (more on that later). No-Mar also sells wheel balancers and balancing supplies, but I already had them.
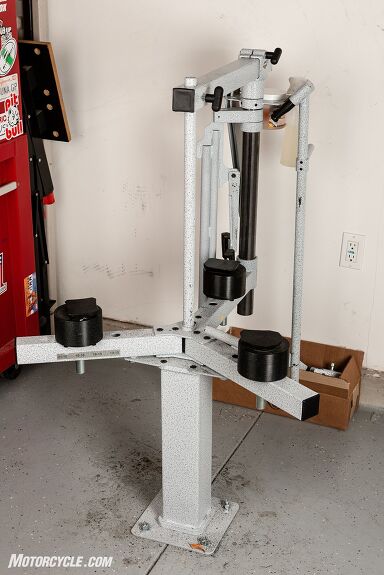
The Classic HD Motorcycle Tire Changer is constructed of steel that is protected with powder coat. Several mounting options are available, even a handy hitch mount that will fit standard two-inch receivers for your truck or SUV, but I opted to bolt it to the floor of my garage. Since I forgot to order the $10 Tire Changer Floor-Mounting Kit, a quick trip to the hardware store was necessary to mount the base. After drilling and installing the floor studs, assembly of the tire changer took about 45 minutes. The instructions were clear, and all of the parts bolted together without any need for massaging.
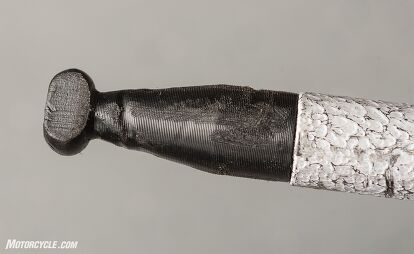
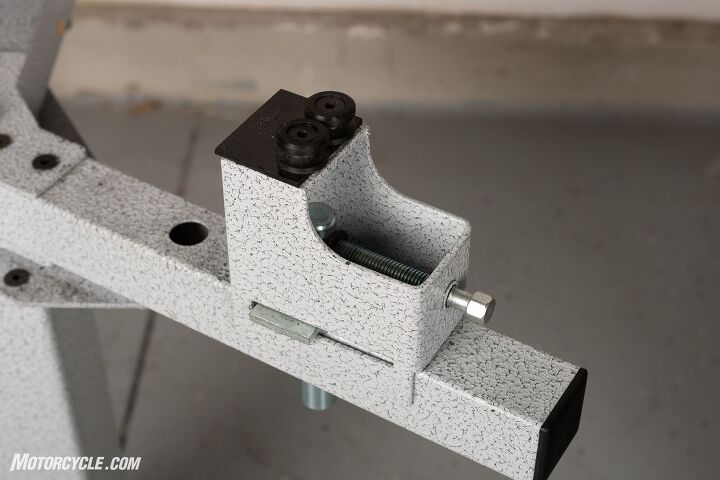
The key features of the Classic HD Motorcycle Tire Changer are the waist-high platform, the locking cam and dog blocks that hold the wheel in place while you’re working on it, the built-in, waist-level bead breaker arm with its non-marring working surface, and the secret sauce of the whole package, the mount/demount bar with its scratch-proof tips. Other goodies that make life easier are included with the system: tire lube paste, a spray bottle for tire lube, a spare demount tip, and a tool collar to hang the accessories from.
Putting it to the test
I’ll admit that I was a little nervous the first time I placed the rear wheel from my 790 Duke on the operating table the afternoon I finished assembling the tire changer, but even though my new tires were still being shipped to my house, the adaptability of the system fascinated me. I had to try it out by removing and remounting the tire I already had. (Note, this change was not included in my tire change total for cost calculations.) Armed with the knowledge gained from watching videos on the No-Mar website – and one extremely important tip from my contact there – I went to work.
With the bead breaker, I learned right away that there is a sweet spot where the non-marring plastic of the working end would do its job on the tire. Even with my newbie fumbling around, both beads were broken in just a couple of minutes.
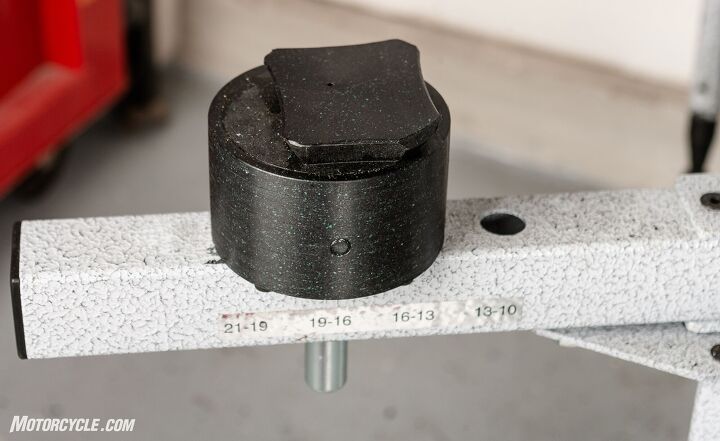
The clever design of the patented Locking Cam and Dog Blocks allows for a variety of wheel sizes to be mounted to the changer. The trick is to work on one block at a time. First, you depress the tire on the block before sliding the edge of the rim into the retaining slot and then repeat on the second. The third mounting point, the locking cam, requires that you hold the rim in position after the edge is in the slot, while you reach under the tire to rotate the cam as far as it will go. This holds the wheel in place remarkably securely, and I only had the wheels I mounted shift slightly during the tire mounting process. Having an assistant hold the wheel during that last, toughest part of the process will keep it from moving. However, during my solo tire changes, I found that the shift of the wheel is so slight that I didn’t need to worry about it. (If you do have a particularly difficult tire that keeps spinning on the dog blocks, taking a ratchet strap from a wheel spoke to a fixed location on the tire changer will keep the wheel in place.)
But I’ve gotten ahead of myself.
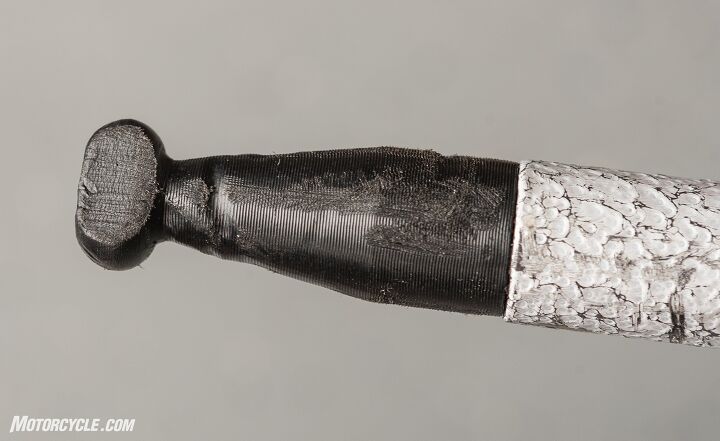
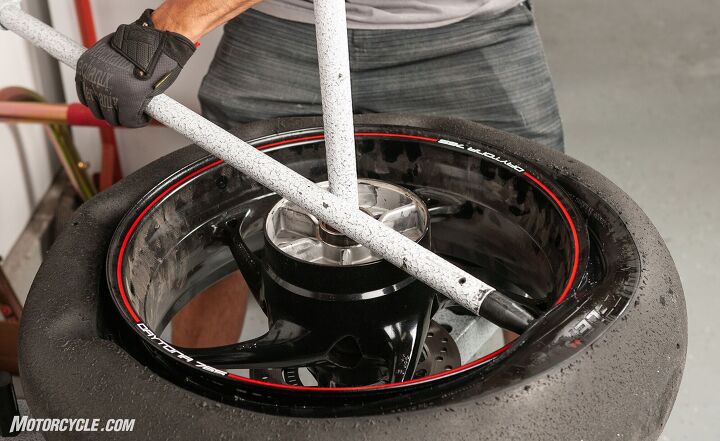
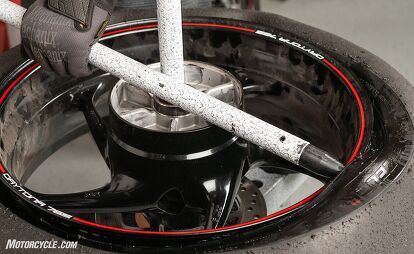
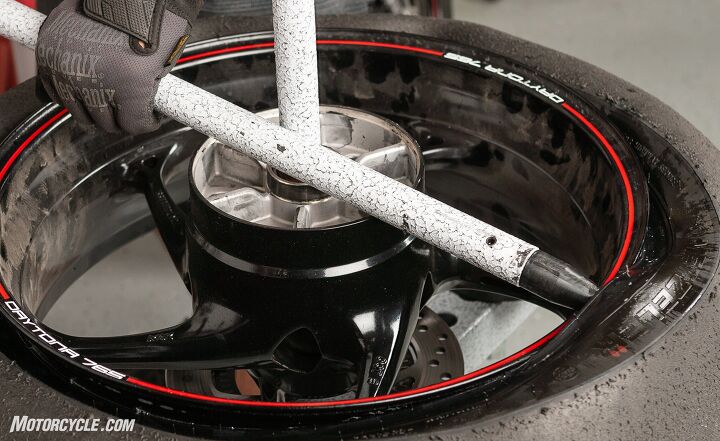
The first tire removal showed me the simple beauty of No-Mar’s tire changing bar. The tip has two flat sides that make it easier to work it between the bead and the rim. Once the tip is in there, rotating it 90 degrees locks it in place behind the bead. The next step is the most important one and makes the difference between the bead easily popping over the rim and the breaker bar needing to have the tip replaced. ( Right, Troy?) With the tip locked in place behind the bead, lift the bar straight up – don’t pry – until the bead and the tip are all the way up against the rim. Then you can lay the mount/demount bar across the wheel, lifting the bead gently over the rim. After that, rotate the overhead swivel arm in position and lock the center post in place. Using the center post as a pivot point, simply walk the bar around and watch the bead come off in seconds. For someone who has sweat and muscled beads over rims with tire irons, this is an extremely satisfying moment – one that you get to repeat with the second bead. (Although I have heard that some cruiser rims can be particularly tough, I haven’t run into any problems with street tires, yet.)
Mounting the new tire requires a little more elbow grease and the application of No-Mar’s Tire Paste. To ease the mounting process, apply a thin coating of the paste to the drop center of the wheel. Additionally, a small application to the outside of the rim between 10:00 and 2:00 (when facing the tire changer from the front) helps slip the first bead over the rim. Begin by sliding the bead over the rim at 6:00 pressing on the tire, working both sides up to 12:00 where it should pop on with one final push. Before going any further, now would be a good time to double-check that you are mounting the tire’s rotation correctly and that you’ve got the dot on the tire lined up with the valve stem. Otherwise, you could end up needing to remove the tire and flip the tire after you’ve muscled the second bead onto the rim. (Another good idea is to let the new tire warm up in the sun for a while to soften it up before mounting it. If you don’t have warm weather and sunshine, I’ve heard that you can leave a hairdryer on low inside a tire for a few minutes.) If you haven’t done so already, apply a little tire paste to the inside of the bead at 10:00 and 2:00.
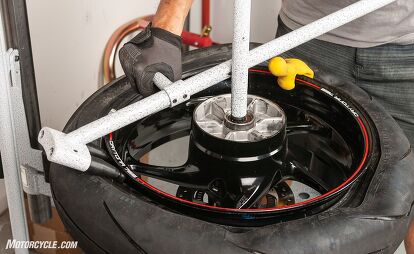
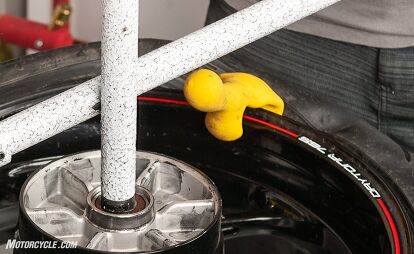
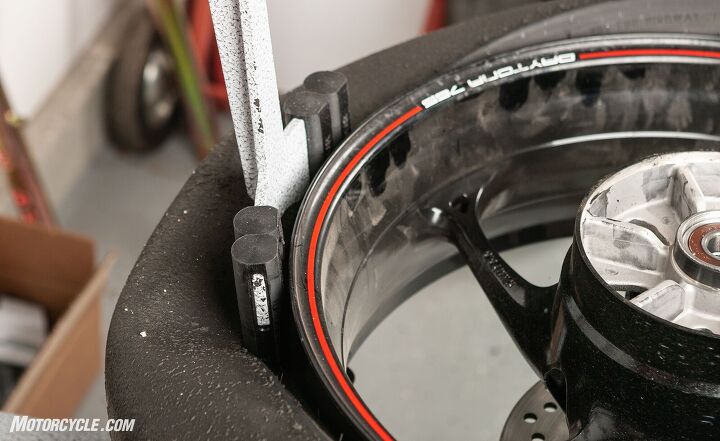
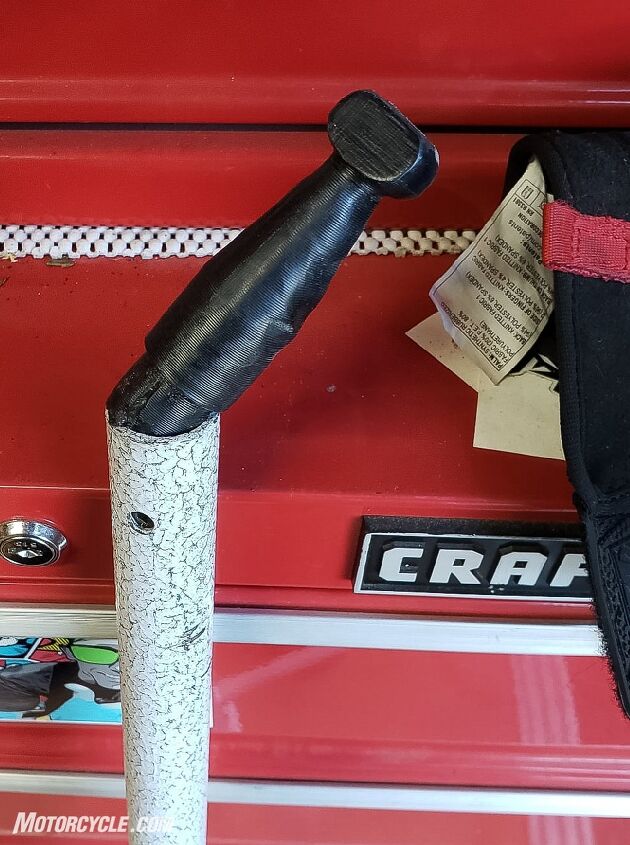
Here’s where the fun begins. Starting at about 2:00 on the wheel, press the bead over the rim. Now, place the Yellow Thing ($40) tool – yes, that’s it’s name – over the edge of the rim to keep the bead from popping back over. Working your way clockwise, press the bead over the rim until you get to about 7:00. Wedge the two non-marring pins of the mounting end of the bar so that they are locked under the rim’s lip. Lay the bar across the wheel then position and lock the swivel post and center bar. Next, you’re going to use your body weight against the bar to work the bead into place while helping to hold the tool at the correct angle via its handle. Although some tires require more effort than others, I have yet to be stymied by a tire, though one did make me step away for a glass of water. In my experience, the narrowness of front tires makes them a bit more work.
With the tire in place, all that’s left is airing up the tires seat the bead, setting correct tire pressure, and balancing the wheels.

But what about off-road tires?
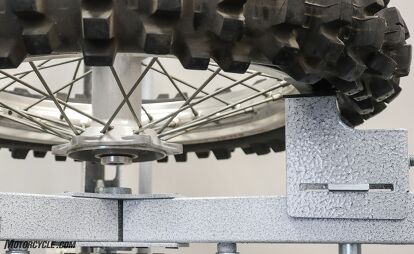
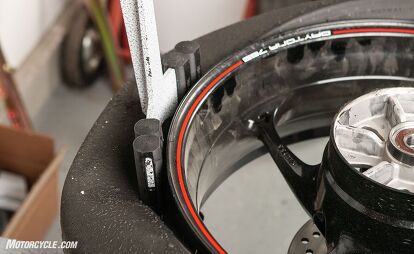
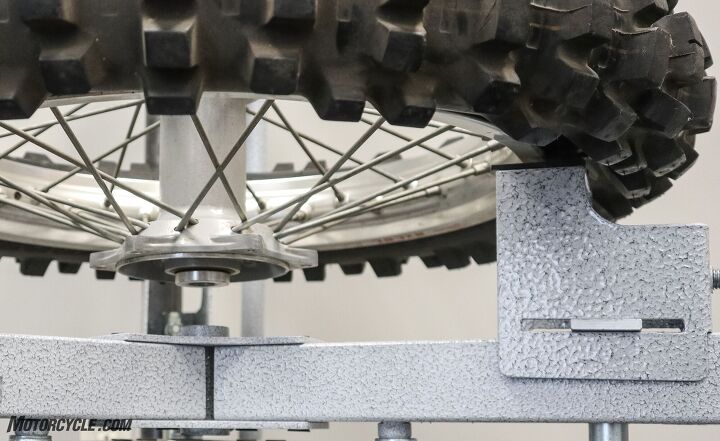
As convenient as the Locking Cam and Dog Blocks are for street tires, the knobs on dirt tires make using the blocks impossible. So, No-Mar developed the Posi-Clamps ($165) to use non-marring spools to perform the same function. (As I said above, they’re also useful for big cruiser tires and tires mounted to spoked wheels.) Simply lift the dog blocks out of the alignment holes and drop the Posi-Clamps in. You’ll latch onto the rim with the spools by using a socket to tighten the clamps. Unfortunately, the demount bar can’t be used with spoked rims. So, I returned to my old nemesis, the tire spoon.
Ever the team player, Ryan volunteered me to change four tires for his personal dirt bikes in the interest of “testing.” It’s a good thing he was there, too. While significantly easier than my old method of sitting on the floor while spooning tires off their rims, I quickly found that some dirt tires, particularly front ones, needed an extra set of hands, and the occasional knee, to hold the bead in the wheel’s drop center. Additionally, I found that having three tire irons made the job easier. Ryan, who has more experience with changing dirt tires than I do, sent me a note saying that, while the Posi-Clamps’ spools held the wheel firmly in place at a good working height, he felt that they also prevented us from getting the bead fully into the drop center of the rim to make levering the bead on the other side harder than it needed to be.
The tire installation process is essentially the same: Press the first bead onto the rim by hand (though you may need to use a spoon for the last little bit) and then lever the second bead over the lip. By the time we got to the fourth tire, we were moving significantly faster. Starting with the bead in the rim lock (if you have one installed) is essential. So, placing it at the 2:00 position is helpful. The rest is just working your way around with the spoons. I won’t lie, Ryan and I worked up a sweat changing the four tires, but there was no blood involved. One key tip is to make sure the rim is completely seated in the notch on each Posi-Clamp spool. The clamp can seem like it is tight with the edge of the spool tightened down against the rim, but it will pop out as soon as you start leaning into the tire irons.
The good news
Remember when you bought your first pickup truck and all your friends came out of the woodwork asking you to haul things for them? Well, the No-Mar Classic HD Motorcycle Tire Changer is likely to have a similar effect with your riding buddies. The good news is that, in the case of street tires, the process is so easy that you won’t mind swapping out the rubber for them. While I’m sure that my dirt tire technique will improve over time, it remains, for me, a two-person task. That’s not bad, though. Ryan and I had fun swapping out his tires. Wrenching with a buddy on a summer afternoon is fun.
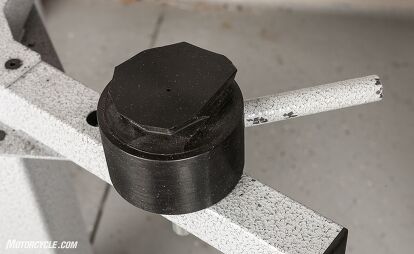
My time with the No-Mar Classic HD Motorcycle Tire Changer has been enlightening, making me wish I’d bought one years ago. Is it worth the $649 retail price? To that, I give a resounding hell yes! The tire changer and the accessories I needed aren’t cheap. Quality construction rarely is. My entire package with the Posi-Clamps ($165), the Yellow Thing ($40), and the 16-inch Spoonbar ($70) cost a total of $1,053. You may not need the additional tools, but since we handle all kinds of bikes here at MO, I loaded up. However, the Yellow Thing is essential. So, be sure to include it. (For my personal use, I could get by with just the tire changer and the Yellow Thing since I’m primarily a sporty bike street rider.)
No-Mar has tire changers ranging in price from $449-$1,395. So, you’re sure to find one that fits your price range and needs. See which model suits you at the No-Mar website.

Become a Motorcycle.com insider. Get the latest motorcycle news first by subscribing to our newsletter here.

Like most of the best happenings in his life, Evans stumbled into his motojournalism career. While on his way to a planned life in academia, he applied for a job at a motorcycle magazine, thinking he’d get the opportunity to write some freelance articles. Instead, he was offered a full-time job in which he discovered he could actually get paid to ride other people’s motorcycles – and he’s never looked back. Over the 25 years he’s been in the motorcycle industry, Evans has written two books, 101 Sportbike Performance Projects and How to Modify Your Metric Cruiser, and has ridden just about every production motorcycle manufactured. Evans has a deep love of motorcycles and believes they are a force for good in the world.
More by Evans Brasfield


Comments
Join the conversation
Huh? There are several pneumatic tire changers out there for that price, and they will take the same space as this thing. Sure , you'll need an air compressor, but if you have a motorcycle and garage certainly you have a compressor. For that price it doesn't make sense. Pneumatic all day long for the same price
I had one and found it difficult to use. After awhile I sold it and bought a Weaver.
Took up far less room and a whole lot easier to use.