


A Great Moto-Hauler That Won't Break The Bank - Part 2


In Part I of this 2-part series, we reviewed a base Ford Transit T-250 and its suitability as a moto-hauler. In Part II, we’ll look at ways to get it ready for hauling motos, cutting interior noise levels for more pleasant driving, and towing.
A Great Moto-Hauler that won’t Break the Bank – Part 1
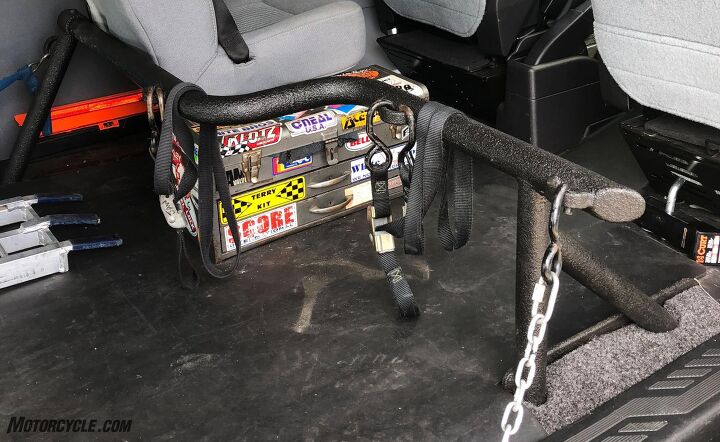
I’m addressing the bike chocks question first because I believe it’s important to mount any wheel chocks or cross bar directly to the metal floor. I’ve seen guys mount them through the vinyl mat and padding, and the chocks flex and move quite a bit. There are a variety of different wheel chocks available on the market, and I’m not going to review them here. I have always used a beefy cross bar mounted to the floor of the van, as I’ve found this method to be more versatile for loading different bikes and keeping more of the floor area clear.
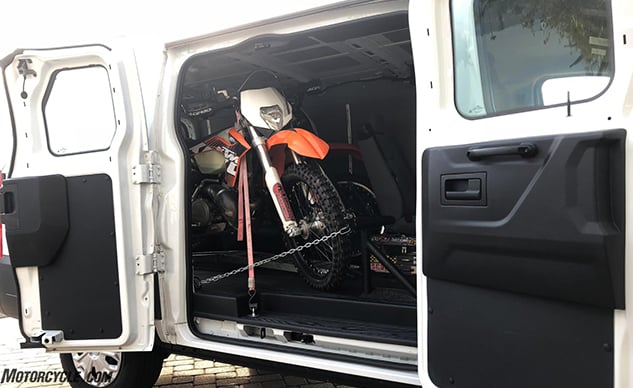
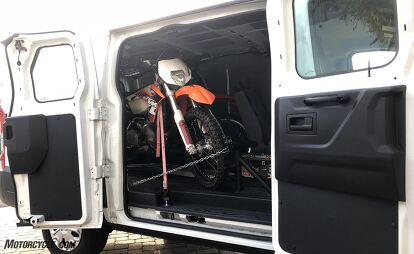
The key thing to keep in mind if using any wheel chocks is not to mount them too close to the sides of the van. Doing so will mean that the bikes lean too far inward (to allow clearance for the handlebars), making them less stable and more difficult to secure. You want the bikes as vertical as possible, and get a decent angle on the tie-downs. In other words, you never want the tie-downs to be parallel to the front forks. This provides very little leverage and often results in bikes falling over. Take your time and experiment with bikes inside the van to get the optimal placement. I like to position my bikes so that the handlebars are turned toward the outside. This allows you to get the bikes a little closer to the walls while leaving more room in the center for gear and/or a third bike facing backwards. (Understand we’re talking off-road bikes here. You probably won’t fit more than two street motorcycles.) Also be aware that you may not be able to drill holes in the floor exactly where you want. Frame rails under the floor and location of things like the van’s fuel tank and wiring looms will dictate where you should or shouldn’t drill. Look before you drill!
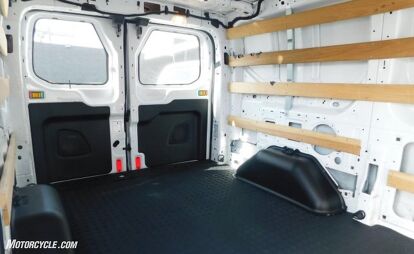
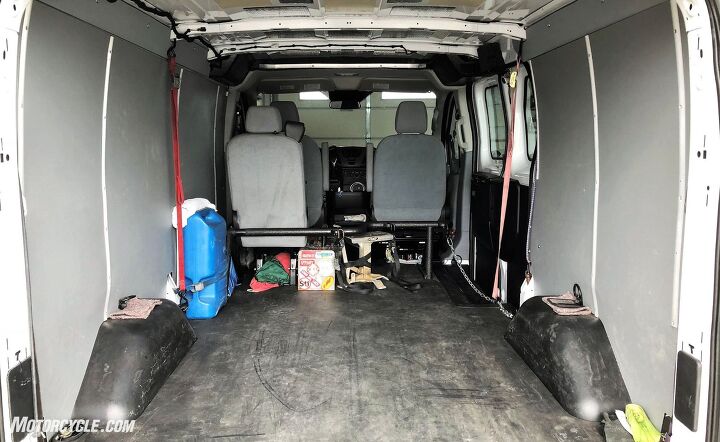
A neat feature of the Transit is that the rear doors are concave. There’s another 3-4 inches of room to work with; the rear tires of the bikes can actually extend a little past the rear-most edge of the floor. As mentioned in Part I, these Transit cargo vans have great tie-down hooks installed from the factory. I only had to add one more in the right front area down in the side door foot well.
Step into the Aft Chamber…
Now for the interior treatments. Anyone who has surfed the web for ideas on paneling or otherwise customizing the interior knows there’s no shortage of opinions on the best approach. My goal was pretty straightforward: Cut the interior noise down as much as possible while creating a durable cargo area for bike hauling and occasional camping.

First, a little introduction to noise sources and their relative contribution in a cargo van. This is not scientific by any means; merely observations from doing several of these projects over the last few decades. My view is that the floor area represents the majority of the noise source at 60%, the sides account for 30%, and the roof about 10%. Regardless of whether you agree with these specific percentages, the floor is obviously where you want to do the best job of sound attenuation because of reflection from the road surface and all the mechanical sounds of the drivetrain and suspension. For this reason, it’s also worth getting a set of wheelhouse covers (Ford Part #CK4Z-16A550-GA “Quarter Wheelhouse Cover”). They run about $80/pair and need to be installed before any other work to the floor or side walls.
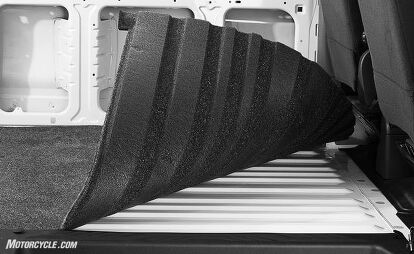
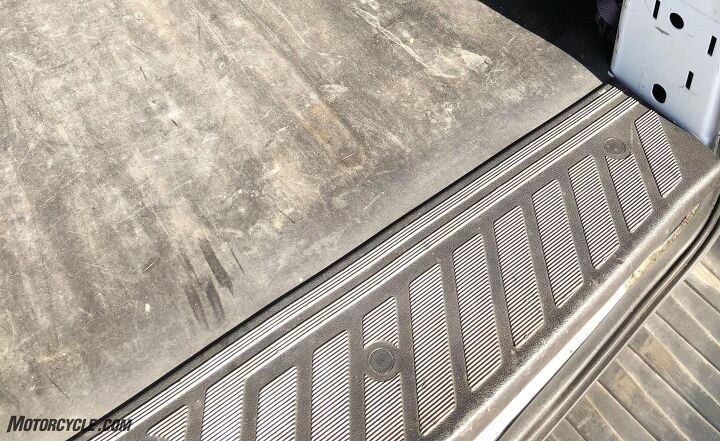
Most of these vans come with a simple, non-insulated vinyl cargo mat. Great for sliding things in and out of the truck, but pretty ineffective at cutting the noise down. I found a nifty product called the “ Bedrug” that is actually custom-cut to match all the ridges and valleys of the sheet metal floor.
It’s also much better than carpet or garden variety foam padding because it’s closed cell foam and doesn’t absorb water. If you want the floor of your van to rust out as quickly as possible, just lay down some old carpet or residential foam padding on the floor. It’ll act as a sponge and retain moisture from condensation and spills so that corrosion can continue even while you’re sleeping.

The next layer represents the single most effective component in reducing sound levels. Mass Loaded Vinyl or MLV is designed for one purpose: Attenuating sound. It’s simple enough in concept: Take vinyl, a flexible and relatively cheap medium and impregnate it with a heavy substance (typically barium sulfate). In the world of noise reduction, one rule of thumb generally applies: Weight and density are your two best friends, and MLV offers both. It’s readily available from a number of sources, but here’s a link for one source: Acoustimac.com. For those interested, additional technical information can be found here: Acoustiguard.com – Mass-loaded Vinyl
I used ⅛-inch thick material with a weight of about 1 lb. per square foot. Lay the MLV from the rear all the way to the back of the front seats. One of the standard widths is 54-in., which maximizes your coverage yet still fits between the wheel wells with minimal trimming. At this point, you might ask: “Why not just put the MLV directly on the sheet metal floor and forget about the Bedrug?” My reasoning is twofold: First, I wanted to have a little additional padding on the floor for my knees when crawling around in the back, and also to insulate the floor for occasional sleeping when I’m not towing my camper. Second (and more importantly), the Bedrug acts as a “decoupler” between the sheet metal floor and the MLV. This layering effect really maximizes the benefits of the MLV as a sound deadener. Finally, the last layer in the “sandwich” is the OEM vinyl mat. Mine was fluted with longitudinal ridges so boxes and other cargo could slide easily, but it was painful on the knees. So I flipped it upside down and now have a smooth surface. One last note: Even if your van doesn’t come with an OEM or other vinyl cargo mat, you’ll want to get one. You can’t use MLV as the top layer because it’s too soft and will tear easily from tool boxes, knobby tires, etc. Your top layer needs to be tough.
I was able to tuck the edges of everything under the stock plastic floor trim at the rear and side door areas. It made for a really clean, edge-less installation.
Now for the walls. Many of these cargo vans are up-fitted with wooden stringers along the sides. They make the paneling process much easier by giving you a ready-made material to drill into. But before we get into types of wall coverings, there’s an important step: Applying sheets of butyl rubber or so-called “fat-mat” to the walls of the van. Here again, you will find many opinions on what kind of wall insulation is best, but all I can tell you is that, just like in the floor, you do not want anything that will absorb moisture or hold condensation. I learned this the hard way with an older Dodge van. I used fiberglass house insulation under the paneling and it literally started rusting the van from the inside out. Condensation from moisture in the air “wicks” down the fluffy fiberglass to the floor and begins the corrosion process.
This time, I used a product called Noico, but there are several products on the market that will do the job.
Just be sure it’s butyl mat and not some sort of porous foam or similar material. The butyl is heavy and dense (good for noise reduction) while also being hydrophobic (doesn’t absorb water). Perform this part of the job when it’s about 70-80 degrees as it makes working with the mat much easier. Be sure to get the little roller device for installation – it makes a huge difference in minimizing bubbles between the mat and the sheet metal walls. Air bubbles can contain water vapor and could eventually lead to corrosion if excessive. And here’s an important point: You don’t need 100% coverage. You only need 25-50% coverage of the walls to accomplish the sound attenuation you’re seeking. The butyl’s main job is to reduce vibration of the sheet metal. This vibration is a chief source of the noise you hear when bombing down the road at 65 mph. I used about 45 square feet of the 80 mil material to do the walls and roof.

After you have the sheets of Noico or FatMat installed, now you can cover the sides with some sort of paneling. I started with a layer of Coroplast, a sort of “plastic cardboard” as an intermediate layer. It’s not a terrific sound deadener, but it’s actually what Ford uses as OEM material when you order the premium interior package for a new cargo van. It’s about 4mm thick and has corrugations sandwiched between two smooth sheets of PVC.
It comes in a variety of sheet sizes, so pick the one easiest for you to work with. I ended up getting 4’x 8’ sheets, but if I was going to do it over again, I’d probably just get the 2’x 4’ sheets because they’re so much easier to handle in the confines of a van. There’s a fair amount of custom cutting to do, so hefting the big sheets in & out of the van a hundred times got old.
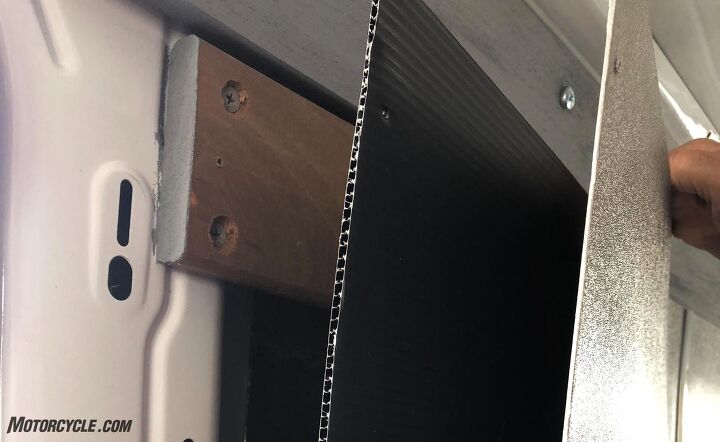
Some of you might be just fine with the Coroplast as the only covering on the walls. I wanted something tougher with more longevity, so I applied a sheet of gray .060” (about 1/16”) ABS on top. This stuff is pretty indestructible, and will better withstand an errant handlebar or bark buster slamming against the side of the van vs. the Coroplast alone. It can be cut with a good pair of industrial scissors or tin snips, but it’s a workout. Take your time and double-check all your measurements. Like the Coroplast, I would suggest getting the 2’ x 4’ sheets vs. the 4’ x 8’ sheets. It’s pretty heavy and awkward in the larger sizes.
I applied aluminum trim strips to help secure the ABS, and they’re also useful in covering the joints where two sheets meet. For fasteners, I used galvanized drywall screws and some cupped washers in spots where there was no aluminum strip. Be sure to note where your wood stringers are so you know where you can use the drywall screws. If you use the smaller 2’x 4’ sheets, you may wish to stagger the Coroplast and ABS panels so the joints aren’t in the same place. For your top covering, consider your color choice carefully. Black sounds appealing, but combined with a black vinyl floor mat, the inside of your van could quickly become a black hole, making the simplest of tasks more difficult merely because it ends up being really dark inside.
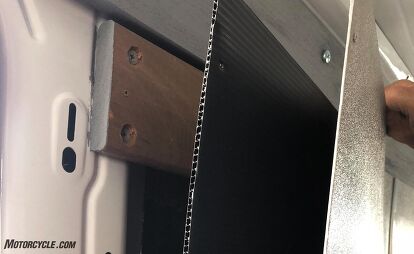
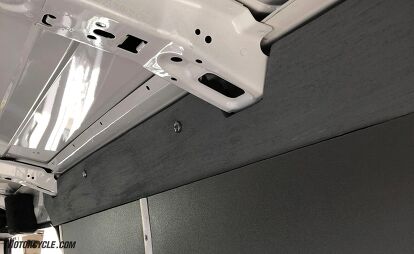
The final step on the walls was to fill in the gap between the top of the Coroplast/ABS covering and the roof, and for this I simply went old school. I used two pieces of 1×6-in. pine and cut them from a template I made out of cardboard. I used some non-skid, grey deck paint I had on the shelf to match the color and texture of the ABS plastic. There are threaded holes along the top rail of these cargo vans (for installation of shelving or cabinets, for example) so affixing the wood planks to the van was a snap.

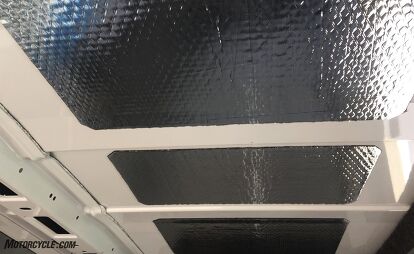
The last surface to be done was the roof, and I made an executive decision not to panel it, but merely cover it with some butyl sheets. My reasons were pretty straight forward: Covering the ceiling is about 50 times more hassle than covering the sides, and I didn’t want to lose any headroom. My van is the standard roof model, so even an inch of extra headroom between the cross members makes a difference. Same rule of thumb applies here as on the walls: 25-50% coverage is fine. In the end, it came out kind’a cool – it looks a bit like a little space shuttle inside now.

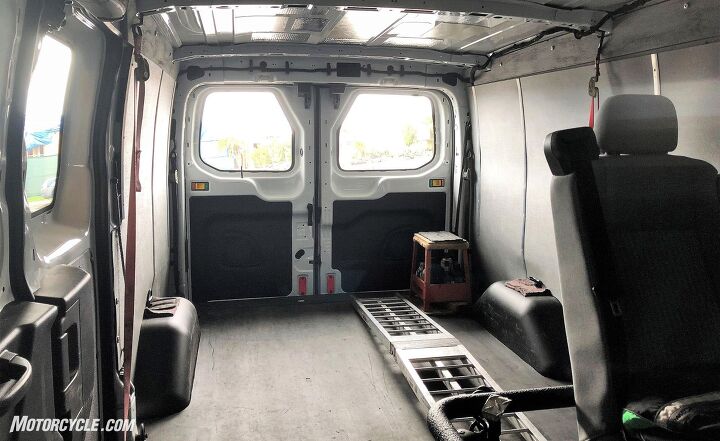
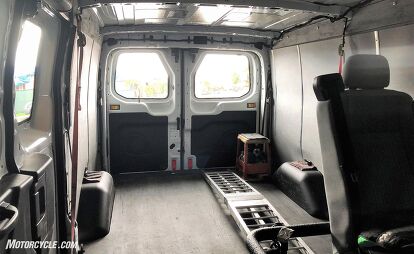
I added a third seat behind the driver’s side simply because there are times when we have three bikes and three riders on a trip. I found a second row seat online from a 2016 Transit Passenger Wagon, so the upholstery matches perfectly. Plus, it has the shoulder and lap belts integrated right into the seat. I remember fondly the days when we strapped a lawn chair between the two front seats, but hey, I’m older and wiser now. Craigslist and eBay are great resources for an extra seat.
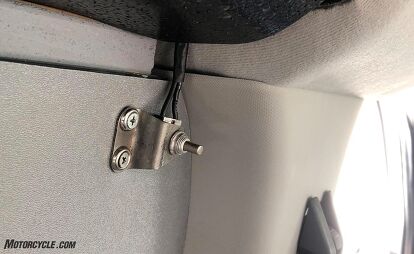
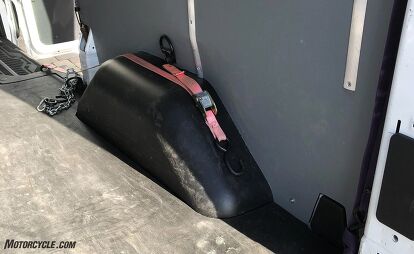
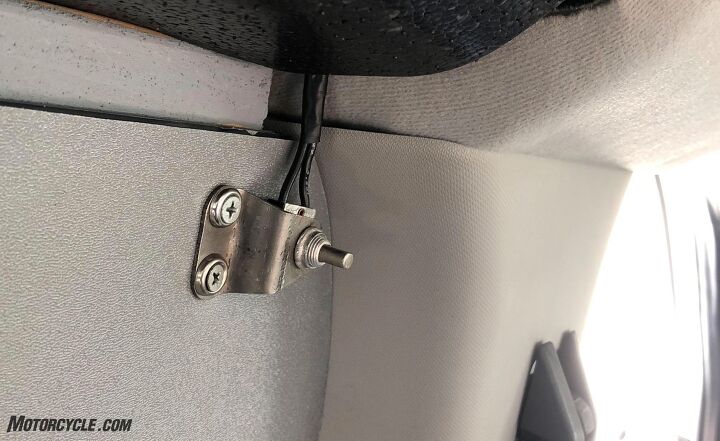
The finishing touches to the interior include some leftover Bedrug material to cover the door latch mechanism above the side doors as well as the back edge of the headliner. I also added a cargo light cut-out switch and will save you endless hours of googling: Ford really dropped the ball on this one. At least through model year 2017, there’s no way to turn off the cargo lights if you have the doors open. There’s a nice switch for the front cabin lights, but it doesn’t do anything for the cargo lights. They will shut-off automatically after 20-30 minutes, but if you’re going to use your van for camping or as a pit vehicle, it’s kind of annoying to have the cargo lights on for long periods for no reason. I won’t go into it any deeper here – there are some pretty colorful threads on the Transit USA forum for your entertainment pleasure. All you really need to know is where to catch the right wire. I chose the hot (+) side of the cargo light wiring just before it crosses over to the first cargo light. You’ll have to pull off the big Styrofoam block covering the left side airbag cylinder (don’t worry – you won’t set-off the airbag!), then unravel a section of electrical tape to get to the right wire. Look for the green wire with violet stripe. Double-check that it’s the right one on your van before cutting. Just splice-in a simple single-pole/single-throw switch and you’re done. I mounted mine high on the side wall behind the driver’s seat so I can access it from the cargo area and also while standing outside next to the driver’s door.
Tow Things
For towing, you have several, very inexpensive options for hitches and installation is a breeze. The wiring is a bit more complicated. This is largely due to the CAN bus architecture of these new Transits. You can still cut into the wiring like the old days, but you have to be A LOT more careful about what kind of loads you place on the system. If all you need is simple lighting (i.e., LT/RT, Stop and Running Lights), then I would recommend a simple aftermarket wiring kit. A great source for hitches and wiring kits is etrailer.com, plus they have excellent DIY videos to help you through the installation process.
If you want a 12-volt charging line for a trailer battery and/or trailer brakes, it gets a bit more involved. Ford offers a kit intended for dealer installation, but you can order it as a consumer, too. Just be aware that it doesn’t come with any instructions, so you’d better be comfortable with automotive electrical work. The Trailer Tow Module (Ford Part #FK4Z-15A416-A) is available from your dealer or a variety of online sources. See this link for an overview of the various configurations and what your options are:
One issue with the Ford TTM is that you’ll need to have a dealer re-flash the main body control module in order for the running lights to work. It’s too much to explain in this story, but I took my van to a local Ford dealer for the re-flash and they couldn’t figure it out. Again, if all you need is simple lighting for a trailer under 3500 pounds, I’d strongly suggest just going with an aftermarket kit.
In Part I, I mentioned that I removed the big U-Haul running boards from the sides. I think they’re ridiculous and I had bruises on my shins for the short time they were on my van. Removing them isn’t overly complex, but it exposes some bare body work underneath. I considered buying the individual trim pieces from Ford, but it ran up to about $400 pretty quick. My better half came up with an elegantly simple solution: Clean the surfaces really well and get a can of spray-on bed liner paint. One can was perfect, and aside from a little masking work, it was super easy. What’s more, no one will even notice it unless YOU point it out to them.
I had fun with my project van, and I hope you will too. Now let’s moto!
More by Jim Williams


Comments
Join the conversation
Love it. I saved this to my list of useful things for later.
These are articles are worth bookmarking. Great information, thanks.