


How To Change Your Motorcycle Spark Plugs

Suck, squeeze, bang, blow – those are the four basic actions that a motorcycle’s internal combustion engine makes to create almighty horsepower. It works like this: An air/fuel mixture is sucked into a combustion chamber and squeezed by a piston, a spark ignites the explosive mix with a bang, and what’s left over is blown out of the exhaust. Each step is as crucial as the next when it comes to producing power, but in this article, let’s focus on what creates the little bolt of lightning behind it all: The spark plug. Spark plugs are serviceable components, which often has our dear MOrons asking time-honored maintenance questions such as “How do you change your motorcycle spark plugs?” So, let’s review the tools you’ll need, the steps you’ll take, and some signs that your bike is ready to swap its plugs out.
Promoted Product: Drag Specialties Iridium Spark Plugs
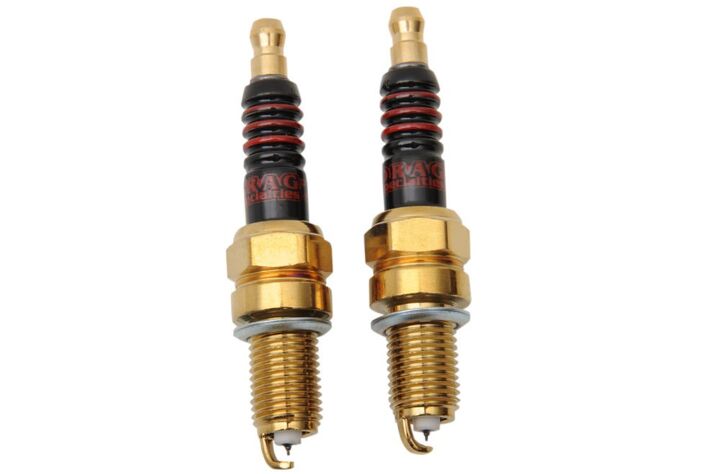
Spark plugs are a fairly inexpensive product, but that doesn’t mean you should just go and choose the cheapest option. If you want the best performance out of your motorcycle engine, consider Iridium spark plugs from Drag Specialties. They feature an iridium electrode, which is smaller than a standard electrode, requiring less voltage for the spark. Iridium also provides a hotter spark. And because Iridium has better electrical resistance, it doesn’t burn out as quickly (compared to copper), which means you won’t have to change your plugs as often. Finally, Drag Specialties’ Iridium spark plugs are dressed in black ceramic with red lettering and a gold-colored corrosion-protective coating.
Use Dennis Kirk’s My Garage Tool to be sure you get the right part for your ride.
When Should You Change Your Spark Plugs?
Whether your motorcycle is powered by a single, twin, triple, inline-four, or six-cylinder engine, rest assured that one or more spark plugs are tirelessly sparking away to create the all-important bang step. Motorcycle engines routinely operate at higher revs and sustain those rpms for longer periods than your average car, which wears them out much faster than you might expect.
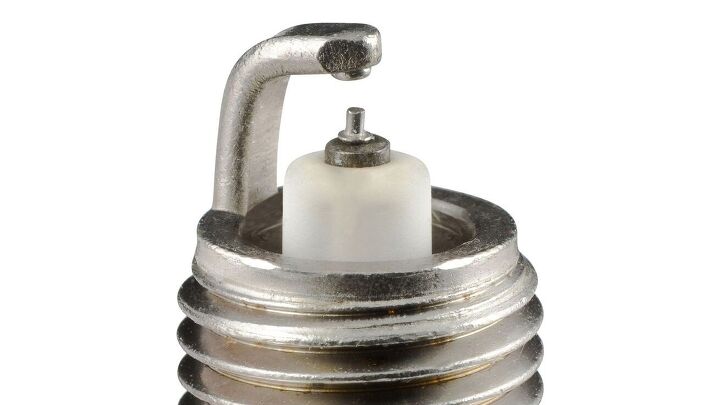
All spark plugs function the same way. The ignition system feeds electrical current to the spark plug, which relies on a high-voltage arc jumping from the center electrode to the ground electrode – that’s the piece of metal that looks like a “J.”
Every time a spark occurs, microscopic particles of the electrodes are worn away, hence why your owner’s manual cites a specific service interval. Generally, spark plugs can last between 8,000 to 10,000 miles but always refer to your owner’s manual for exact maintenance schedules, as they can change depending on the make and model of your motorcycle.
If your motorcycle begins to exhibit rough idling, misfires, or performance losses, it’s a good idea to pop the plugs out and inspect them. Look for excessive carbon build-up, which can reduce spark efficiency. Likewise, a cracked ceramic insulator will cause voltage fluctuations and intermittent issues. Lastly, oil on the electrodes or threads is a sign of deeper mechanical problems, but in all cases, you should replace the plug(s).
Can I Do It Myself?
Difficulty will vary greatly depending on the motorcycle. Many Single-cylinder, V-Twin, Boxer-Twin, and Parallel-Twin engines allow easy spark plug access. However, full-fairing, multi-cylinder motorcycles can often be more involved with the spark plugs located beneath the fuel tank and airbox. While those bikes require more effort, it all falls under routine maintenance. If you’ve successfully removed and reinstalled your wheels after a tire change, you’re more than capable and always refer to your authorized service manual.
What Tools Will I Need?
A basic set of hand tools, including a ratchet, deep sockets, and an extension, will complete the job. The only specialized tool you’ll require is a gap tool, which is necessary to confirm that the spacing between the spark plug’s electrodes is within manufacturer specs. As always, your service manual will cite the precise socket size and gap. We also strongly recommend a Spark Plug Socket, which is a socket featuring a rubber grommet to grip a spark plug, making installation or removal much easier.
Spark Plug Socket – a cost effective one from Performance Tool.
How To Change a Motorcycle Spark Plug
First things first: We always recommend using the correct spark plug cited by the manufacturer. In addition, it’s good practice to change out all the plugs simultaneously on multi-cylinder bikes.
Step 1: Remove the Spark Plug Cap(s) or Ignition Coil(s).
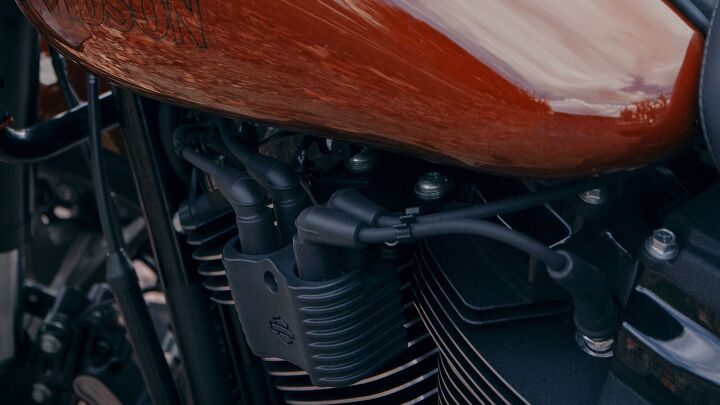
There are two common ways that your motorcycle’s ignition system powers spark plugs. Often, manufacturers use rubber caps with wire leads connected to the ignition coils, delivering electricity to the plug(s). However, stick-style ignition coils recessed within the cylinder head are another standard solution. Whatever the case, don’t overthink it: Grip the rubber boot or ignition coil and remove it from the spark plug with a tug.
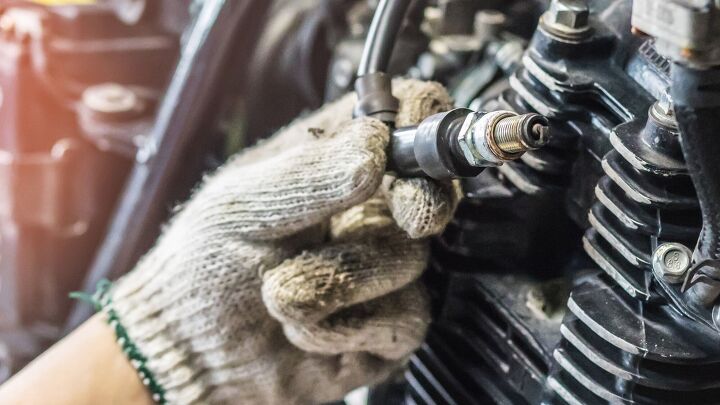
Step 2: Remove the Spark Plug.
With your appropriately sized Spark Plug Socket and ratchet in hand, place the socket over the spark plug and remove it by turning the ratchet counterclockwise. Depending on the plug’s location, you may need to utilize an extension on your socket and ratchet, which is usually the case with plugs located within the cylinder head. Unscrew the plug and carefully remove it from its home.
Step 3: Inspection.
Spark plugs operating within a healthy engine will develop a brown or tan tint on the electrodes. If those markings are readily visible, then it’s safe to say that the plug is operating well within specification and your engine is in working order.
There are several warning signs to be aware of when inspecting spark plug wear. First and foremost, your spark plug should be clean and dry. Oil leaking past piston rings can sometimes foul the plugs and leave oily deposits. In other cases, oil can seep through worn valves or valve seats and have the same effect. Take special care to note if excessive wear is present and check for pitting, blistering, or electrode damage. Should you discover any issues such as these, we strongly encourage you to seek an authorized mechanic, as these can be signs of overheating, lean conditions, or simply utilizing the wrong plug.
Step 4: Mind the Gap.
Most modern spark plugs often have the correct gap set from the factory, but it’s a wise practice to double-check the spacing between the ground electrode and the center electrode. Ensuring proper gap will allow your spark plug(s) to operate at peak efficiency and spark as intended. Checking the gap is incredibly easy with any common gap tool. Measure the gap, and if it’s too wide, then bend the J-shaped ground electrode closed. The opposite is true if you need to open the gap a bit. It’s really that simple.
Step 5: Install the Spark Plug.
With your gap set, you’ll be ready to thread the spark plug back in place. Start by threading the spark plug back into the cylinder head and tightening by hand. Once completed, consult your motorcycle’s service manual for the proper torque specification and use an accurate torque wrench to secure the spark plug. This is a crucial step for new mechanics where one can strip the threads within the cylinder threads, causing a great deal of unnecessary damage. We always recommend using manufacturer-cited torque specifications for critical components.
Now that the spark plug is reinstalled, replace the caps and/or ignition coils, confirming that they’re seated correctly without any kinks or pinches in the wiring. Once everything is returned to its place, turn the ignition on and fire your bike up!

Conclusion
There you have it, folks. Changing your spark plugs might seem daunting, depending on the type of motorcycle you own, but it’s not as complicated as it looks. A basic set of hand tools can get the job done, and as always, we strongly encourage readers to cite their service manuals when performing any work on their motorcycles.
We are committed to finding, researching, and recommending the best products. We earn commissions from purchases you make using the retail links in our product reviews. Learn more about how this works.
Become a Motorcycle.com insider. Get the latest motorcycle news first by subscribing to our newsletter here.
More by Edward Narraca


Comments
Join the conversation
If you ever take your bike off-road its a good idea to blow some compressed air down around the plug before removal, there can be dirt, or small stones, etc. around the sparkplug that can enter the cylinder. A little anti-seize on the sparkplug threads can't hurt either.
Some bikes (Kawasaki ZX636 for example) bury the spark plugs. A lot of plastic and sometimes the air box or radiator) will have to taken off just to see them let alone remove them. That's why they come with expensive iridium plugs so you don't have to change them often. Just bear in mind that when the time comes it will take a while.