

How To Change Your Motorcycle Tires


If you are fortunate enough to live in an area where well-stocked motorcycle shops abound, it’s likely possible to get same-day service on tire mounting and balancing. For the rest of us, purchasing new tires often requires leaving a bike at a shop for a few days. As often as I go through tires, this involves considerable down time. Since I can change a set of tires in about 90 minutes, and save money in the process, it makes sense for me to do it myself. It might make sense for you as well.

Changing the tires on your motorcycle yourself is one of the few items of standard maintenance I’d recommend for any rider. It’s absurdly easy to find great deals on tires from any number of online vendors these days, and you can get them shipped inexpensively to just about anywhere in North America, lickety-split. Do-it-yourself mounting and balancing is a task well within reach of most reasonably competent weekend mechanics. Of course, you’ll need a decently well-equipped workspace, but anyone who wants to save a little time and money should be able to accomplish a tire-swap in a few hours.
Mounting tires can be dangerous. Eyes, ears and fingers are all at risk. Seating the bead on a new tire involves rapid pressurization to pop the beads onto the rim seats, and a crushed finger barely scratches the surface of the potential hazards of do-it-yourself tire mounting. Please exercise appropriate caution and be sure to wear safety glasses at all times. The directions below apply specifically to tire changing on modern street bikes.
Tools Of The Trade

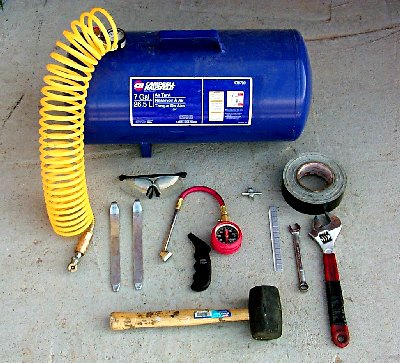
You’ll need a work area with enough space to bolt a tire-changing stand to the floor where you can get completely around it. Harbor Freight used to sell an effective motorcycle tire-changing stand (#42927) that bolts to their standard automotive manual tire changer (#34542, $42.99) but no longer lists it online. The total cost for both items is fairly low, and this setup is well worth the cost. The hand tools required are: two tire irons, a spray bottle with soapy water (any dishwashing liquid in water works just fine), a brush, gaffer or duct tape, a valve tool, a rubber mallet, wrenches and/or sockets to fit your particular bike, an air pressure gauge, an air tank (preferably attached to a compressor) and safety glasses. Having a buddy around can also comes in handy for your first tire changing experience.
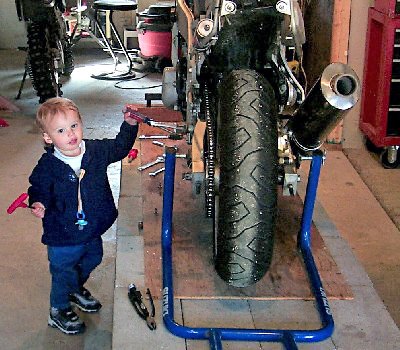
The bike shown in the accompanying photos is a CBR954RR that is in the final stages of being converted back to street duty after a weekend at the track. The CBR is fairly typical of most modern sportbikes. Your bike will probably not be race wired or equipped with abused DOT-legal race tires, but other than that, everything else ought to appear pretty much the way that it does in these photos.
Rear Guard
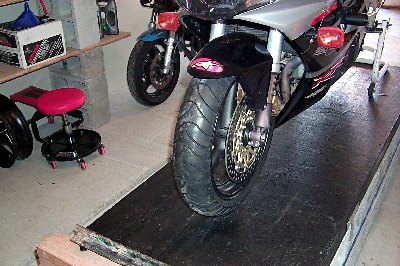
Let’s get started. First, securely support your bike with both wheels off the ground. If your motorcycle is equipped with a centerstand, then you’re all set for rear wheel removal — but you’ll still have to raise and support the front. Since most modern sportbikes don’t have centerstands, the easiest and least expensive way to raise both ends of most bikes will be with a combination of a front wheel stand and a rear swingarm stand. Note: many stands, which purport to be “universal,” will not work with all bikes no matter how adjustable they are. Before purchasing stands, you should be sure to check for compatibility with the bike(s) that you intend to use them on.
As a rule of thumb, the wider the tire, the easier to break and re-seat the bead, so the rear wheel is a good place to begin. After you’ve made sure that the bike is securely supported, the next step is to make careful note of the arrangement of bushings, washers, alignment collars and nuts on the rear axle and swingarm. Once you’ve figured out how everything goes together (make notes if you have to), remove the retaining pin from the axle nut and then the nut itself. Not all axle nuts have a retaining pin so don’t worry if you don’t see one on yours. Unless it’s been previously over-torqued, the axle nut should come off without a lot of muscle.
It’s much easier to convince the axle to slide out when the wheel isn’t pushing-down on it with 20 pounds of force. I make sure to clean the axle very thoroughly every time I take it out, and at the end of the process give it a light coat of waterproof grease before replacing it. Be sure to be very gentle while tapping the threaded side of the axle when you remove it (use a rubber mallet or a block of wood against the threads). On most bikes, the rear brake caliper will come off as you tap the axle out, You should be diligent in noting the position of washers and bushings associated with it, too.
Once the axle is out and you’ve carefully inventoried all of the hardware and noted where everything is going to go upon reassembly, you are ready to remove the rear wheel from the swingarm. Most modern chain-driven sport bikes are equipped with a rubber “cush drive” for smoother operation. If your bike is so equipped, the sprocket should separate from the hub with just a firm tug. Be sure to make note of how the rubber cush drive bushings fit in the hub. The exact location of each isn’t really important, just how they are oriented in their slots. Place these aside with the sprocket.
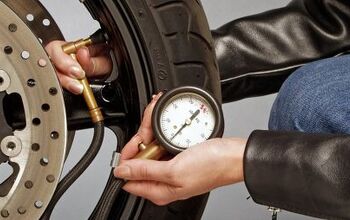
Next to let the air out of the tire. Remove the valve cap and use the pointed end of the valve tool to release most of the air. When this is done use the slotted end of the valve tool to unscrew the valve stem. In the process of unscrewing the valve stem the remaining air will vent, so be careful not to shoot the valve stem across the room in the process. It’s also a good idea to note the amount of torque (not much) required to loosen the valve stem.
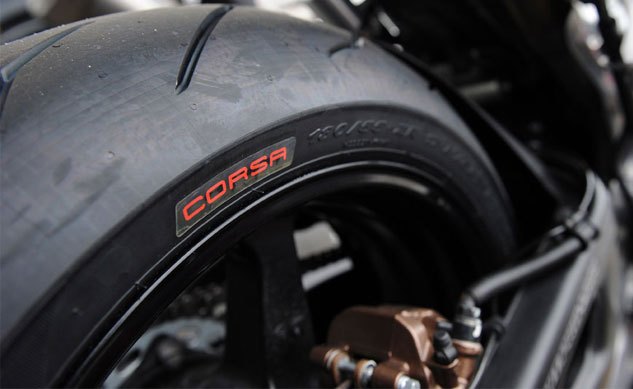
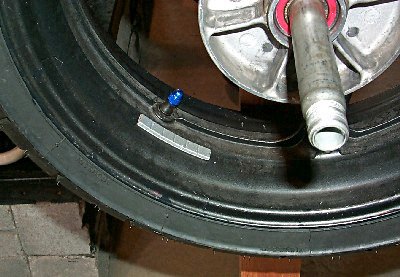
When the air is completely out of the tire, make sure to make note of the direction of tire rotation (there will be an arrow on the tire sidewall noting the direction of forward rotation) with respect to the rim. On the rear wheel, the direction of rotation is obvious because of the asymmetry in the hub. All you have to do with the rear is put on the new tire with the arrow pointing forward. But I use masking tape and a Sharpie to mark the direction of rotation on the front rim before I remove the tire.
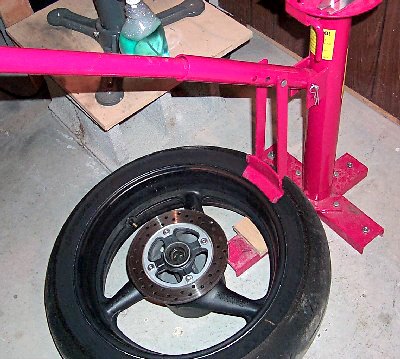
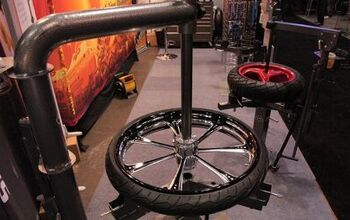
Next, place the wheel/tire combo on a tire changing stand, but first make sure it’s bolted to the floor of your work area. I normally use a few layers of gaff tape on the clamps to protect the rims from scratches.
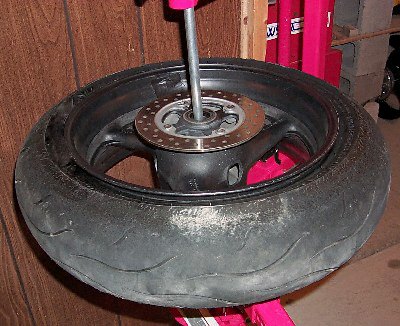
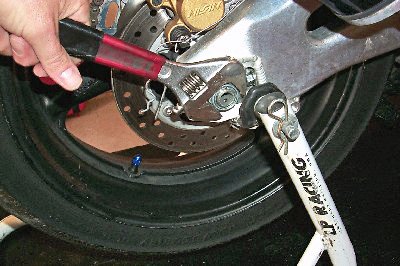
Before the tire and wheel can be mounted to the stand, you must first break the tire’s bead loose from the rim seat. I’ve seen all sorts of homemade presses and levers used for this purpose, but some stands come with a compact bead breaker that is almost worth the cost of the entire outfit by itself. I use a piece of soft wood to cover the metal leg of the stand where the wheel is going to make contact. Place the tire on the ground below the bead breaker’s shoe (as shown below). Be extremely careful not to allow the brake rotor(s) to touch anything! Putting any substantial lateral force on brake rotors could bend them.

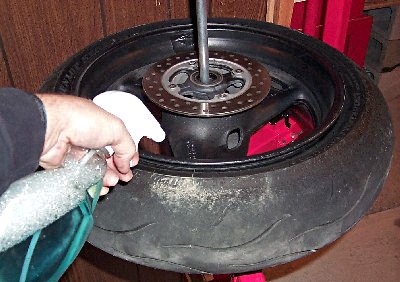
Bead-breaking can get tricky. Some tire/rim combinations will pop so easily that you’d swear that you could have done it with your fingers. Most sportbike tire beads will break from their seat with a small amount of soapy water and gentle persuasion with the bead tool.
Once you succeed in popping the upper bead from the rim seat, rotate the tire and do it again until the entire upper bead is free. Flip the wheel over and repeat for the other side.
Be sure to tighten the clamps so they hold the rim firmly, but do not overtighten! I also consider it good policy to use the safety rods supplied with the stand to prevent the rim from completely parting company with the stand should it slip out of the clamps.
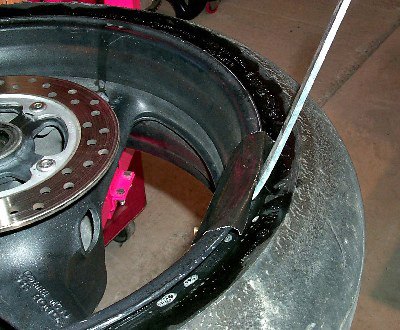
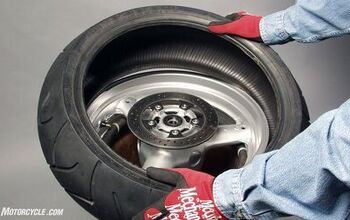
Now it’s time to break out the tire irons. You are entering a new and potentially catastrophic phase of the tire-changing process, so pay attention. Whatever you do, do not use large automotive tire irons to remove a motorcycle tire. Use the short motorcycle tire irons sold in nearly every motorcycle shop on the planet, and if you care at all about the condition of your rims, the shorter, the better. If you are doing things properly you won’t need much leverage; if you are straining or have to use a large iron or a crowbar to gain maximum leverage, you are likely doing something wrong. Again, exercise extreme care not to bend the brake rotors by pressing against them with your tire iron.

Make sure that the tire bead is not touching the rim seat or the edge of the rim anywhere on either side of the tire. Since the rim is deeper in the center than it is at the edge where the tire seats, you’ll be able to get the bead started over the outside of the rim fairly easily if you first force the sides of the tire to the center of the rim in the area opposite from where you are going to begin with the tire irons.
I use gaff tape to protect the rims in the area where I am going to begin with the tire irons. Some people use cut up plastic shampoo bottles or milk jugs for the same purpose. You can also buy rim protectors or rubber-coated tire irons. Normally, it’s not necessary to protect more than 1/3 of the rim’s circumference in the vicinity of where you are beginning, because once you’ve got a third of the tire over the rim, the rest comes off without much fuss. Once you’ve got a single iron inserted between the tire and rim, use it to lever the bead up and over the outside of the rim.

While holding this iron in place, insert the second iron between the tire and rim a few inches from the first and again lever the bead up and over the outside of the rim. To reiterate, this process is a lot easier if you can force both beads on the opposite side of the tire to the center of the rim. If you do this, the bead should come up and over with little effort. Getting the tire completely off involves repeating this process, moving the irons a little farther apart each time, until a big portion of the bead pops over the outside of the rim. Again, if you are doing this properly, surprisingly little force is required.
Clean dirt and debris from the seat, clean up any water, oil or grease anywhere inside of the rim and carefully inspect the entire rim before mounting the new tire.
New Shoes
Putting on the new tire basically involves reversing the previous steps. Make sure to observe the direction of the rotation arrow on the tire and to place the tire on the rim in the proper orientation. Again the lower bead should go on easily with just your hands and a little soapy water. But be sparing with your use of water, as you don’t want it sloshing around inside the tire after you’re done.
Once you get the lower bead over the top edge of the rim, you’ll want to line-up the harmonic balancing mark with the valve stem. The idea is to line up the lightest part of the tire with the heaviest part of the rim — ostensibly the area containing the valve stem. Most (though not all) tires will have a paint mark somewhere on the sidewall marking this lightest section. Lining-up this paint mark with the valve stem should help to achieve a rough balance.
TIP: Use a balancing stand to verify that the valve stem is in fact the heaviest part of the rim – if it’s not, you won’t discover it until after the tire is mounted, forcing you to add excessive wheel weights to bring it into balance.
The upper bead will require the use of tire irons once you have it about halfway over the rim. Again, use the soapy water sparingly and be very careful not to tweak your brake rotors! A little patience and more finesse will go a long way.
Once the tire is completely on the rim, it’s time to seat the beads. The idea here is to get the air into the tire fast, so I like to use an air compressor for this step (as opposed to an air tank) because it allows the use of a large volume of air while still limiting maximum pressure. I usually set the regulator for a maximum pressure of 45-50 psi and see if that does the trick – and it almost always does. If it doesn’t, you’ll have to repeat this step, incrementally increasing air pressure.
With the valve stem still removed, inflate the tire until you hear a couple of loud reports as the beads seat. Usually these “pops” are loud and quite unmistakable, but occasionally the beads will seat without a pop. At any rate, listen for air leaking around the edge of the rim before removing the pneumatic fitting from the valve. Once you are convinced there are no leaks, disconnect the fitting from the valve and allow the tire to deflate. Once the air is completely out, screw the valve stem back in and inflate the tire to its recommended pressure.
Front And Center
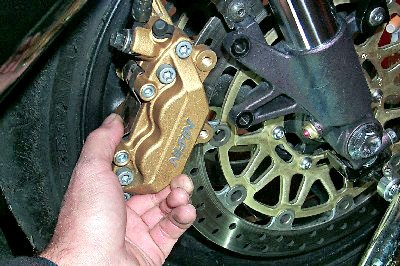
Removal of the front wheel on most modern sport bikes involves some additional complexity. First, a pair of pinch bolts is commonly used to bind the front axle in each fork leg and these must be loosened prior to removing the axle itself. On dirt bikes and cruisers, brake caliper interference isn’t usually an issue. However, on 17-inch rims, you will probably have to remove both front brake calipers, in order to get sufficient rim clearance for wheel removal.
Unlike the rear caliper, these are typically secured to the fork legs with two bolts that must be removed. Once the front wheel is removed from the bike, the tire removal process is identical to that of the rear. Since front rims are usually narrower, the front tire is usually a little harder to get off the rim. However, if you picked up on the right tricks with the rear, you shouldn’t have a real problem. It is important to note that front brake rotors are even bigger and easier to damage than rears.
Balancing Act

Once you’ve got both tires on their rims and have inflated them to proper operating pressures, it’s time for balancing. Proper balancing will result in enhanced tire life and a much smoother ride. The only tools required for tire balancing, are a stand (mine is made from 2x4s) that will accept a metal dowel over which you can slide the axle for your wheels and a pair of pliers to trim the wheel weights. Everything needs to be level and the wheels must be able to turn freely on your stand. I also find it helpful to have the wheel closer to eye level than upon a bench top stand, but that is a matter of personal preference.
TIP: Before beginning the balancing, take the opportunity to dress up any small nicks or scratches on the rim with a little touch-up paint.
Give the wheel a few spins and allow it to rotate freely. If the same spot consistently settles to the bottom, add wheel weights to the opposite side of the rim until the wheel is balanced. You’ll know it’s balanced when it does not settle in any one particular place after you spin it. I like the weights with the adhesive on the back: just trim the weights until you have the proper amount to achieve a good balance and viola, you’re done.
Re-Mount
The final step is to put the wheels back on your bike. If you were careful in noting how everything came off, this should not be a problem. Make sure to tighten all bolts to the proper torque specs, line up your rear wheel with the indicator marks near the axle and set the drive chain tension according to your owner’s manual. I also like to take this opportunity to do a careful inspection of the entire drive train and foot controls. Some folks like to do a front and rear wheel alignment at this point.
TIP: This is a good time to check chain and sprocket wear.
That’s about it. The first time around you should budget an afternoon for all of this, but after a few tries you’ll be able to do it much faster. Once you hit the road, take it easy on fresh tires as they can be very slippery until scrubbed-in. High-siding a bike on fresh tires is an embarrassingly common occurrence. Also, your brakes will need a few pumps to bring the pads next to the rotor, so it’d be a good idea to do this before going for a big ol’ stoppie at your first intersection.
Photos by Martin Hackworth
More by Martin Hackworth


![Can You Change Your Tire While Riding? [video]](https://cdn-fastly.motorcycle.com/media/2023/05/07/11552623/can-you-change-your-tire-while-riding-video.jpg?size=350x220)


Comments
Join the conversation
why be so angry and critical. It is very simple to change tires by yourself if u have proper equipment. The equipment listed here is adequate with the exception of the 2X4 balancer. Bad wheel bearings can give u false weight centers on wheels and tires.U should never have to exceed 40 grams of weight in balancing. if u do there is probably a false mark on tire or you have an issue with rim (wheel) or both. Unfortunately MOST dealers dont have training days for their mech/techs. they rarely send all their wrenches to update schools. U should ask for a well qualified tech to do your work. u may wait a while but that tech knows his rep is on the line. Cycle jobs dont have unions but probably need one. Also, the tape-a-weights are ok but should be divided and placed on either side of a alcohol cleaned wheel and as close to center as possible. And while not aesthetically pleasing some color matched duct tape over those weight keeps in place laterally on wheel. I do love the statement regarding proper torque. It is a MUST and a good clicker torque wrench should be in everybody's tool box.
Kudus for you on being a DIYfer. All it takes is patience, proper tools and know how. Been riding since 1975 and have always done my own work. You not only save money but more importantly it's the pride in workmanship knowing that it was done right and not rushed. Oh and your garage is open 24-7.