


MO Wrenching: How To Adjust Suspension Damping
Keep the chassis stable and the rubber on the road

Modern sportbikes are impressive handling machines. While their rigid chassis and weight distribution have a lot to do with this, the fully adjustable suspensions can take much of the credit, too. Although many stock suspension components offer quite a bit of adjustability, many aftermarket units will give you even more flexibility. That’s the good news. Unfortunately, the plethora of suspension settings can be a double-edged sword that turns your state-of-the-art machine into a bucking bronco if you make ill-advised adjustments. Because of this, you will want to keep a record of any changes you make any time you step away from the manufacturer’s recommended settings. You’ll want to be able to go back to previous settings if you make changes you don’t like.
MO Wrenching: How To Set Suspension Sag
Before set up your bike’s damping, first start with the sag properly set. If you don’t, you won’t get a good baseline. Also, consider the condition of your suspension components. If it’s been a few years since the fork oil was freshened or you’ve got a couple of hard seasons on your shock, do that maintenance first. Similarly, if you’ve squared off your tires with the daily commute or your last three-day sport tour, spoon some new rubber onto the rims. Trying to tune damping on poorly maintained suspenders or worn-out tires is a time-consuming exercise in futility.
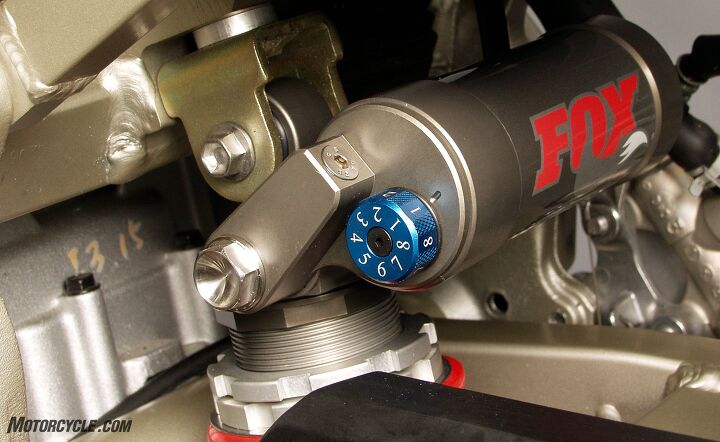
Begin by setting your bike’s damping adjusters to the factory-specified positions. They probably won’t stay there, but the settings should get you in the general area. Damping adjusters measure their settings one of two ways: clicks or turns. If your bike uses clicks, turn the adjuster all the way in (clockwise) and unscrew the adjuster the number of clicks recommended by the factory. For turns, do the same thing but count the turns instead of clicks. From here, you’ll set your suspension’s rebound before you ride and then modify the compression and rebound based on your riding impressions.
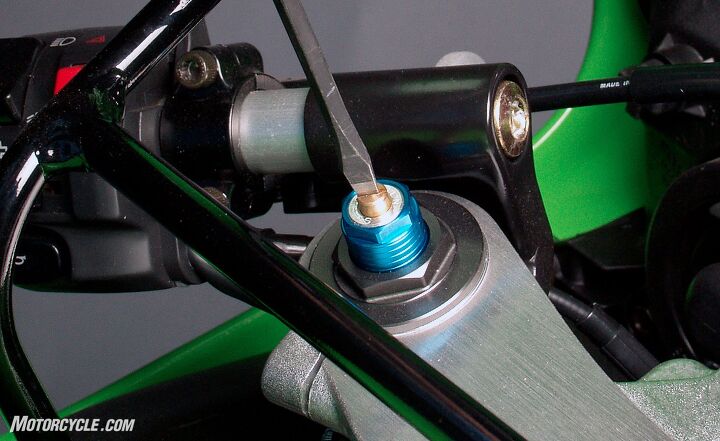
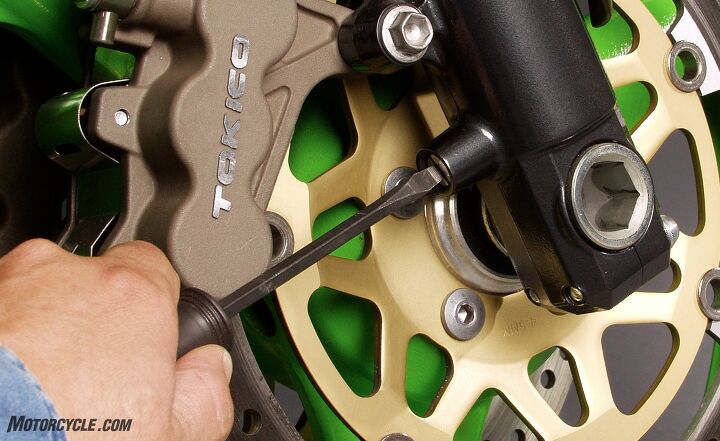
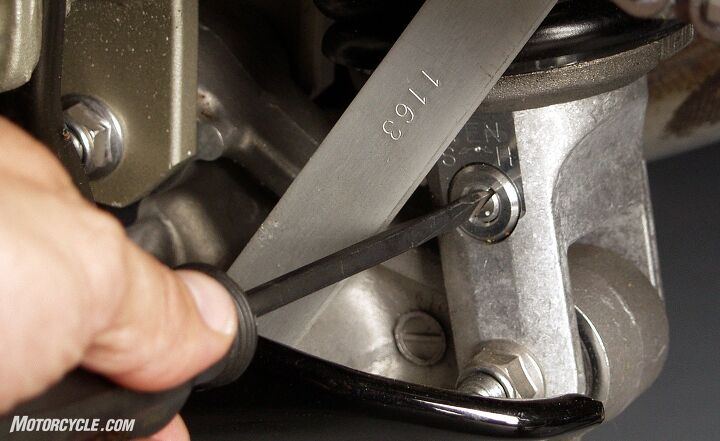
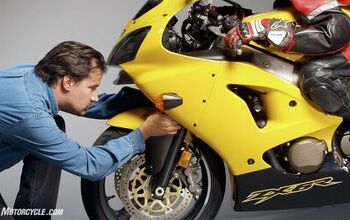
To test your fork’s rebound damping, stand your bike straight up. Press firmly down on the center of the triple clamp — not the handle bar. Be sure not to hold the brake. The suspension should rebound back to its starting point and not beyond. If it bounces back beyond the original position, you should increase damping by screwing in the rebound adjuster (usually found on the top of the fork). Generally, make adjustments in single clicks or half-turns. If the fork rises back directly to its original position, press on the triple clamp and time how long it takes to rise back. You want the rebound to take about a second. Adjust the rebound damping until you feel the timing is right. Follow the same procedure in the rear, pressing on the center of the seat. The shock’s rebound adjuster is typically on the bottom of the shock body.
Although you can test your suspension settings anywhere, the best way to get an accurate measurement of changes is to repeatedly ride the same section of road. Dial in the front and rear suspension separately. To get a feel for what direction you need to go with your compression damping, ride your test road with the compression set to the factory specs to form a base line. Next, go a couple of clicks firmer. Did the handling improve or get worse? Now try a couple clicks softer than stock. Which of the three settings do you prefer? Keep experimenting. Take notes. When you’re satisfied with the front suspension, continue the process with the rear.
The challenge of setting up your suspension to suit your personal riding style is that some symptoms can be caused by completely opposite problems. For example, if the front of your bike has a vague mushy feeling, you could be suffering from either a lack of compression damping or rebound damping. Looking for other symptoms will help you determine which setting to alter. Careful notes will help you in your detective work. Settings that worked great on your canyon runs may not be firm enough on the track and vice-versa. Generally, street pavement is much rougher and necessitates softer compression and rebound damping to accommodate greater wheel movement.
When you’re happy with how your bike’s suspenders perform, try one last test to make sure that you have balanced settings. Support the bike without any stands and press firmly on the tank. The front and rear suspension should compress and rebound in unison. If either end compresses or rebounds differently from the other, try altering the settings slightly to get the chassis movement in synch.
As your riding and suspension tuning skills improve with time, don’t be surprised to find that your settings need to change, too. You may find yourself developing “bumpy” and “smooth” road settings or “canyon” and “commuting” settings. Have fun, and give yourself a pat on the back for being so intimate with your bike.
[This article was adapted from Evans Brasfield’s book 101 Sportbike Performance Projects. Learn more about it here. Read the MO review here.]

Like most of the best happenings in his life, Evans stumbled into his motojournalism career. While on his way to a planned life in academia, he applied for a job at a motorcycle magazine, thinking he’d get the opportunity to write some freelance articles. Instead, he was offered a full-time job in which he discovered he could actually get paid to ride other people’s motorcycles – and he’s never looked back. Over the 25 years he’s been in the motorcycle industry, Evans has written two books, 101 Sportbike Performance Projects and How to Modify Your Metric Cruiser, and has ridden just about every production motorcycle manufactured. Evans has a deep love of motorcycles and believes they are a force for good in the world.
More by Evans Brasfield


Comments
Join the conversation
My BMW telelever front shock has zero adjustments, I think it might have been sourced from Pep Boys.
I went from having bikes that had no suspension adjustability to have bikes that had electronic suspension. I was able to screw around with it till i got it liked i wanted and i csn see the benefits of having adjusted the suspension. Now I have 2 bikes that are manually adjustable and I am COMPLETELY lost on how to set them up. But I really want to get the most out of them. Just not sure where to start.