


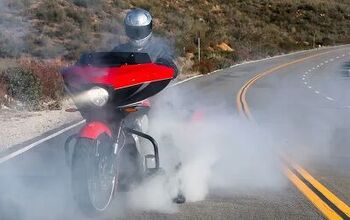
Motorcycle Downshifting Techniques
Separating the dilettantes from the diehards

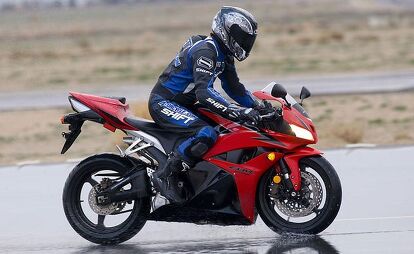


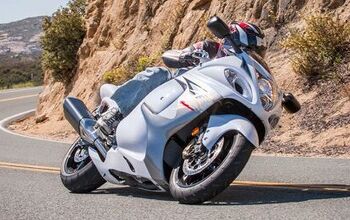
One of the hallmarks of proficient motorcyclists is the smoothness with which they apply the controls. Downshifting and braking are two of the skills that require the most finesse. Get ham-fisted with either, and you will display (and anyone riding with you will see) the telltale bobbing of an unsettled chassis – or worse, crash. This is why novices are recommended to master the basics of both braking and downshifting separately before trying to cram them together while rushing headlong into a corner.
In its most basic sense, downshifting consists of just three things: pulling in the clutch lever, pressing down on the shifter, and letting the clutch lever back out. However, there’s the important issue of matching the engine speed to the road speed. Most beginning rider courses emphasize a slow release of the clutch lever which allows the engine speed to rise to meet the road speed.
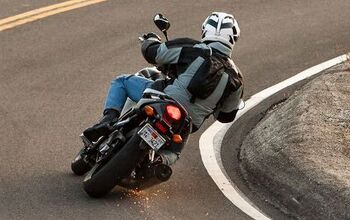
But do it too abruptly, and you’ll get a lurch – as if you briefly mashed on the rear brake. In extreme examples, this can lead to rear wheel hop, which explains why many sport/racing-oriented motorcycles have a slipper clutch. While a slow-release clutch method of bringing the rpm up to the right range is an effective tool – and teaches good clutch control – it isn’t terribly efficient. Multiple downshifts will take something just short of an eternity.
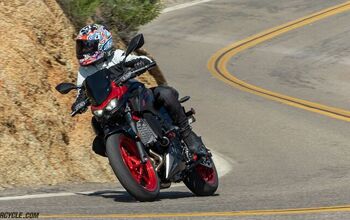
Proper Motorcycle Lane Positioning
As riders progress up the skills curve, they begin to combine a faster clutch release with a blip of the throttle. When it works, the downshift is so smooth as to be imperceptible. If the revs drop and then rise again as you let out the clutch, you need to give a little more throttle before releasing the clutch. If the bike surges forward, give less throttle. Either way, the chassis is upset, and your nice, tidy line through the corner becomes more difficult.
While you practice matching the engine speed to the bike’s road speed, make the corner entries easier by separating the braking and getting it done early. Practice downshifting at every opportunity you get until you no longer have to think about how much throttle is required until the process becomes second nature.
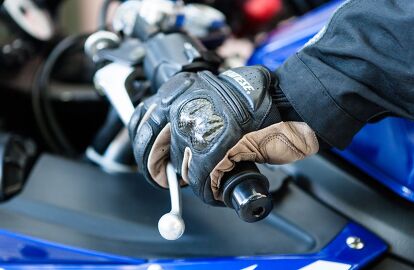
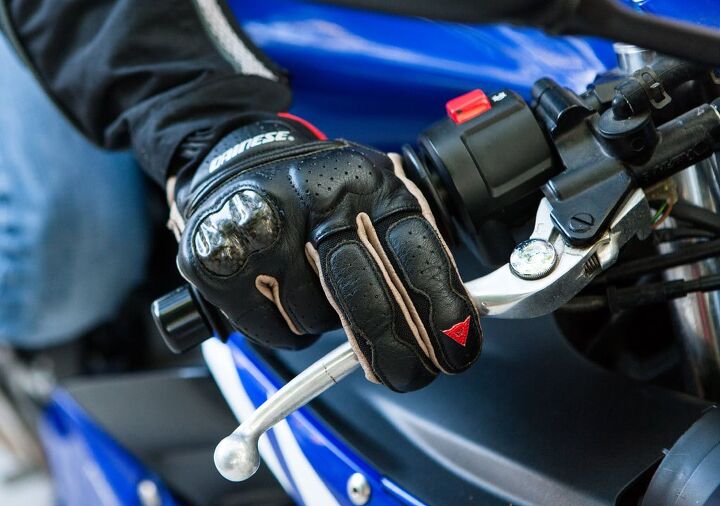
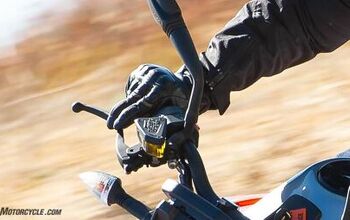
Now the real fun begins: combining the braking and downshifting. If you weren’t already riding with two fingers on the brake lever at all times, you need to be doing it now. Also, placing your hand in the proper position on the grip will make the process easier. When the throttle is completely closed, your wrist should still have a slight downward bend – not choked-up drag racer style – as you rest your fingers on the brake lever.
Before you practice this technique on the road, sit on your bike in your driveway and rehearse maintaining a constant pressure on the brake lever while rolling the throttle on and off. Remember, although it’s a challenge to modulate the brake and throttle simultaneously, you will be able to greatly compress the distance it takes to slow and downshift once you’ve mastered the skill.

While the right side of your body is handling the brakes and the throttle, the left side of your body will be busy shifting gears and modulating the clutch. Here’s one secret to make downshifting easier: You only need to pull in the lever far enough to disengage the clutch plates. Pulling the lever all the way in is wasted effort that makes it more difficult to shift smoothly.
Motorcycle Riding in the Wind and Rain
Some riders make the movement easier by covering the clutch lever with two fingers. Bumping the lever against your other fingers will remind you when you’ve pulled it in too far. (To make sure you fully disengage the clutch at a stop, continue to use all four fingers.)

There’s a trick for your foot, too: Although downshifting appears to be simultaneous to the clutch action, you’ll want to preload the shifter by pressing down on it just before you disengage the clutch so the transmission will slip right into the next gear. Release the shifter as you normally would when the clutch is fully engaged.
The process is the same no matter how many gears you’re going down through. Just let the clutch out fairly quickly between each shift. Don’t tap down more than one gear while the clutch is in. Getting the downshift(s) done early in the braking will help mask any slight mistakes you make in matching the engine speed. This also lets you focus on setting your corner entry speed and getting off the brakes at the proper time.

Eliminating unnecessary movement from gear changes will help downshifts go much smoother. For clutch operation with a minimum of finger movement, make sure the point of full clutch disengagement is as far out from the grip as possible while still allowing for 2 to 3mm of freeplay at the end of the lever. Similarly, the gearshift lever should be set so that you don’t need to lift your foot off the peg to press down on the shifter, but don’t set it so low that it compromises upshifts.
Becoming proficient in simultaneous braking and downshifting will pay dividends in the city, highway and track. By being in the correct gear for your speed, you will be able to motor away from trouble around town or stabilize the chassis for the acceleration from a canyon road’s corner exit. All it takes is practice.

Like most of the best happenings in his life, Evans stumbled into his motojournalism career. While on his way to a planned life in academia, he applied for a job at a motorcycle magazine, thinking he’d get the opportunity to write some freelance articles. Instead, he was offered a full-time job in which he discovered he could actually get paid to ride other people’s motorcycles – and he’s never looked back. Over the 25 years he’s been in the motorcycle industry, Evans has written two books, 101 Sportbike Performance Projects and How to Modify Your Metric Cruiser, and has ridden just about every production motorcycle manufactured. Evans has a deep love of motorcycles and believes they are a force for good in the world.
More by Evans Brasfield


Comments
Join the conversation
After learning your bike's engine RPM: Road speed in each ratio, try to match engine RPM to what the wheel wants as closely as possible during normal shifting, so much so that you barely need to blip the clutch. When you get good at this, slow yourself with clutch pulled, throttle up, front brake starting to come on, then use compression to brake the rear wheel, balancing clutch/throttle and front braking and leaving a solid mechanical connection between engine and rear wheel to allow for smooth acceleration out of a turn.
As a former MSF instructor, one of the things that were emphasized was not covering the brake and to use all four fingers to clutch and brake. The reason for this is to create positive muscle memory, so when needed a rider would have a better feel for their motorcycle. Opposed to using just two or three fingers all of the time, and when they needed to stop on a dime and all of a sudden grab with all four fingers, the muscle memory wasn't there and over braking would occur.