


How to Set Up Your Motorcycle Controls to Fit
When the fit is right, the ride is right. Take the time to fit your bike to your body.
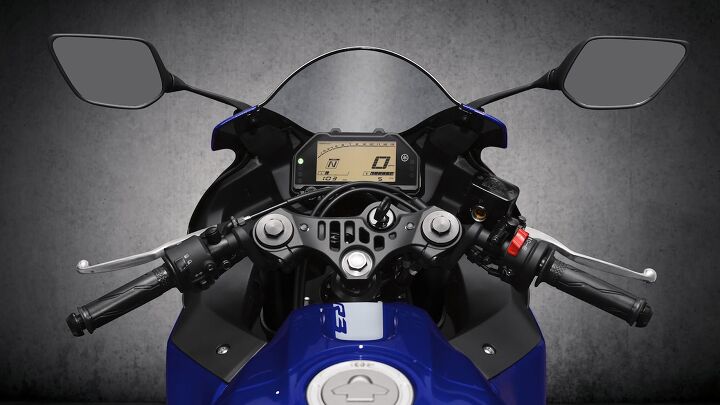
Riding well is all about control. And the more precisely your controls are set up and operate, the better the experience. The basic idea is to position the controls where you can instantly and accurately use them. Your riding experience depends on this – and so may your health and safety in a moment of crisis. In almost all cases with motorcycles, there are five individual controls to consider – throttle, clutch, shift lever, front brake, and rear brake. We say “consider” instead of “adjust” here for a reason – not all may be fully adjustable on all machines. But in most cases, built-in adjustability should provide a reasonable accommodation for different rider sizes and riding postures. And fit is key.
Motorcycle.com thanks Yamaha for sponsoring this new rider series.
Throttle
This crucial control must be adjusted right – for obvious reasons. But the good news is that once it’s set right, it generally will stay set right. On your motorcycle, you’re either going to find electronic fuel injection or carburetion. If the former, there’s little to do for setting up the throttle except make sure the cable slack is set to factory specs. (Find these either in the factory shop manual or owner’s manual.) As a rule, if you’re not sure what you’re doing here, take your bike to a qualified shop.
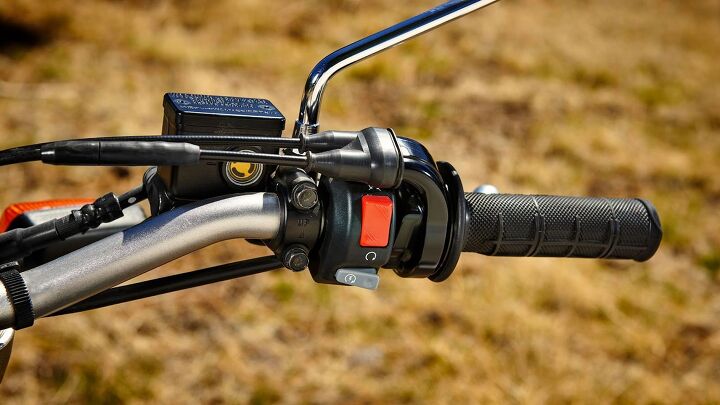
Bikes with carburetors can be 100 years old or current model year – though ever tighter emissions standards are accelerating their demise. Still, there may be a plethora of adjustment points and methods for the control cable or cables. If there is a single rule here, it’s to keep minimal slack in the cable, and to make sure the cable(s) are routed safely and cleanly so that no tension is applied to them when the handlebar turns or suspension compresses or extends.
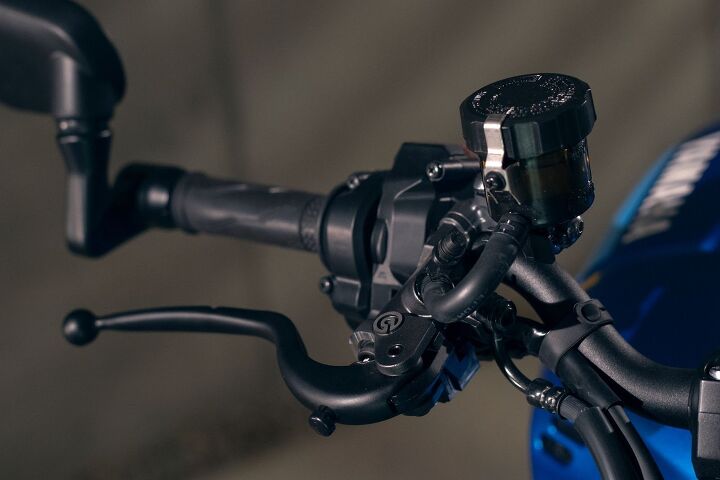
Clutch Lever
Your motorcycle’s clutch lever may have one, two, or three possible adjustments, depending on the age, make, and model of the bike. In an ideal scenario, you’ll be able to first rotate the clutch lever bracket (aka “perch”) on the handlebar to position the lever in a favorable attitude for you. Typically, with either a screwdriver or socket wrench, loosen the fastener(s) for the bracket perhaps ½ to 1 turn. Then rotate the bracket slightly forward or backward until the lever is in a comfortable position for your hand when you are in the riding position. The lever is in a good position when you can easily change your hand position from grasping the grip with all fingers, to extending one through four fingers over the clutch lever. When you’ve found this balance, retighten the bracket.
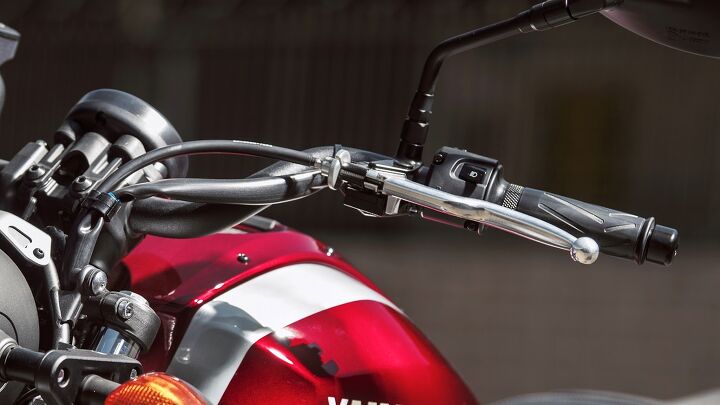
Clutch lever adjustment is particular to the type of clutch your bike has. A cable clutch will likely have an easy-to-adjust thumbwheel or star wheel that takes up “slack” in the clutch cable. An ideal starting point for this is for the clutch to “bite” or engage when the lever is released about halfway. Instead of a thumbwheel or star wheel, a hydraulic clutch may have a small pushrod, adjustable via a small open-end wrench, located near the pivot point for the lever. To engage and disengage the clutch earlier, “lengthen” the rod; to slow or delay engagement or disengagement, slacken the rod.
Additionally, some – but by no means all – clutch levers are adjustable for “reach.” In other words, they are adjustable for different hand sizes. This is done via a simple eccentric built into the lever near the pivot point. This simple mechanism may be marked with numbers, such as 1 through 4, for reference.
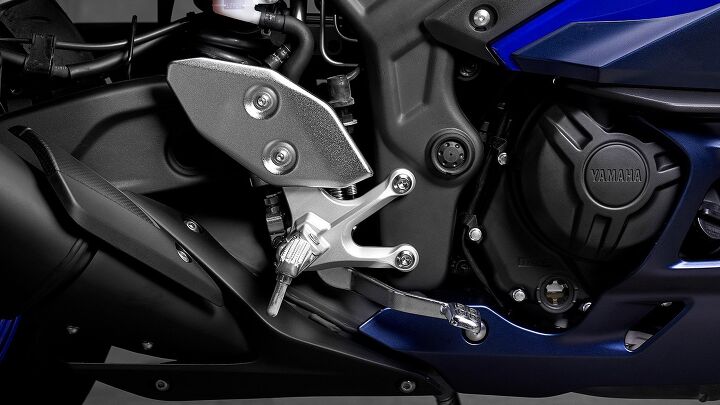
Shift Lever
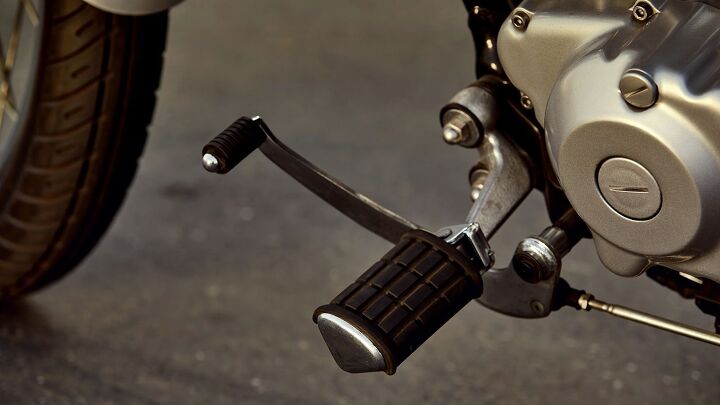
Everyone has different foot sizes and shoe preferences, as well as different degrees of natural flexibility in their ankles. Regardless, all should share in the desire to have the shift lever positioned – or perhaps more accurately, “adjusted” – so that they can quickly, easily, and precisely shift either up or down. Take a seat in your normal riding position. If the bike doesn’t have a center stand, then support it with your right leg and leave your left boot on the foot peg. Now consider whether your boot “naturally” rides above the lever or the toe box of the boot drops below the lever. If neither occurs in the majority, the lever is probably adjusted appropriately for your stature.
The sweet spot, then, is to have the lever adjusted so you neither must overtly flex your ankle to upshift, nor overextend it to downshift. If the shift lever is mounted directly to the engine’s shift shaft, then removing the pinch bolt, removing the lever, and indexing it either upward or downward one position may reset it to your liking. In other cases, the shift lever might pivot remotely on a separate spindle; in this event, its static position may be adjusted by a threaded rod and locknut(s) connecting the lever to a shorter actuating lever located on the engine’s shift shaft.
Front Brake Lever
For our money, this is perhaps the most important adjustment you can make on your bike. Because this single control provides most of your stopping power, it can also control your destiny. Here’s how to get the adjustment right. Following the pattern for adjusting the clutch lever, when the brake lever is set right, you want to be able to move your fingers from comfortably on the throttle grip to fully on the lever in a flash.
Whether you brake with one, two, or four fingers, make sure the lever is positioned to make this possible. If it’s rotated too high up and back, or rotated too far forward and down, adjustment may be possible by loosening the lever bracket or perch. For most bikes, this probably means also rotating the hydraulic master cylinder slightly.
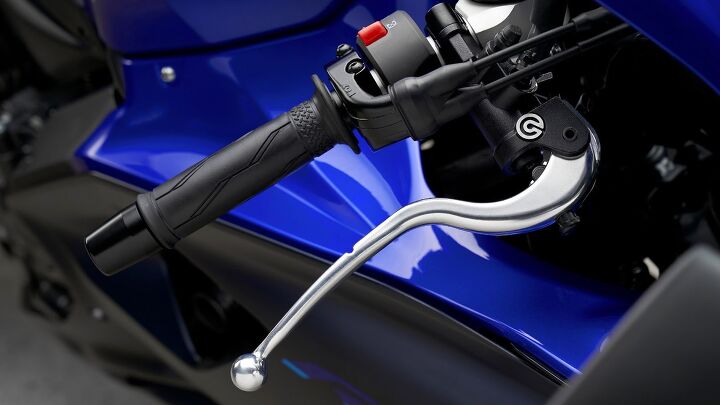
On machines with hydraulic front disc brakes, the lever may additionally be adjustable for “reach” – just like some clutch levers referenced above. Again, this adjustment is via a simple eccentric built into the lever near the pivot point. This simple mechanism may be marked with reference numbers, such as 1 through 4.
Although increasingly rare, a cable-operated front brake will likely have an easy-to-adjust thumbwheel or star wheel that takes up “slack” in the cable, together with a threaded shaft and nut at the lower end where the cable attaches to the brake actuating lever on the backing plate. Ideally, adjust the front brake lever so that the brake begins to activate within about ½ inch of lever movement. If the brake engages with too little lever movement, it may startle you; too much lever movement before braking action begins slows response when it’s needed most.
Rear Brake Pedal
If your motorcycle has a center stand, place the bike on it and then climb aboard and sit in a natural riding position. Grip the bars and place your feet on the foot pegs (or perhaps floorboards). Ideally, the rear brake lever should be positioned beneath the toe box of your right boot (or perhaps left boot if you own an early European machine!).
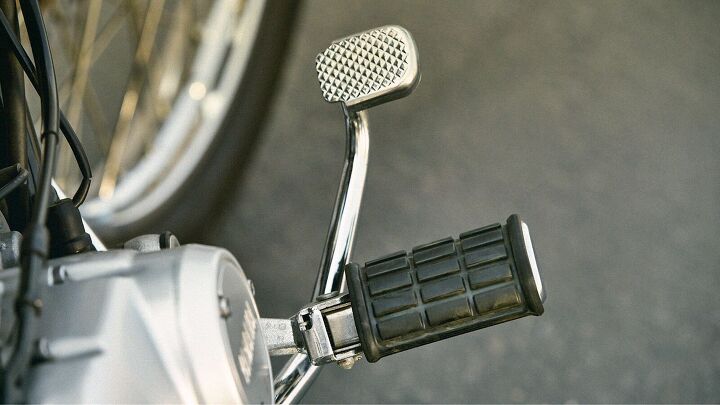
If you must either pick your foot up to move your toes above the lever, or else push your toes downward more than just a bit to activate the lever, you may find an adjustable lever stop, located near the lever’s pivot point, can help adjust the static height of the lever.
Older or more basic current machines with mechanical rear brakes (e.g., a rod- or cable-operated unit) will likely have an adjustment hex nut, wingnut, or thumbwheel located at the end of the rod or cable. Your owner’s manual should have adjustment specifications, but generally speaking, the brake should activate before the lever moves an inch or so. Hydraulic disc brakes are typically less adjustable, excepting perhaps the ride height of the foot lever.
As with all mechanical skills, when adjusting motorcycle controls to fit your physique, practice certainly makes perfect. And so does working with a friend or friends, maybe on their bikes as well. That turns a personal control-fitment win into a definite win-win.
Become a Motorcycle.com insider. Get the latest motorcycle news first by subscribing to our newsletter here.

John L. Stein brings 30 years of both automotive and motorcycle experience, having written for AutoWeek, Car and Driver, Motor Trend, Sports Car International, Chevy Outdoors, Truck Trend, Cycle World, Motorcyclist, Adventure Travel, and Men’s Journal, just to name a few. His articles have been published in the US, England, Japan, Australia and France. His technical knowledge combined with his ability to understand and effectively communicate what a motorcycle is doing underneath him is an invaluable resource to the Motorcycle.com team.
More by John L. Stein


Comments
Join the conversation