Jardine RT-One Slip-On Exhaust Install

Stew Lawson
by Stew Lawson

It’s always exciting when you receive a package in the mail and it’s even better when it’s a new part for you pride and joy. When the big white box labeled “Jardine” showed up we were as happy as a little school girl with a new kitten.

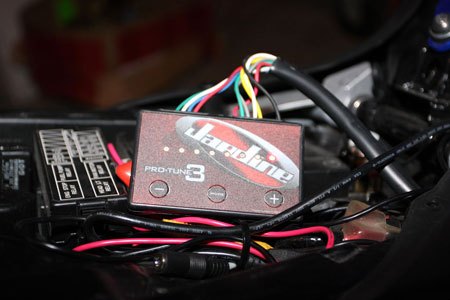
Neatly packed inside the box was a Jardine Performance Products RT-One slip-on carbon fiber exhaust ($678) and a Pro Tune 3 fuel programming card ($310) for our 2007 Honda CBR600RR.

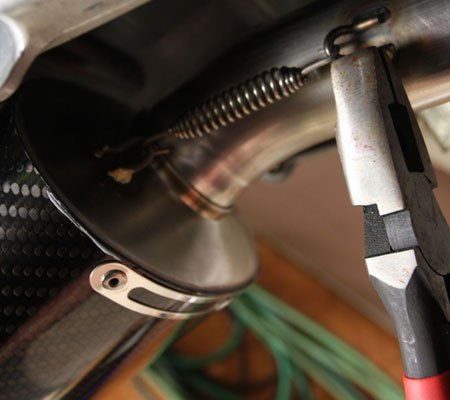
As soon as we opened up the box we were itching to install the new goodies and find out how they performed. We installed the exhaust first, which wasn’t too difficult an operation, but knowing your way around a toolbox and using a little common sense is helpful.

Nothing like Christmas in the summer!

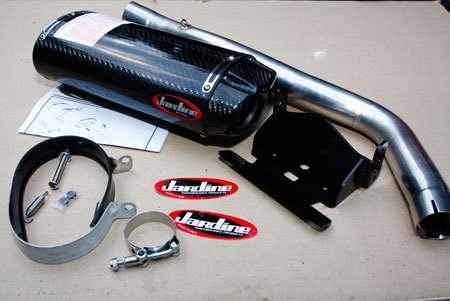
Before getting started the first thing you should do is lay out everything from the box and make sure you have all the pieces listed on the inventory list. Nothing’s worse than starting a project only to find out you’re missing something.

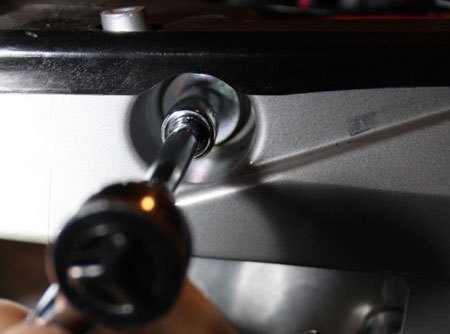
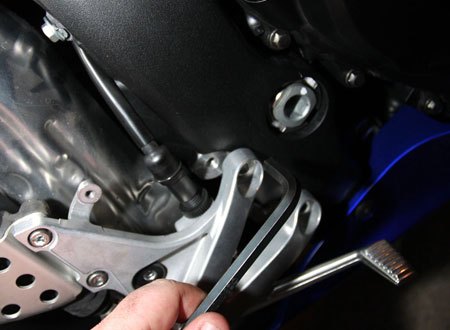
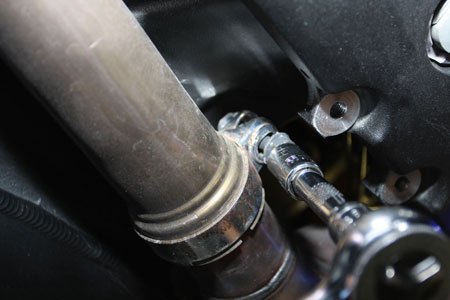
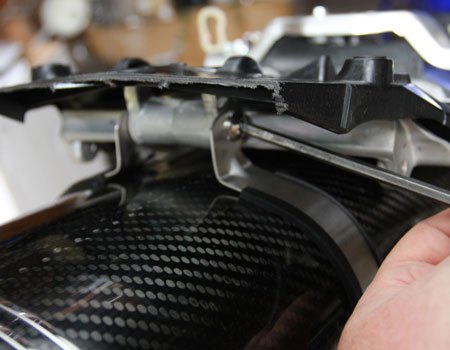
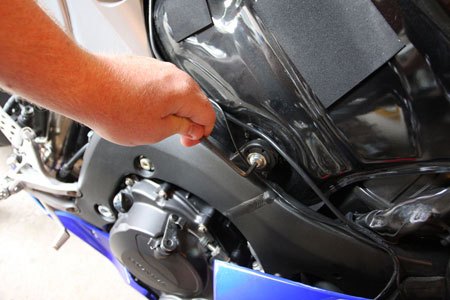
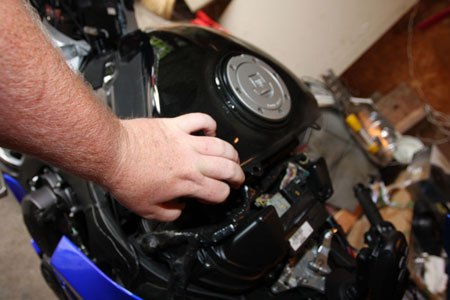
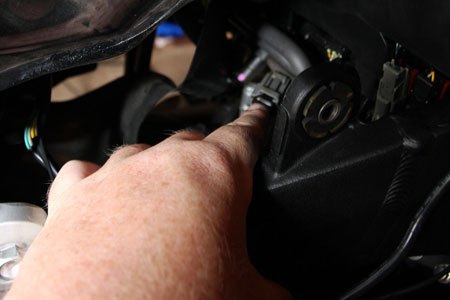
Jardine RT-One Exhaust Install• Remove your rear seat. • Remove the four hex bolts holding the tail section in place. Use the Allen key provided in your tool kit.• Pull back the rear corners of the main seat and remove two more hex screws holding on your seat.• You should now be able to remove the tail. Slowly pull the rear of the tail up and slide the tail to the back of the bike. You might have to pull the sides open a little while sliding it off.• Unplug the lights for the brake and turn signals. These will be the white, blue and orange clips - slide back the protective black plastic to find them. • Remove the license plate bracket via the two 10mm bolts on each side of the tail.
• Remove the middle bolt on the right side of the tail used to hold the exhaust.
• There is a single Hex bolt on the top of the rear. Remove this also.• Remove the rear passenger pegs – mine use a 5/16th Allen key.• Remove the 10mm bolt on the right side of the tail that is also holding the heat shield.• Remove the rear brake reservoir. There is an 8mm nut on the inside. Also remove the screw in front of it that is holding the heat shield.• Remove the rear brake switch from the right side rear set. There is a spring that you will have to unhook from the brake lever.• Remove the right side rear set via the two large hex bolts. Make sure you have removed the screw holding the plastic heat shield cover.
• You should now be able to see the clamp holding the exhaust together. Remove the clamp via the 12mm bolt and slide it down.
• This is the tricky part. We had a hard time separating the down pipe. It is going to take a lot of wiggling, twisting, and side-to-side action.• Now it starts to get easy, put on the new up pipe. Make sure you put the new clamp over the pipe before installing.• Remove the stock frame bolt that is under the rear passenger seat.• Take the new hanger and slip it around the exhaust can.• With the hardware provided mount the new hanger to the frame bolt that you just removed. Slide the new exhaust can into the up pipe.
• Take the springs provided and attach them to the can and the up pipe. Make sure you have a good set of pliers, because you are going to have to get a really good grip on the springs.
• Make sure everything is lined up correctly and then go back and tighten everything down. • Some of you may choose to use different under tail kits and some may also choose not to put the heat shields back on. This is your choice.• Reverse the dismantling steps to put everything back on your bike.

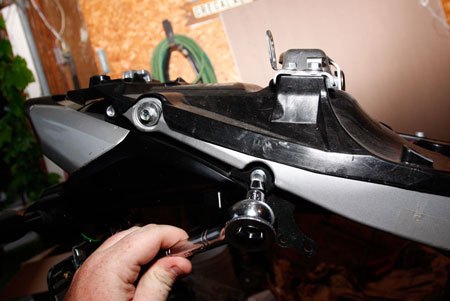
With the sweet new Jardine slip-on in place, it’s time to install the Jardine Pro Tune 3 Fuel Programming Card. It wasn’t as difficult to install as we thought it would be, but follow the steps below as a guide.

It's not as sexy as the exhaust, but the programming card completes the package.
Jardine Pro Tune 3 Install• Remove the seat and the front fairings. We’re lucky in the sense that we have aftermarket plastics and are able to pop off the upper fairings from the tank and simply remove the tank cover.• To remove the tank cover there are two plastic pop rivets facing up around the bars and two hex head screws on the sides just below them. By the seat cover there is a hex head screw holding the base of the tank cover and two plastic screws adjacent to the battery. Two hex bolts are holding the black plastic where your legs tuck while in riding position.• Once all hardware is removed you can lift the tank cover away from the bike. **Note the rubber gasket around the tank filler cap.• To get to the injectors the tank must be tilted upwards and away. To do so there are two (one on each side) mounting tabs that must be removed. Remove the bolts holding the tabs and be sure not to lose the metallic spacer from the rubber bushing.
• Once the bolts are removed carefully tilt the tank backwards towards the tail of the bike. DO NOT remove any of the hoses attached to the tank.
• Use something to prop the tank up as you don’t want this sucker falling on your fingers. We had an 8 inch section of aluminum that did the job just fine.• Once the tank has been tilted back you’ll see two sets of four injectors. You want to tap into the lower set (the primary set) that is attached to the throttle bodies. These are orange and hard to get to!
• After the injectors are located, gently depress the connector to unplug it from the injector.• After the connector has been disconnected take one of the pigtail ends of the Pro Tune 3 wiring harness and plug the female connector to the injector and the male connector to the stock harness of the bike. Repeat the process four times.• Note: the injectors have a swivel head on them and may move to the side a little. Don’t stress out too much like we did thinking it’s broken. Just softly rotate it back into position and plug in the female end.
• Make sure that you hear each plug snap or click into place to ensure they are connected properly.• Once the wiring harness is complete, the ground loop must be grounded to the chassis. Any chassis or engine location is acceptable.• After the harness is fully complete take the Pro Tune 3 head unit and pass it under the tank and into the seat location. Make sure the wiring does not interfere with any of the mounting components.• Double check all your clip locations (make sure they are connected correctly) and drop the tank back into place, secure the bolts you removed from each side.• Once the tank is in place start the bike and make sure the ProTune 3 turns on and the LEDs are working correctly. If they are working correctly, after five seconds of the bike being started there should be a single lit Green LED.• Once functionality has been confirmed begin to reassemble the bike and fairings.
Sweet!!!

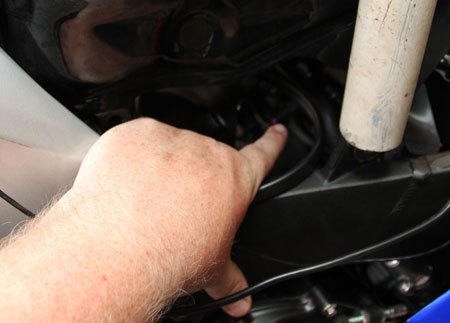
Installation of the exhaust and fuel programmer was fairly simple. If you know how to change your oil you shouldn’t have much trouble doing the install on your own. Plus, it will help you familiarize yourself with your machine.

Once the garage was cleaned up and the tools were put away it was time to gear up and take the bike for a test ride. Immediately upon starting the bike up we found ourselves grinning from ear to ear. The first thing we noticed was the exhaust tone – it’s a much deeper, throatier sound than the stock pipe. Right away it seems to be more alive and begs to be taken through the gears. All you want to do is ride around town listening to how much happier the bike sounds.

We found the throttle response to be a little slower at low RPMs, but once we really got on it at the top of first and second the bike wanted to come up a little easier. Fair warning to all you power junkies out there who want to crack the wrist in first gear – we were quite surprised at how much easier the front end wanted to lift.

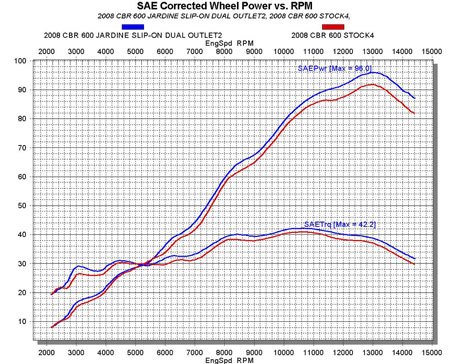
Along with shaving off four pounds of weight, Jardine claims the RT-One provides a 5hp gain over stock. We didn’t have a dyno available for a comparison, but we don’t doubt Jardine’s numbers. This kind of performance is just what you’d expect from a company that has direct ties to pro racing. According to Jardine, the RT-One is derived from the development of an experimental system built for the American Honda AMA Superbike team. How cool is that?

Jardine's dyno shows a power increase across almost the entire rev range, as well as a modest increase in torque.

Adding the Pro Tune 3 fuel programming card also offers some benefits. If you’re a track nut, it’s got both race applications and CARB legal settings. You can make adjustments on the fly thanks to integrated buttons and you don’t have to worry about interfering with stock sensors.

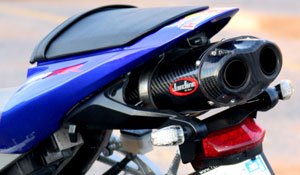
Overall we are extremely happy with the Jardine power upgrade. Esthetically the Jardine products are top notch. The dual opening end cap on the exhaust can really helps set your bike apart from the crowd and the carbon fiber looks fantastic. If carbon fiber isn’t your thing, the RT-One is also available in Titanium.

Visit JardineProducts.com for more information.

Stew Lawson
Stew Lawson

More by Stew Lawson

Comments
Join the conversation
Next