Victory Hard-Ball Touring Project
Being a badass biker is one thing; riding thousands of miles to Sturgis or Daytona takes a whole 'nother kind of rider. And while not every biker out there can hang on for more than a few hours in the saddle, others have the salt to take it to the extreme.
Items like windscreens, heated clothing and communication systems are just some of the tricks we use to keep us happy over rough roads and rougher rides, but there's no need to look like weenies while doing it. We know riding with our fists in the wind, dirt beneath our fingernails and a scowl on our face is part of the look we’re after, but here are a few accessories that will make it hard to keep a smile off your face while ironing out that 1000-plus-mile run to the next rally.
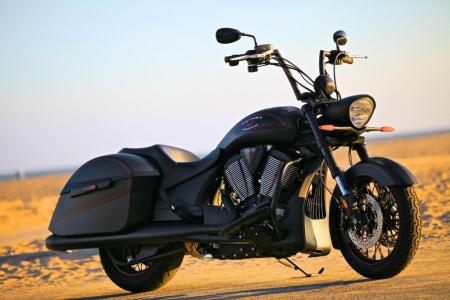
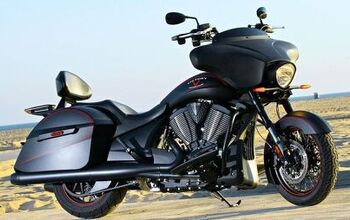
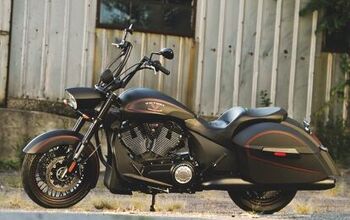
Given the tough-yet-touring look of the Victory Hard-Ball, you're halfway to touring bliss already. With possibly the largest saddlebags in the segment, the best suspension setup to come stock on a cruiser, and the aggressive, high-bar front end, the Hard-Ball has the reverse-mullet of motorcycles down pat – party up front and business in the back. You've got all the attitude you need while also being capable of carrying extra riding gear, cameras, laptop computer, what have you… beer, you name it. Everything you need to keep you in business both on and off the bike.
In preparation for our road trip to the legendary Sturgis Motorcycle Rally, we've taken the MO-'Ball and kitted it out for touring duty while adding some extra power and attitude.
Visually and functionally, the most obvious revision is the addition of a batwing-style fairing and pillion backrest/rear rack combination. Less obvious changes are flashier engine side covers, heated grips, plus the Victory Stage 1 exhaust upgrade to supply more attitude, growl and power.
While you can pick and choose your way through the parts and accessories available from Victory, we opted to whip up a complete package that took our local mount beyond city limits with comfort. The style was there already, we just made it more comfortable to enjoy 12-hour days in the saddle. We enlisted help from the good guys at Southern California Motorcycles in Brea, CA to make sure the transformation was done right.
After digging through piles of boxes, packaging and parts, we tackle the handy stuff first. We installed the heated grips before the access point for the wiring harness was covered by the fairing. The switch mounting plate is fastened under the stock handlebar riser by two bolts. The plate has room for two switches, so we put in a dead-switch to fill the empty space that could otherwise be used for switching extra lighting or audio equipment.
The heated grips package ($199.99) comes with set screws for secure installation. Most Victory models ship with a predrilled hole in the handlebars for adding this accessory, but the Hard-Ball does not, so you'll need to tap your own hole. Cold hands be gone!
While you have the headlight cracked open to access the wiring harnesses, this will be the point to tap in for both the heated grips and the stereo fairing harnesses – that is if you're doing both touring installs at the same time.
Next we mounted the fairing from Victory’s accessory catalog. Available as an accessory to the High-Ball in 2011, the $899.99 piece features color-matching matte-black paint and a three-inch darkly tinted eyebrow windscreen.
Available separately is a fairing audio kit ($799.99) that includes an Apple iPod/iPhone dock connector and a pair of premium Kicker speakers. Also handy on any long ride is the 12-volt socket ($54.99) which mounts on the left side, just above the rubber-lined pocket designed to hold your music device.
While installation of the fairing itself is rather simple, what to do with the exiting wiring harness is a little tricky. Be sure to run the wires from the left side. But first, before you button up the headlight nacelle, tap in the audio switch controls and mount that to the underside of the left-hand switch housing. Our switch shipped in chrome by mistake instead of the desired black version. Test your heated grips and audio system before closing up the headlight.
Begin mounting the fairing by placing two of the fairing’s four mounting bolts part way into the sides of the upper triple tree, enough to hold the weight of the fairing. From the front of the bike, peek over the top of the fairing and hang it on those two bolts like hanging a picture on the wall. Secure it with the two remaining bolts on the bottom triple and return to the top to totally clamp 'em down.
The tricky part is the limited clearance for fastening the hex-head bolts. There is barely 3/4 inch between the bolt and the inner fairing, so we had to conjure up a wrench to fit in there – we used a hex bit inside a 3/8-inch ratchet driver, then reached in from the rider’s position. While it’s a little tricky at first, it gets easier once you’ve done it. So, while I wouldn't call this fairing a true quick-release style, it doesn't take more than a few minutes to pull the four bolts and disconnect the wiring connector to return to the badass biker you were back at home before the long ride out of town.
Wires feeding the speakers should be hanging out the left side of the inner fairing so they can be connected to the bike’s lead-out. A Christmas tree-type ratchet post gets fitted to an empty hole between the tank and the steering head to keep the kit’s lines as clean as possible.
We added a bit of bling with a pair of chrome bar ends, which gave our steed the more touring-oriented look of Victory's "Cross" bikes. Another cosmetic upgrade was bolting on the blackened and finned Ness engine covers ($159.99) that added a little more attitude back into the look of the now-faired bike.
As the stereo wiring harness and switches (volume, track and mode) are designed to work for the fleshed out Cross bikes, with this kit you're left to pick your playlist or album before connecting to the dock connector and placing it in the rubber-lined holding pocket in the fairing. Lacking the Cross’ LCD screen, selecting tracks, albums and playlists has to be done via the player itself. I dealt with it by just selecting a playlist before connecting to the bike.
And with that, we move on to the rear of the bike to mount the Lock & Ride passenger backrest (449.99) and matching black luggage rack ($499.99), the latter to ensure a variety of luggage-carrying options. While the parts need minimal assembly, just four nut/bolt pairs, there are a few plastic spacers, or liners, that also need to be put in place on the saddlebag frame rails. Just remove the saddlebags, remove the three bolts that will hold the luggage rack in place, slip in the top-hat-like gray-and-black pieces into place as seen in the photos and replace the rack bolt. Done. Now on to more audible portions of the upgrades!
Bitchin bike! But how does it sound?
The Hard-Ball’s V-Twin emits a deep and powerful note in stock form, but it sounds much better after the addition of Victory's Stage 1 exhaust kit. Retailing for $699.99, it is a 50-state-legal slip-on kit that replaces the internal elements of the stock pipes and adds some sweet sound to your sweet ride.
The first step is to remove the three hex bolts holding the exhaust tip end caps in place, the rubber bushings that cushion the saddle bags, and the two bolts holding the trailing end of the stock pipe to the cross-brace. Then loosen the header pipe clamps, pull off the preferably cooled-down stock exhaust, cut the straps holding the heat shields to the original, and migrate those to the new pipe using the new straps included in the kit.
Leaving the heat-shield worm clamps loose aids proper final placement, allowing them to rotate freely into perfect position after the pipe is mounted to the bike.
Once you place the included CARB sticker into your side cover, spark up the old girl and listen to your new motorcycle. The rumble at idle will be nearly the same, but the intake snarl and exhaust note really open up after about 1500 rpm, a welcome upgrade to the stock bagger that sounds a bit tame.
The one accessory you cannot install for yourself, however, is the chip upgrade that requires a Victory dealer’s computer. While the bike will run just fine without the remap, you'll be missing out on one of the best features of the upgrade – the power boost. So take the barcoded card that shipped with the pipe and your bike down to your local shop and expect about 30 minutes of your shop's labor to get the package completed.
The two pipes weigh about the same, but the results are quite different. Having taken the bike to Gene Thomason for a few pulls on the dyno, we compared the newly-outfitted and freer-breathing Freedom 106 with the results from a previous test bike’s numbers.
The modifications make a noticeable improvement to the motor, especially at the low end of the curve. It’s something you can feel from the saddle. The bike feels a little more awake at the roll-on and sharper in the note. It’s so nice!
All told, it took us about 5.5 hours to install everything. The cost of having your dealership do the work for you will vary depending on the hourly rate, but that’s a deal for you to make with 'your guy.' Or just do it yourself, as the install isn’t exceedingly complicated.
So get to work and be ready to ride longer and in more comfort thanks to the relieved pressure on your chest and the inclusion of your favorite tunes. And you’ll have a happy passenger thanks to that backrest/luggage rack combo.
Now we’re ready for The Road To Sturgis, an adventure you’ll soon be reading about on these pages.
For information about all the Victory accessories we used in this project, click here.
Related Reading
2012 Victory Hard-Ball Review - Video
2011 Victory Cross Country Review: Cory Ness Signature Edition
2010 Victory Cross Country Review
Victory Vegas 8-Ball Project: "Evil 8" Part 1
Victory Vegas 8-Ball Project: "Evil 8" Part 2
Victory Vegas 8-Ball Project: "Evil 8" Part 3
2012 Sturgis Motorcycle Rally Report
2012 Sturgis Motorcycle Rally in Pictures
More by Alfonse Palaima












Comments
Join the conversation