


MO Wrenching: How To Properly Splice Wires
The prescription for strong joints


Time and again, I’ve had people tell me that they are afraid to modify their bike’s wiring harness to install a new accessory. Upon a little digging, the bugaboo is usually fear of splicing wires into the bike’s harness. While cutting your motorcycle’s wiring harness is not to be taken lightly and should only be attempted when you are certain as to which wires should be cut – by, say, obtaining the factory service manual – the process isn’t really that scary.
Wire splicing is the process of physically connecting two or more wires to make a mechanically strong, electrically sound path. This can be done a couple of different ways. Mechanical connectors which physically clamp the wires together or to a common conductor are the easiest, but they take up more room and particular kinds are prone to failure. Soldering uses a hot iron to heat the wires to a temperature that will melt the solder, which when it cools takes care of the sturdy physical connection and the electrical conductivity. However, soldering is also a great source of distress amongst novices. Never fear, it is perfectly acceptable to splice wires if done correctly.
The source of the splicing fear usually is ignorance about soldering, which apparently many feel should only be done at midnight, during the full moon by a practitioner of the dark arts. Fortunately, that idea is bunk. Anyone, even someone whose hands shake as much as mine do, can learn to solder with a minimum expenditure of blood and treasure.
Turn On: How To Install Switched Accessory Power To Your Motorcycle

What are my connection options?
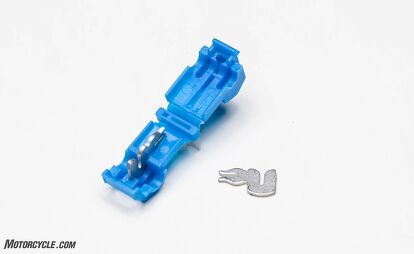
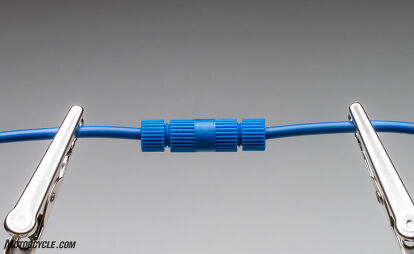
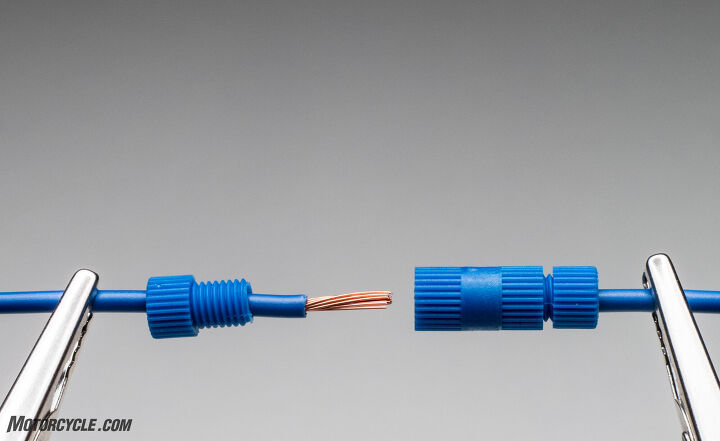
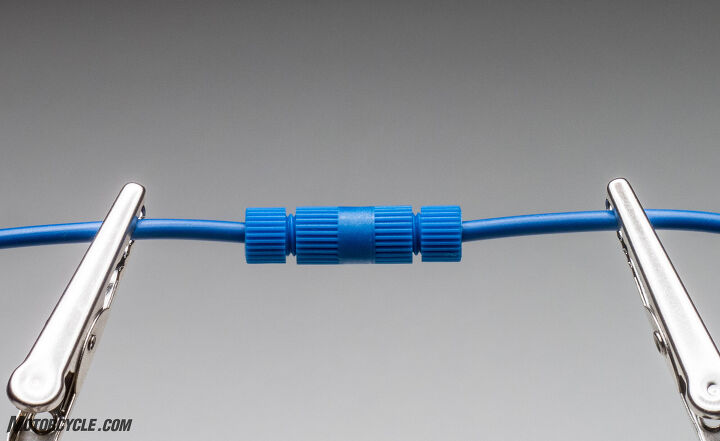
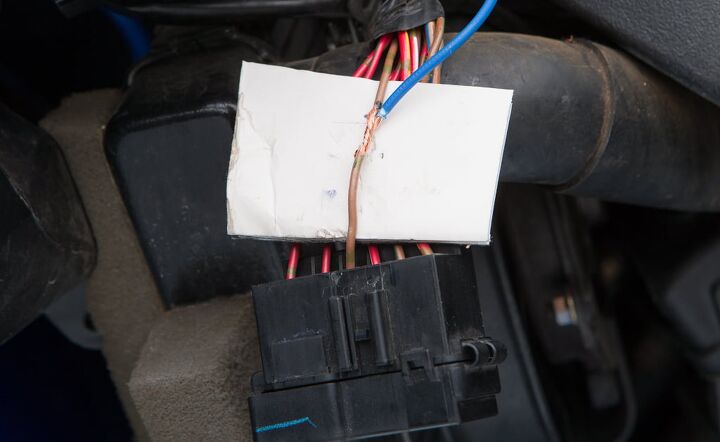
The most common connectors you’ll find in aftermarket kits are the crimp-on wire taps. These are tools of the devil. Throw them away and either learn to solder or use Posi-Lock connectors, which are a little more expensive, but I’ve yet to have one fail. With Posi-Lock connectors, strip about a half-inch of insulation from the wire ends but don’t twist the individual strands. Slide the plastic collar over the wire end and then screw the collar and wire into the Posi-Lock body to a strong finger-tight. Repeat with the other wire end. This produces a strong, electrically sound joint that I’ve used for years when there’s not enough room to solder. I’ve also used the Posi-Locks as wire connectors in locations where the joint may periodically need to be disconnected.
The reason crimp-on wire taps are evil is pretty simple. While you’d think that they would make splices easy by just clamping into place, they can also cut through some of the actual wire strands, making the wire weaker, higher in resistance, and more prone to failure. Additionally, the high-vibration environment of a motorcycle makes crimp splices more likely to loosen and cause intermittent failures which are a pain to track down.
What do you splice wires with?
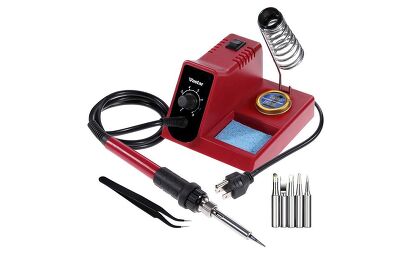
A decent 40-watt soldering iron can be purchased for under $20, but I recommend one with a variable switch and built-in stand. If you watch for sales, they can be had for $35 or less. You want some wire solder in a gauge that is narrow enough to melt easily with the wire gauge most commonly found on motorcycles, usually 18 gauge for most purposes. I usually buy solder without the rosin core, preferring to use a dab of flux on the bare wires before heating them and applying the solder.
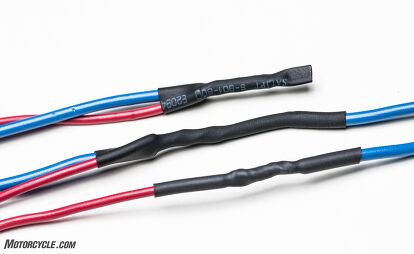
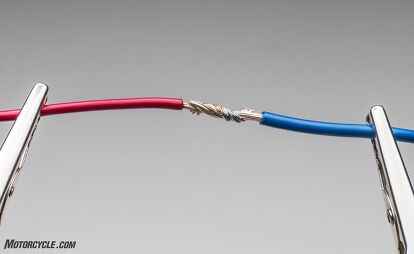
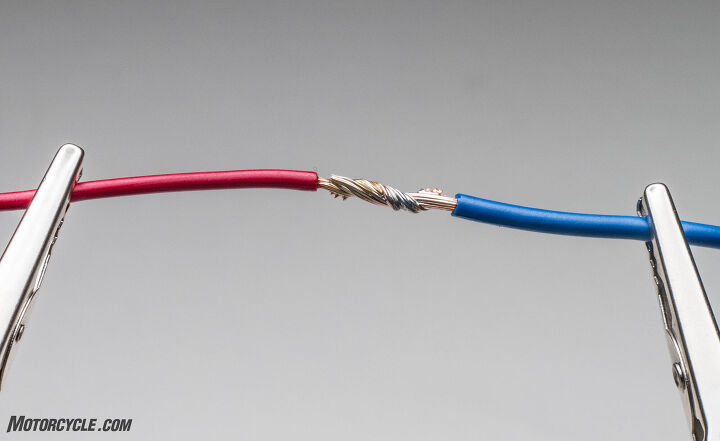
You should learn how to solder on something other than your wiring harness. For this article, I chose 18-gauge wire in red and blue colors to make it easier to see how they go together. When splicing wires, you’ll usually incorporate one of three kinds of splices: the butt splice, where the two wires are joined to form one, continuous wire; the pigtail splice, where the wires lie next to each other; and the three-way splice, which brings a second wire into the middle of another wire.
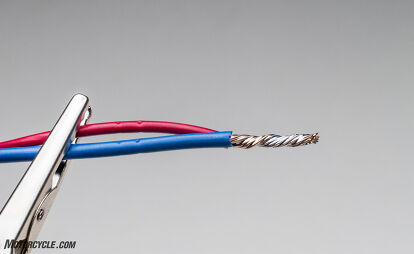
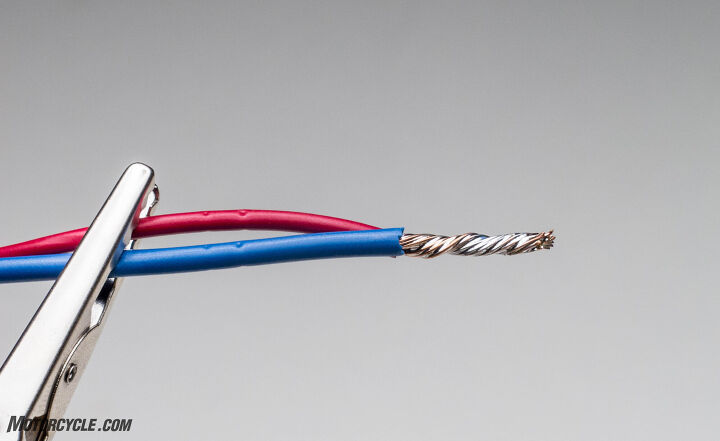
The first two splices require that about a half-inch of the insulation be removed from both of the wire ends. The ends are twisted together to form a good mechanical bond between the wires. A stand with alligator clips can be homemade or purchased to hold the wires in place while applying heat from the iron.
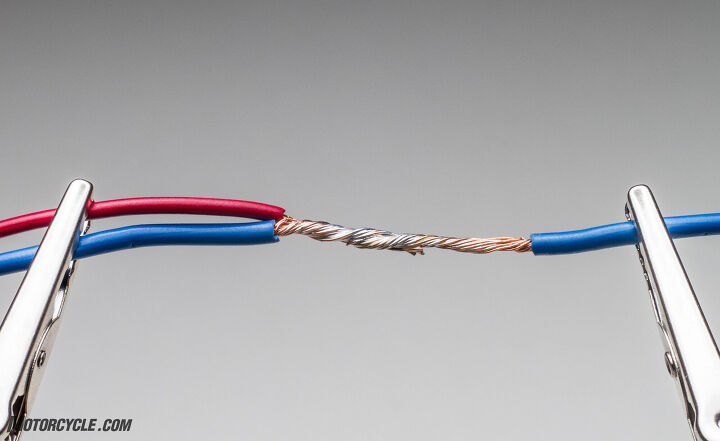
Before touching the soldering tip to the wires, tin the tip by melting a small amount of solder on it. This helps to spread out the heat when the tip touches the wires. When melting the solder to the wires, try not to touch the iron with the solder. Instead, allow the iron to heat the wire to the point that it melts the solder. Holding the iron below the wires allows the heat to travel upwards while gravity pulls the molten solder down. Capillary action plays an important role in distributing the solder throughout the splice. Touch the iron and solder to a few points on the splice to make sure it is uniformly spread throughout the wire strands. While you want the solder to cover most of the splice, try to avoid leaving big globs of solder on the joint. It looks ugly and will make the splice much larger once it’s covered with tape.
After the splice has cooled, trim any loose wires that could poke through the tape or shrink wrap. Then wrap it with electrical tape or shrink-wrap to prevent any accidental grounding against other wires or connectors.
Keep practicing your soldering technique until you are comfortable with it before you attempt it in the most confined spaces of a motorcycle.
Soldering tools
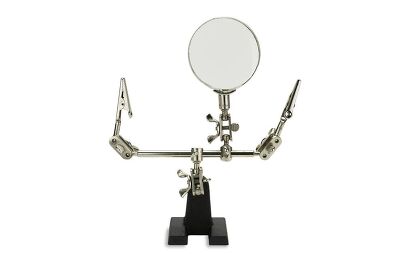
While you can start out with just a simple, single temperature soldering iron and a roll of solder, I’ve found that the investment in a variable-temperature soldering station pays off. First, they usually have a convenient place to place the hot iron between uses. No more burns on the workbench. Second, they can also have a sponge holder that allows for easy tip cleaning before you start a new joint. The other tool I recommend is a Helping Hand to hold wires in place when you’re working on a bench. It makes life so much easier.


We are committed to finding, researching, and recommending the best products. We earn commissions from purchases you make using the retail links in our product reviews. Learn more about how this works.

Like most of the best happenings in his life, Evans stumbled into his motojournalism career. While on his way to a planned life in academia, he applied for a job at a motorcycle magazine, thinking he’d get the opportunity to write some freelance articles. Instead, he was offered a full-time job in which he discovered he could actually get paid to ride other people’s motorcycles – and he’s never looked back. Over the 25 years he’s been in the motorcycle industry, Evans has written two books, 101 Sportbike Performance Projects and How to Modify Your Metric Cruiser, and has ridden just about every production motorcycle manufactured. Evans has a deep love of motorcycles and believes they are a force for good in the world.
More by Evans Brasfield


Comments
Join the conversation
ALWAYS make a good mechanical connection. Even a good solder job can fail if the wire gets hot enough. In fact, the ABYC (American Boating and Yacht Council) recommends GOOD mechanical connection and marine shrink wrap-soldering is optional. Try non-insulated butt connectors with a double-action correctly sized crimping tool, THEN solder, THEN shrink wrap.
For a great selection of NSPA Krimpa-Seal waterproof sealed electrical connectors checkout https://monsterbolts.com/ . They have both sealed crimp and seal, and waterproof crimp and solder versions available. Great quality and inexpensive.