

MO Wrenching: How To Install Frame Sliders
A little planning goes a long way


Updated February 2020
Frame sliders have been around for a while, but they are the subject of some misconceptions. With the exception of when you drop your bike in your garage, they most likely won’t keep your bodywork from getting scratched up in a slide. Once the bike leaves the relatively smooth surface of the pavement, other things, like gravel and sticks, come into play. Because of their roots in racing, frame sliders are designed to minimize the damage to major components, making repairs that much easier so the rider can get back on the track in time for the next race.
However, bring up the subject of frame sliders, and you’re almost certain to get a little controversy. Some riders swear by them and put them on every bike they own, while others think that they are the tools of the devil and will cause more damage to your bike. Well, which is it? Are frame sliders good or bad? The answer is that there are good frame sliders and bad ones. Also, no frame slider can protect your motorcycle from every type of crash. In a tumbling crash, like in a high-side, you can’t beat the laws of physics. Similarly, the higher the speed of the crash, the more likely it is that the slider could catch and send your bike tumbling. But then again, so could the handlebar. There is no 100% perfect solution for protecting a motorcycle sliding on its side. You just need to decide where you stand on this game of odds.
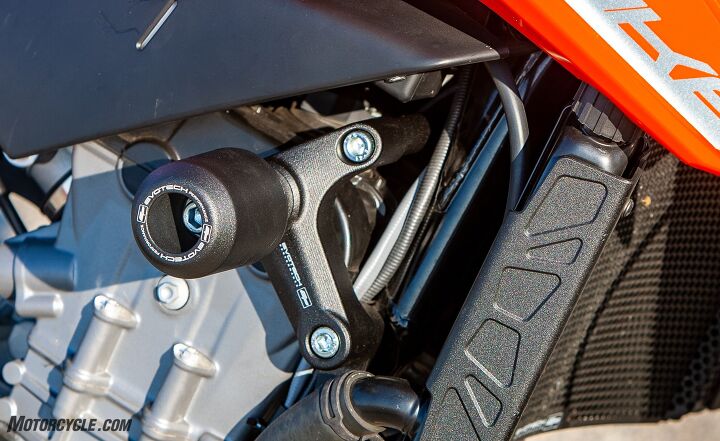
Now that we know that there is no perfect frame slider, how do we separate the good ones from the bad ones? Start by sticking to the major players in motorcycle aftermarket parts. You’ll find them by looking at online retailers. Avoid the cheap eBay specials. Look for sliders made out of tough, low friction material. Chromed or billet aluminum sliders may look good, but their higher coefficient of friction compared to plastic will make them more prone to catching and flipping your bike.
Next, consider the mounting brackets. Some manufacturers are selling “street” sliders that don’t require bodywork to be drilled. If you look around, you’ll find people who have had those protectors break after something as minor as the bike falling off the side stand. While this doesn’t happen with all street sliders, it happens often enough to warrant a little research on your part if you’re that afraid of drilling your bodywork. Choose wrong, and you could end up with sliders that will damage the very bodywork you’re trying to protect.
The catch is that frequently “no drill” sliders come with brackets to offset them from their mounting point on the chassis to a more favorable point on the bodywork. Look closely at the design of these items. They should have beefy brackets and multiple mounting points. A bracket with only one bolt point can allow the slider and bracket assembly to pivot on its mounting bolt and damage the parts you’re trying to protect.
Now that we’ve got the issue of frame sliders out of the way. Let’s look at installing them. For riders of naked bikes, all you really need to do is follow the instructions that came with your sliders. You shouldn’t have to cut anything. For sportbikes or sport-tourers, there’s a pretty good chance that you’ll need to cut some bodywork. It’s not a big deal. Really.
Why are people reluctant to drill plastic to mount frame sliders? Well, mistakes in locating the holes are painfully obvious, and replacement bodywork is expensive. However, with careful planning and a steady drill hand, you can mount frame protectors in a couple of hours.
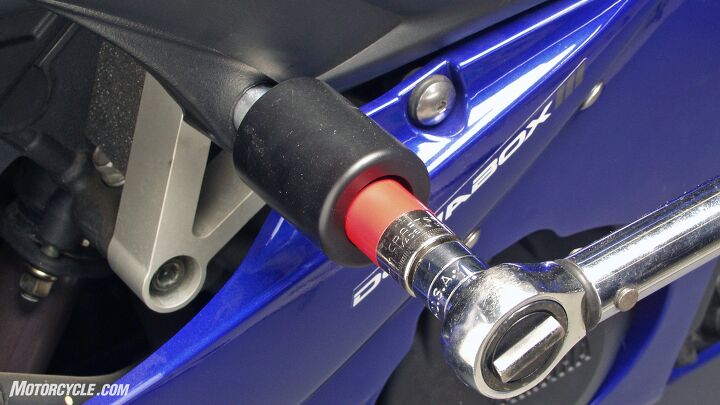
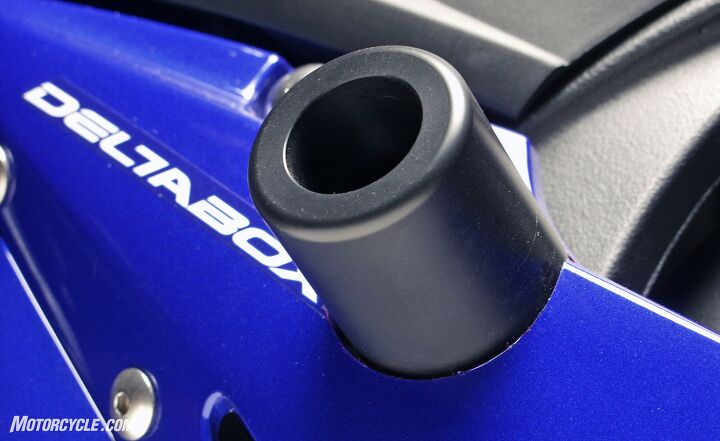
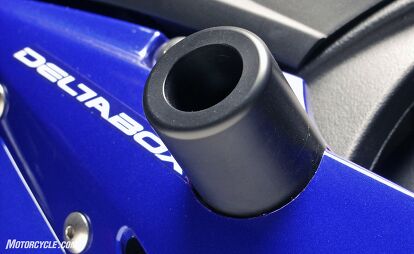
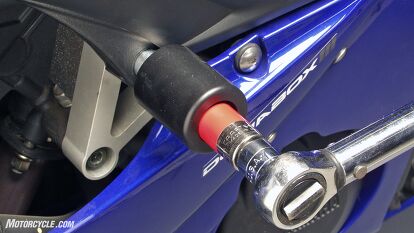
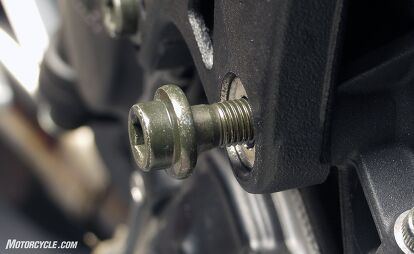
If your bike doesn’t require that the bodywork be drilled for the sliders, you can install them in three easy steps – with your eyes closed. Step one: Remove the stock mounting bolt. Step two: Slide the replacement bolt through the frame slider and spacer. Step three: Apply blue Loctite to the threads and torque to factory specification. See you later, have fun riding.
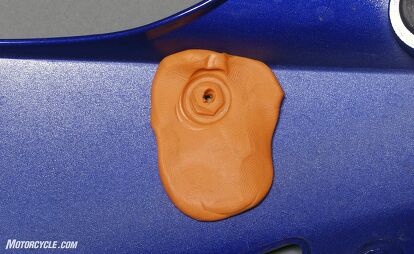
The rest of us have a little more work ahead of us. The most important part of the whole process is finding the proper location for the pilot hole in the bodywork. With the bodywork mounted, look to see approximately where the bolt lines up. Remove the bodywork and loosen the bolt until it will almost reach the bodywork when it is in position. Do not loosen the bolt so far that it droops off its usual axis, or you’ll risk locating the pilot hole too low. Mash a thin layer of modeling clay or some similar substance to the back of the bodywork. Remount the panel and press it against the bolt. You now have an exact indentation marking the location of the bolt in reference to the plastic.

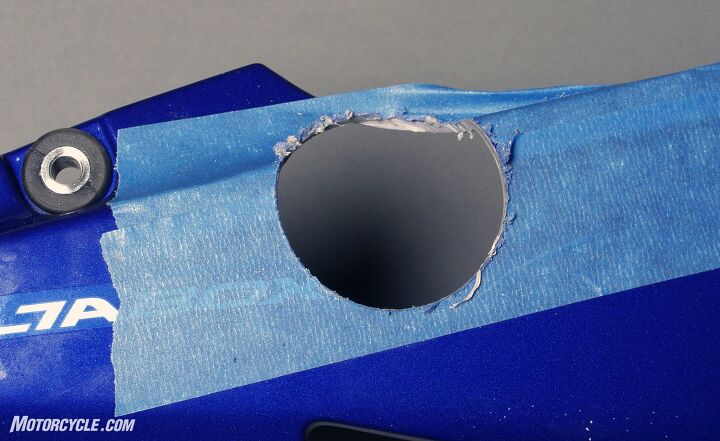
Remove the panel and inspect the mark. You want a neat, easy-to-see, negative impression of the bolt cap. (If you don’t have one, smooth the clay and try again.) Stick a layer of masking or painter’s tape over the finished side of the bodywork. Make sure the tape covers the entire area the hole saw will cut. Drill a small pilot hole through the center of the bolt impression. You can now remove the clay. Before you crank up the hole saw and reach the point of no return, remount the panel and check to see that the hole lines up with the bolt. Eyeballing the bolt through the hole isn’t very accurate. Instead, try sticking something through the hole and see if reaches to the bolt at the correct angle. If it’s long enough, the drill bit would be perfect for this test. Now, it’s safe to move on.

When using the hole saw, you’ll want to cut from the shiny side of the bodywork, so that the cleanest part of the cut will be what is visible. Only run the drill fast enough to cut the plastic – and no faster. Trying to use a high speed can melt the plastic and lead to a messy installation. When you are drilling, make sure you keep the drill perpendicular to the bodywork. If you let the hole saw cut at an angle, you’ll end up with a oval hole with a large gap on parts of the frame slider. Similarly, if the panel makes any radical curves (as the top of this R6 panel does), you may want to angle the hole saw back toward the center of the cut when you’re going through the curved portion. This will help keep the hole round as it cuts through the plastic’s bend.
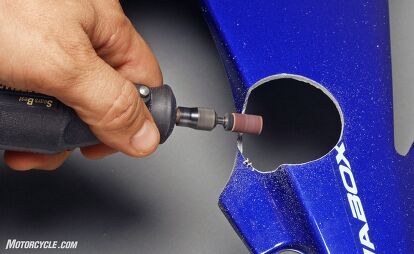
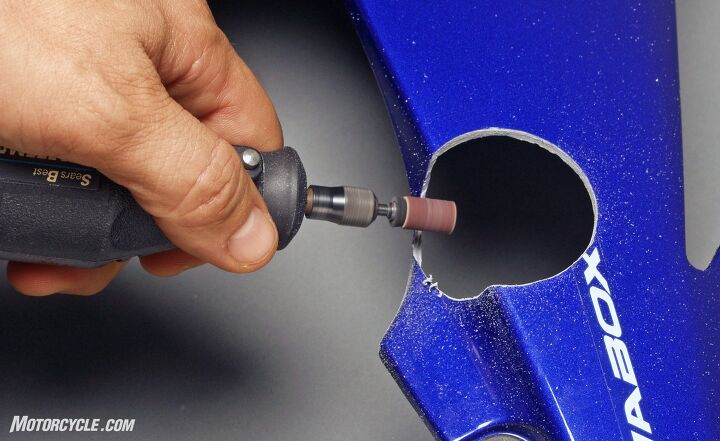
Remove the tape. Clean off the plastic burrs with a knife. If any rough spots remain use a file or a rotary tool (again at a low speed) to finish neatening up the hole’s edges. Temporarily mount the bodywork and the slider to see if the hole lines up perfectly. If you were careful, everything should be in line. However, if the space is too tight on one side, you can grind away more of the plastic with the rotary tool. Apply blue Loctite to the bolt threads and torque the frame slider in place. If you’ve got factory touch-up paint, a quick application can help make the inside of the hole disappear. You can also do this with a Sharpie for standard colors like blue, black or red, but check the color on an inconspicuous place first.
Once everything is remounted and in position, you can add the finishing touch to black frame sliders by giving the silver bolts inside the plastic pucks a spritz of flat black paint. This way there will be nothing bright to draw the eye to the slider. Instead, it will hide in plain sight.
We are committed to finding, researching, and recommending the best products. We earn commissions from purchases you make using the retail links in our product reviews. Learn more about how this works.
[This article was adapted from Evans Brasfield’s book 101 Sportbike Performance Projects. Learn more about it here. Read the MO review here.]

Like most of the best happenings in his life, Evans stumbled into his motojournalism career. While on his way to a planned life in academia, he applied for a job at a motorcycle magazine, thinking he’d get the opportunity to write some freelance articles. Instead, he was offered a full-time job in which he discovered he could actually get paid to ride other people’s motorcycles – and he’s never looked back. Over the 25 years he’s been in the motorcycle industry, Evans has written two books, 101 Sportbike Performance Projects and How to Modify Your Metric Cruiser, and has ridden just about every production motorcycle manufactured. Evans has a deep love of motorcycles and believes they are a force for good in the world.
More by Evans Brasfield


Comments
Join the conversation
You left out one, potential, important step.
If the mount location is a motor mount bolt you need to properly brace the engine before removing the bolt. This will ensure the engine does not move (even the tiniest bit) and the bolt goes back in properly.
Otherwise you run the risk of cross threading the motor mount bolt.
This happened to me before as I thought oh its just one bolt at a time and will be real quick. Nope weight of the engine cause the slightest of movements and the bolt would not go back in smoothly.