

MO Wrenching: How To Balance Wheels
The wheels on your bike go round and round


Anyone who has witnessed a washing machine walking its way across the basement floor can understand how important balancing the load on rotating objects can be. Some people mistakenly think that, because modern wheels have gotten so much lighter and better balanced, they don’t need to balance wheels when fresh tires are installed. This is wrong. Even the smallest difference in weight is amplified many, many times as the wheel rotates. Also, your tires will wear more evenly and your bike will be more stable with balanced tires.
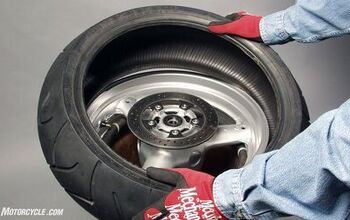
Balancing a wheel starts with a basic assumption: The valve stem is the heaviest point on the wheel. That’s why we line it up with the dot on the tire that marks its lightest point. So this is where we are starting – with a set of freshly mounted tires.
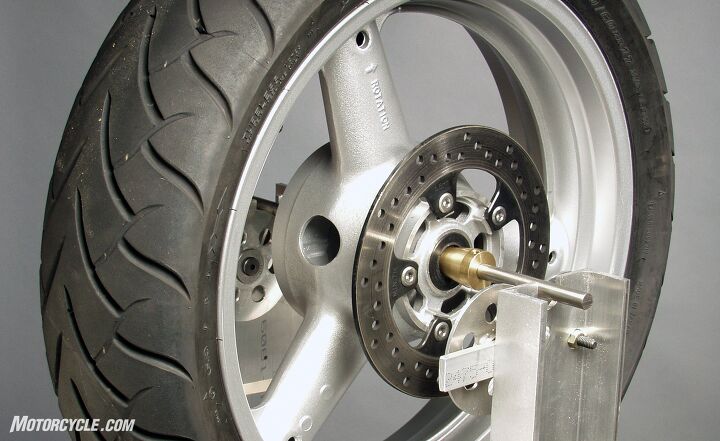
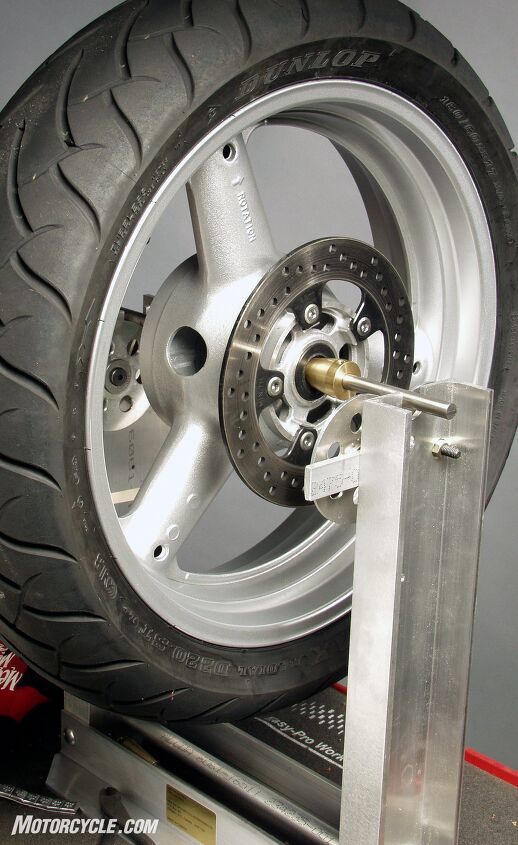
While you’ll find a few places on the internet that say you can construct your own perfectly adequate balancing stand, we’re proponents of buying the real thing. This way, you can be certain that your wheels are rotating properly. The stand used here solidly holds the wheel on a rod via a pair of coned, self-centering inserts. (Note: Remove any spacers from the wheel before inserting the rod and cones.) The rod then rotates on two pairs of wheels.
Finding a wheel’s heaviest point is easy. Place the rod on the balancing stand and give the wheel a slight spin. When the wheel stops, the heaviest section of the wheel will settle to the bottom. Although experienced wheel balancers can gauge how much weight to add to the wheel by the speed with which the wheel drops to the heavy point (go to the track and watch the tire vendors sometime), we can usually begin with two quarter-ounce weights. Remove a small portion of the weight’s tape cover and attach the weights to the opposite edge of the rim directly at the top of the wheel.
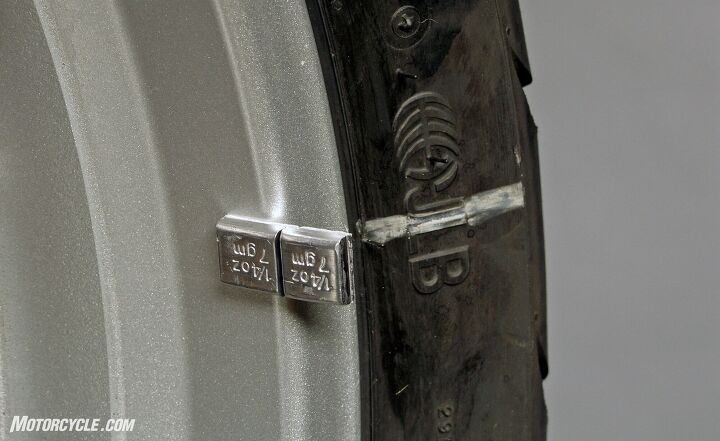
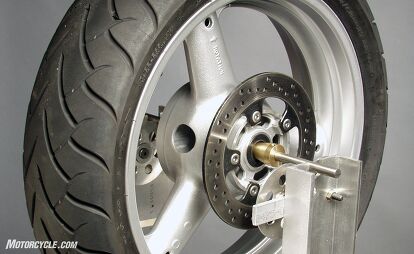
Turn the wheel a quarter turn so the weight is level with the axle. If you’re close to the correct amount of weight, the wheel should not turn when you let go. If you need to add more weight, the weights you’ve already attached will return to the top of the wheel. You can probably guess that if the weights end up on the bottom, it means you need to remove some. You can trim the weights down to size with a pair of wire cutters. The wheel is balanced when it doesn’t move when it is stopped at random places.
Mark the tire with chalk where the weights are mounted. Pull the weights free and clean the spot with contact cleaner. Remove the rest of the protective backing on the weights and apply them as close to the rim’s center line as possible. For more than half an ounce of weights, split the weight up to either side of the wheel. If you find that you need more than an ounce of weights, check to be sure that the tire is properly mounted. (You did remember to remove the old weights, didn’t you?)

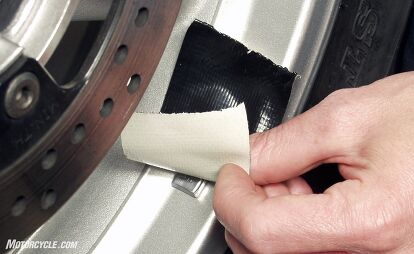
Before you remove the wheel from the balancer, give it one last check. For added security, cover the weights with a piece of duct tape that extends at least an inch beyond the lead weight. If you don’t want to look like a geek, make sure the tape is the same color as the wheels. However, gray duct tape is still better than no tape at all, and mankind almost unanimously agrees that duct tape is one of technology’s greatest achievements.
Your wheel is now ready to be mounted on your bike.
[This article was adapted from Evans Brasfield’s book 101 Sportbike Performance Projects. Learn more about it here. Read the MO review here.]

Like most of the best happenings in his life, Evans stumbled into his motojournalism career. While on his way to a planned life in academia, he applied for a job at a motorcycle magazine, thinking he’d get the opportunity to write some freelance articles. Instead, he was offered a full-time job in which he discovered he could actually get paid to ride other people’s motorcycles – and he’s never looked back. Over the 25 years he’s been in the motorcycle industry, Evans has written two books, 101 Sportbike Performance Projects and How to Modify Your Metric Cruiser, and has ridden just about every production motorcycle manufactured. Evans has a deep love of motorcycles and believes they are a force for good in the world.
More by Evans Brasfield


Comments
Join the conversation
Never seen a shop attempt to balance under 10 grams. Have even seem them stop at 20 because they couldn't get the computer to do better (30 years ago). Never seen a wheel with good bearings that wouldn't turn with just 4 or less grams of weight imbalance. Have done my own for last 30 years. What is the mark the shops shoot for now?
I have had success over the years balancing my own tires by using bottle jacks as supports for the axle prior to reinstalling on the bike. With the freshly mounted tire/wheel assembly on its axle and the axle resting on the bottle jacks, the effect approximates a "real" wheel balancer and the above procedure for balancing can be followed. I know that using the axle is not recommended due to the element of friction that is introduced, but this simple technique has produced results that are satisfactory for me.