


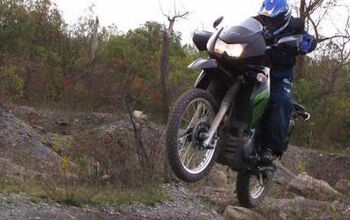
Kawasaki KLR650 Project Bike: Part 3
So it’s been a while since we’ve last visited the Project KLR. But we’re back with a long story I hope to make short. She’s going in to battle, and it’s about time!
I suggested in my last installment that I put the bike to the test, and I’ve gotten my opportunity. The winds of change blow through the California offices like unpredictable dust devils, and before I ever made full contact to the crew at Twisted Throttle about outfitting our KLR with their armor and luggage like we’d seen at the IMS show, another option dropped in our laps by way of the dualie’s maker, Kawasaki.
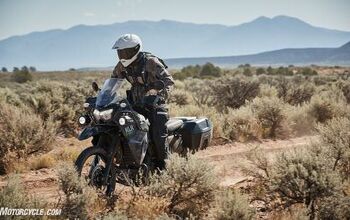
Thanks to the support of Kawasaki Motors Corp., the project KLR and I had been invited to take a trip through Mexico and Central America, all the way to the Panama Canal. Once the PDF invitation was printed, drooled on and RSVP-ed to, I figured that the OEM-branded luggage wasn’t going to be big enough or secure enough for the trip - not having any locks or solid walls. Along with the miles we intend to cover, crash protection might not be a bad idea either. A shopping list grew immediately.
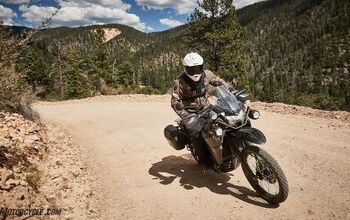
In cooperation with the press team at Kawasaki and Tim Bernard at Happy Trails Products in Boise, Idaho, I got the necessary gear to make this tour of duty possible in both safety and comfort. A long distance ride is exactly what I need to stretch out the bike as well as my own two legs.
I’ve since stopped the postal mail, applied for vacation time and bought a few of those compressed fish food chunks for my Angelfish, “Charlies” and “El Lay”. Its’ time to test the KLR in the real world!
“Happy Trails To You…”The people at HT are huge fans of KLRs, and it shows in their catalog of parts. They also make and sell accessories for the Versys, KLX/KDX and the original Concours - plus some kit and caboodle for ‘dem other OEMs. But they love the KLR so much that during their annual factory tour and BBQ event each year, they hold a DooHickey Tech class/seminar. Now that’s love. Check their events schedule in their newsletter at Happy-Trail.com for the next event.
Tim and his wife Sherry started designing and fabricating motorcycle products in 1989. Their initial focus was building racks to carry tools for forest (and fire) work. In 1991, they outfitted a large group of KLRs for a Baja trip and it really began the journey that has led them to where they are today. In 1999 they established a web presence and in 2003 launched their first online store. All Happy Trails products, especially their racks and panniers, are manufactured in Idaho of the good ‘ol USA. And they’ll ship their products around the world if you ask nicely.
Ding Dong! Honey, get the door!
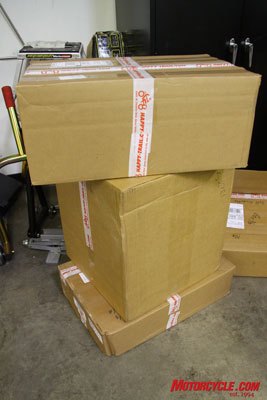
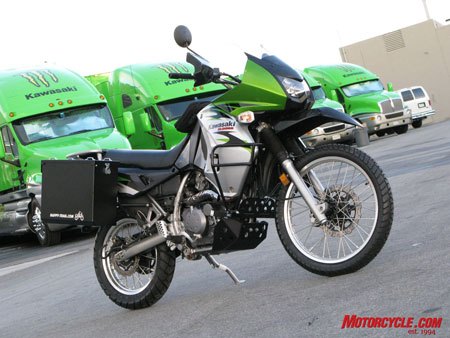
The first and foremost “upgrade” to the big greenie was the addition of waterproof, if not crushproof, aluminum panniers. Being the tried and true sign of a seasonal traveler - or top-shelf poseur - armored saddlebags lend an air of experience to your bike even if you don’t have any. You’ve seen them strapped to Ewan McGregor’s Beemers in “The Long Way Down.” I wanted to be that cool, and protected.
Adventurer is my middle name, so the natural choice was HT’s Teton pannier, a set of well-balanced aluminum side cases that strike the perfect compromise between overall bike width and carrying capacity. They fit the KLR like the whole tour will fit my wanderlust – doctor’s orders.
At first glance, the expansive online catalog at Happy-Trail.com can be a little daunting. Per Tim’s seasoned suggestion on which cases to order, we went with the 33-liter boxes with the Canyon Cut [15” x 18” x 7.5"]. He suggests that anything larger from his catalog and your overall bike width grows wider than your bar ends. Since we here in L.A. use that as our own guideline while lane sharing, we agreed with Tim. He does make larger boxes for the “super adventurers” out there.
According to the Happy Trails website, all the company’s panniers are “TIG welded of .080” aluminum,” purporting them to have “among the thickest (sidewalls) in the industry.” Lightweight and strong boxes like these are sure to last a while. The “Canyon cut” bags get their name from the beveling of the outside edge of each box to accommodate for your bike’s lean angle. If you do the beveling yourself, the boxes won’t be weatherproof anymore. Leave the weathered look for the cuffs of your jeans.
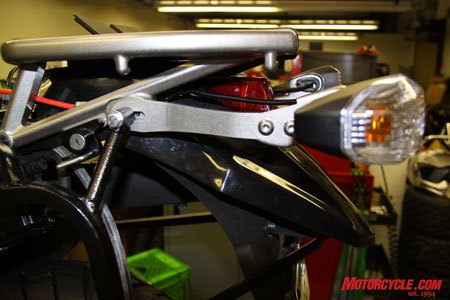
Hidden behind all that obvious “experience” is what Happy Trails calls the SU rack (Strength Unmatched, Structurally Unique). A proprietary and universal three-point mounting system to which your panniers mount, it also includes one additional crossbar securing one case to the other. They are asymmetrically constructed (per your bike’s need of exhaust clearance) of 5/8-inch steel round tube for the connecting arms and 3/4-inch square steel tubing loop where the boxes connect with the aid of the separately purchased pucks. The rack (available for many makes and models) retails separately for $239 if you want to move your cases from one bike to another, for example, or it can be included within a kit for your bike.
But wait, there’s more!
Because Tim’s catalog includes products that apply to more than one model, some items are necessary for this build but are sold separately from the Kit. Not absolutely everything necessary to mount the boxes on your bike is in that kit, so shop smart. One item you’ll need to include in your order is what Tim calls “pucks” ($50).
The second item is optional but a wise choice: pre-drilling the boxes for a mere $38. Referred to as Pre-mounting, this option is actually a simple pre-drill of the cases to perfectly mate with the SU rack in a ‘neutral’ position, also known as centered and square.
We took Tim’s word on the balancing act and paid the additional cost to have the holes pre-drilled for correct and matching balance from case to case. Given the time to do this myself, installation time might have run another day, and I like short cuts.
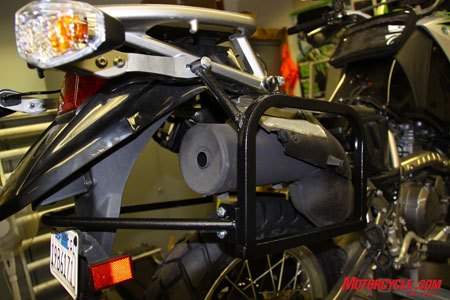
The necessary pucks are L-shaped rocker-cut billet mounting tabs for holding the cases to the rack. Each pannier is secured to the SU rack mounted to your bike from the inside and through the pre-drilled holes to maintain security and a solid mount. Each box is held in place by four tabs, and each kit comes with eight pucks. The lower two, per case, are secured with Allen-head bolts; we added some Loctite for good measure. The top two pucks are hand-tightened via knobs for ease of repeated removal, so we left out the Loctite on those two pucks.
Finally, Happy Trails has a few more optional items that are truly optional. The first is a lid rack. Four footman loops come standard on each lid of each box. If you need to carry larger items on the lids of your panniers and need additional tie down positions you may opt for their lid racks ($88). The last choice you have to make is if you want the cases powder coated. Bare aluminum tends to transfer black soot to the items rubbing against it, making for an icky mess for items stored inside. HT offers a textured-silver finish, as well as a hammer-tone black paint option – the latter aids in preparing hot meals in hotter climes.
All told, the Teton Kit for a 2008 or newer model KLRs include two Teton panniers, the SU rack, and the rack Mounting Kit for a current total $599 in raw aluminum.
Happy Trails Teton Kit Costs: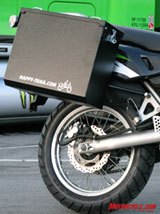
A solid, reliable, water-tight and darn cool looking set of 33.04-liter panniers will run close to 800 bucks and about an hour of your time strapping the rack and cans to your bike. The enjoyment is only limited by your available vacation time, money in the bank and your imagination. No one else was there – how can they prove that you didn’t ride with Bigfoot through the everglades?
We chose the expedition-cool look and rock-solid appeal of the Happy Trails Teton cases for our touring rig. Easy to install, hopefully they deliver in the end. We’ll let you know in a few weeks. But we’ve got a few more items to tell you about. And after a break for a few beers, we’ll come back to tell you about the rest of the laundry list we ordered from Happy-Trail.com. Stay tuned.
More by User


Comments
Join the conversation