


Kawasaki KLR650 Project Bike: Part 2
Welcome to the second part of our project KLR series. We’re still in the early stages, but we’ve been gathering ideas for our resident workhorse, including suggestions coming from you guys via the project’s Forum thread. Thanks for the feedback, ya MOfos! Even the off-topic crap shows that you still exist!
So far, we’ve noticed suggestions for a handful of cosmetic updates – headlights, grips and saddle – as well as some hard-part upgrades. Your ideas are obviously those that help get you down the road harder, faster or both. Thank you for the posts to date.
What does any new motorcycle need? Personalization, of course. Some of you start with an exhaust system swap, others make it their own with a paint job. I’ll choose to beef up any traditional weak links first. Some people just have a desire for their bike to be different from the rest, but no horsepower is gained from the addition of a carbon-fiber trim piece. I’ve got a similar want, and that’s to take a stock bike as far as I can, physically. Pushing the boundaries mile by mile.
As for who wants to read about on/off-road bikes on Motorcycle.com, I’m 33% of the staff and I do, so suck it up! You know you want one of these motorcycles anyway: a comfortable standard that can do everything.
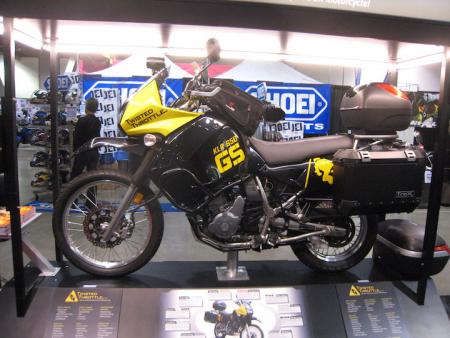
And if you’ve visited or plan to visit your local stop of the International Motorcycle Show, you might have seen the fully kitted show bike put together by Twisted Throttle. They’ve got my dream machine on the tour’s display, complete with every off-road goodie that SW-Motech makes as well as a few other items like the alarmed and LED-lit Coocase (top box) and TraX brand side cases.
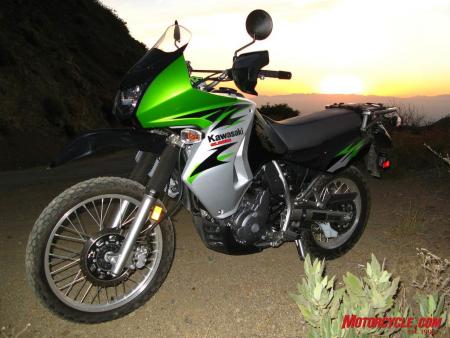
Back in our world, we’ve added a few Authentic Kawasaki Accessories to the bike to get the story rolling. We started with the addition of the OEM-available taller windscreen (MSRP: $99.95) and semi-rigid luggage set. We’ve also replaced two of the four blinker stalks as the production rubber on ’08 models was faulty and Kawasaki made a recall on the part in October.
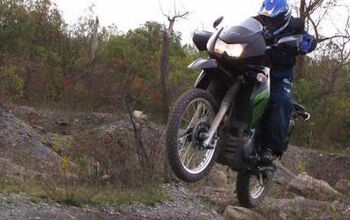
One note of caution to the off-roading KLR owners that considers installing the taller windscreen: When climbing a hill or over an obstacle where the approach angle steepens quickly, the movement of the pivoting bike around the footpegs moves the screen towards your face or chest quickly. I learned this the hard way, of course. My first encounter happened when I was climbing over a few parking stones in the local shopping mall. I stood up for the obstacle, but didn’t foresee the top edge of the windscreen reaching my forward-leaning body. It didn’t hurt, but it might someday. Thankfully I was wearing a full-face helmet or I might have a busted lip.
Available from your local Kawasaki dealer are a collection of individually sold soft or semi-rigid bags designed to accompany the late-model KLR. Each is held in place with a combination of nylon webbing and Velcro straps; none are lockable.
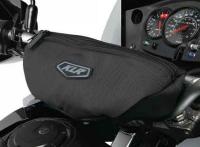

Starting at the top, the Handlebar Bag is a little perplexing in its proper installation being built for a most unique location – balanced across the handlebars. Handily storing your tire pressure gauge and pens, the $45.95 item is a narrow and wide bag that’s sure to come in handy on the trail.
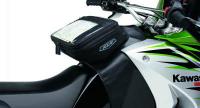
Next in line is the integrated vinyl and nylon Tank Bag that is designed to clip to the seam edges of the tank – at top and bottom. The zippered bag ($67.95) has one main compartment and a PVC map pocket in the lid. I found it strange that the bag is designed to open toward your seated body, placing it in your lap at fuel stops, but it does provide needed extra storage.
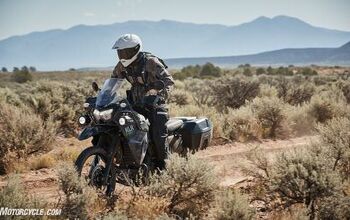
The across-the-seat Saddlebags are ‘KLR’ embossed to match the tail pack and make a secure and complete fit. Retailing for $179.95, they attach with Velcro straps to the little wire loop off the passenger footpeg and the rear rack. Holding nearly as much luggage as a traditional Harley saddlebag, these nylon pods hold their shape and look great on the bike empty or full. They come in your choice of blacks. They’re neither waterproof nor lockable, so these might not be the best choice for overnight or long-distance touring, but they get the job done in fine style if you want an OEM solution to getting the groceries home.
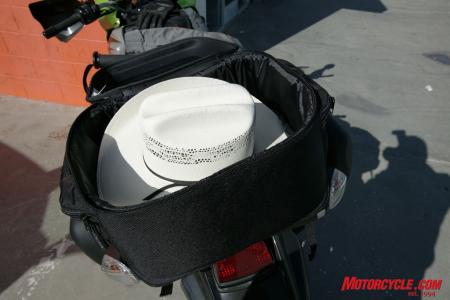
Lastly, the OEM Tail Trunk offered by Kawasaki is the best piece of kit they offer. The $124.95 semi-rigid bag handily stows my fully-loaded laptop bag or a cowboy hat without widening the bike, making it ideal for California-style lane sharing. It’s held securely in place by a few Velcro loops to the stock rear rack.
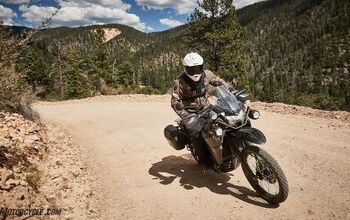
Beyond the cosmetics, our 2008 KLR has been holding steady as the Motorcycle.com photo-mule for just over 2,000 miles now. We’ve been able to squeeze nearly 200 miles from each full tank, averaging about 40 miles per gallon.
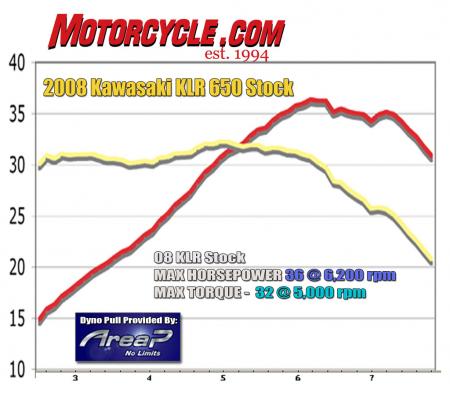
On the Area P dyno in Placentia, California, our man Kerry Bryant coaxed just over 36 horsepower out of the girl, peaking at 6,200 rpm. Applying some complicated math only CrAshley and the Sportbike Pilot understand in depth, the torque peaks out at 32 ft-lbs at around 5,000 rpm.
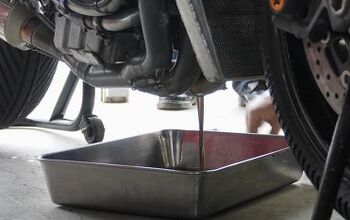
I haven’t had any issue with the excessive oil consumption you might have read about with the 2008 bikes, not within the 2,000 miles I’ve put on the machine. The stock tires, however, are nearing the point where they need replacement. Lots of lug left but they’re squaring off. Maybe I need to ride more twisties! Having done most of those miles on the freeways of Los Angeles, I’m mad at myself for not yet hitting the trail. Soon, I hope!
Next in line is to pay some attention to the suspension, and maybe swap out the fork springs to support the additional weight from some of the accessories we plan to fit. And then I’m going to run away and ride the Lincoln Highway for giggles.
Stay tuned for our next update, and keep your suggestions coming via our Forum thread.
Related Reading
Kawasaki KLR650 Project Bike: Part 1
Kawasaki KLR650 Project Bike: Part 3
Kawasaki KLR650 Project Bike: Part 4
Kawasaki KLR650 Project Bike: Part 5
Kawasaki KLR650 Project Bike: Part 6
Kawasaki KLR650 Project Bike: Part 7
2008 Kawasaki KLR650 Review
2008 Lightweight Dual-Purpose Shootout
KLR stuff on Twisted Throttle’s website
KLR products on Kawasaki’s website
Kawasaki KLR650 Project Bike: Part 8
More by Alfonse Palaima


Comments
Join the conversation