


How To Adjust A Motorcycle Chain
Prevent premature chain wear and sloppy throttle response


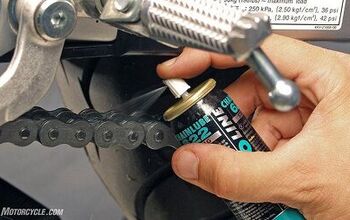
Walk around at any motorcycle gathering and count the bikes with limp, sagging chains. Often, the worst examples also are bone dry with rust and/or crud built up on them. Since you’re a MO reader and regularly clean/lube your chain, you’re ahead of the game. However, you still need to make sure that the chain’s slack is within specifications. If you lube your chain regularly, you will probably not need to adjust it every time you return from a ride, but as a chain nears the end of its usable life, you will need to adjust the slack more and more frequently.
How To Tell If Your Chain Needs Replacing
Ten Steps To A New Chain And Sprockets
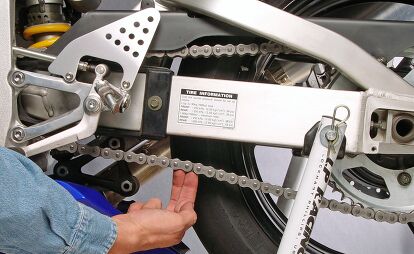
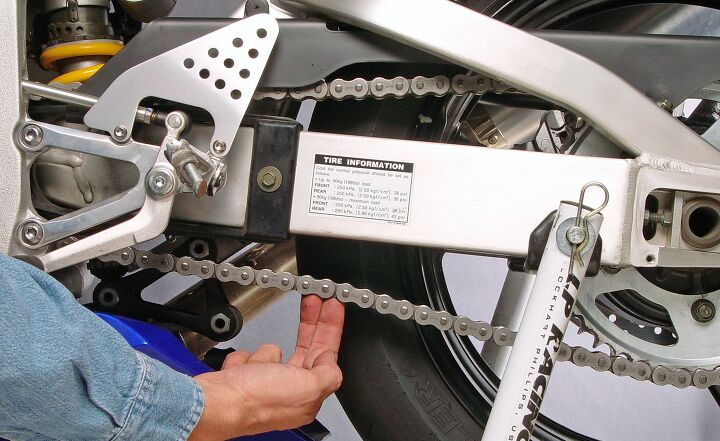
Although a rear stand is not required to adjust your chain, it will make the process much easier. When your chain is cold, measure the slack halfway between the sprockets by moving the chain up and down. Press down on the chain slightly to make sure it is at its lowest point. To get an accurate reading, hold a tape measure in front of the chain and look across the top of the links. Adjust your line of sight until the tops of both sides of the chain line up, which assures your eyes are perpendicular to the chain and parallel with the top of the links.
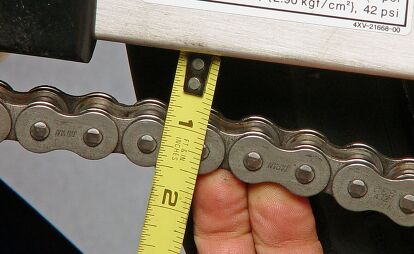
Next, move the tape measure so that one of the inch markings aligns with the top of the chain. Now, press the chain up until it is tight, and, bringing your vision up to align the top of the chain again, note the measurement. A little math will tell you if you if the slack is within your bike’s recommended specifications. Since chains don’t always wear evenly, check the slack measurement in a couple of places. If you need to adjust the chain, set the chain tension to accommodate the tightest point. Also, if the chain is dramatically tighter in one place, consider replacing it.
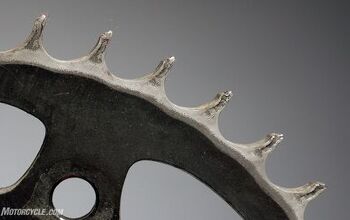
Before you get down to the nitty-gritty of adjusting the chain, take a look at the chain and sprockets. We’ve covered this previously in our articles: How To Tell If Your Chain Needs Replacing and Ten Steps To A New Chain And Sprockets. If your chain is due for a replacement, then there’s little reason to adjust the old one. Just go to your local shop and get the parts you need and then settle into a pleasant hour or two of wrenching.

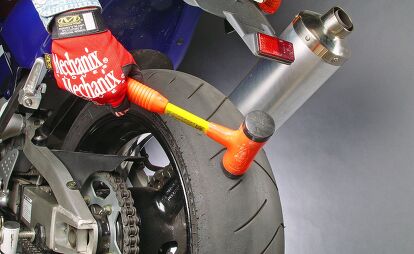
For bikes with lock nuts on their chain adjusters, use a wrench to hold the adjuster in place with a wrench while loosening the lock nut. Loosen the axle nut just enough to enable the chain adjusters to move it. If the axle nut is loosened too much, you can accidentally knock the rear wheel out of alignment, adding extra work to the task. For now, assume that your wheel is properly aligned and make the same adjustments to both chain adjusters.
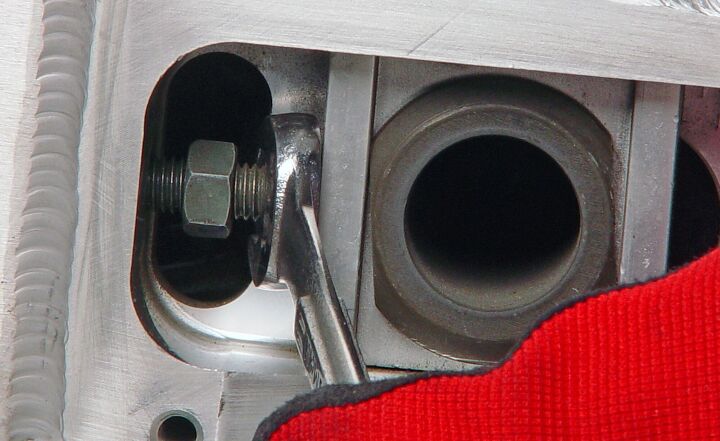
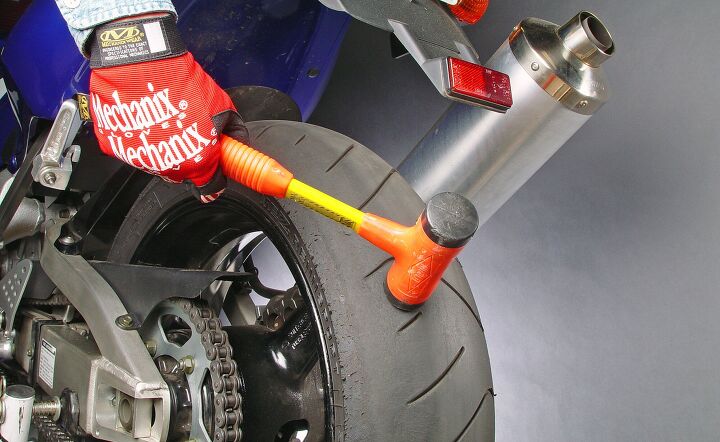
With the exception of eccentric adjusters, you can only move the axle away from the countershaft sprocket via the adjusters. So, don’t get carried away or you’ll have to start all over from scratch. Small adjustments of a quarter turn (or less if your chain is only slightly loose) are the safest bet. Measure the slack after every change. When the chain is within factory specifications (usually around 1.2–1.5 inches), tighten the axle nut to keep it from slipping. If you go too far and the chain becomes too tight, loosen the chain adjusters two full turns and use a rubber mallet or dead-blow hammer to knock the rear wheel forward against the adjusters and begin again.

When the chain has the proper amount of slack, torque the axle nut. Next, tighten each adjuster about one eighth of a turn against the axle. Hold the adjuster in position and set the lock nuts.
The last step in any chain adjustment is making sure the rear wheel is properly aligned. Don’t trust the stamped marks on your bike’s swingarm, unless you’ve verified they are correct by checking the rear wheel alignment several times. A variety of methods of checking the wheel’s alignment are available through the aftermarket, but the least expensive is the “string method.”
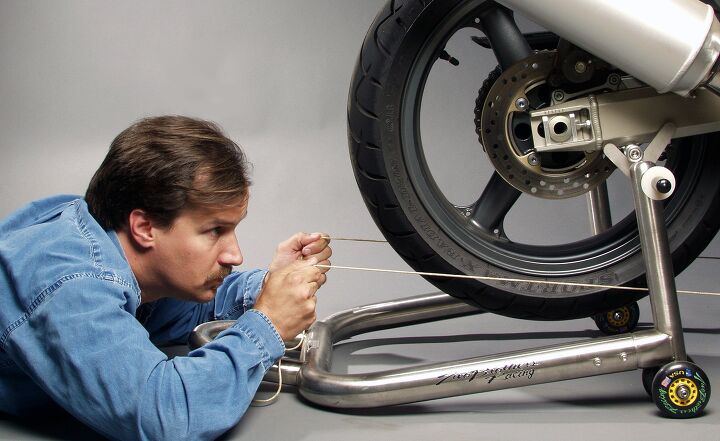
Take a piece of string a little more than twice the length of the bike, find the center and wrap it once around the forward edge of the front tire just below the front discs. Take each end of the string down opposite sides of the bike. Lie down on your stomach, pulling the strings taut so that they both lightly touch the leading edge of the rear tire. Since the rear wheel is wider than the front, the strings will leave a slight gap as it passes the rear edge of the front tire. Your assistant should make sure that the front wheel is straight by checking the gap on both sides.
Now, keeping your hands steady with the string only lightly touching the rear tire, compare the gaps between the strings and the rear edge of the rear tire. If they are not equivalent, the adjuster on the side that has the smaller gap will need to be tightened slightly.
Finally, measure the chain slack one last time. You’d be surprised how often something tightens up. Don’t forget to put a new cotter pin through the axle nut.
If you don’t have an assistant, a simpler but less precise method for checking rear wheel alignment is to spin the rear wheel a few times and watch that the sprocket stays aligned in the center of the chain. If it rubs against one side or the other, the wheel is out of alignment. In that case, find someone to help you perform the “String Method.”
[This article was adapted from Evans Brasfield’s book 101 Sportbike Performance Projects. Learn more about it here. Read the MO review here.]

Like most of the best happenings in his life, Evans stumbled into his motojournalism career. While on his way to a planned life in academia, he applied for a job at a motorcycle magazine, thinking he’d get the opportunity to write some freelance articles. Instead, he was offered a full-time job in which he discovered he could actually get paid to ride other people’s motorcycles – and he’s never looked back. Over the 25 years he’s been in the motorcycle industry, Evans has written two books, 101 Sportbike Performance Projects and How to Modify Your Metric Cruiser, and has ridden just about every production motorcycle manufactured. Evans has a deep love of motorcycles and believes they are a force for good in the world.
More by Evans Brasfield


Comments
Join the conversation
All that string test and alignment adjustment woes are the reason a single sided swing arm is a huge selling point for me on bikes with chains. The last 4 bikes I have purchased all have eccentric type adjusters and I would have bought a ninja 1000 specifically for that feature over its competitors had the insurance company not told me that my premium would be astronomical for that bike. Instead I bought another bike with an SSSA.
The first sentence of this article should say "read the owners manual". Motorcycles with long travel suspensions have chains that will appear to be too slack when they are adjusted correctly. A too tight chain will do far more damage to chains, sprockets, and transmission bearings than a chain that is too loose.