


Basic Maintenance: How To Adjust A Clutch Cable
Because we all need a little Free Play time


It’s not rocket science, is it people? We codgers know the value of keeping cables lubed and adjusted, along with positioning all the bike’s controls for optimum ergonomic comfort, preferably before the first ride, but I, for one, wasn’t born with this knowledge.
If your clutch has a hose leading into a container with juice in it, you can disregard this, since what you’ve got is a hydraulic clutch! (Do not drink the juice.) Most bikes still use the old-fashioned cable, though, because it’s simple, light, tough to screw up, cheap and easily understandable. Or is it?
Your clutch is a wear item; as it clutches and declutches from the engine, gently and not-so-gently over the years, the 10 or so clutch plates stacked up in there get thinner as they snuggle and unsnuggle up against one another. This is the primary reason why my 2000 R1 Service Manual says there should be 10 to 15 millimeters of free play at the end of the clutch lever. You want to make sure that when the clutch is fully engaged – as in when you’re no longer pulling on the lever at all – that there’s enough slack in the line to allow the plates to be fully engaged. Because if your clutch is not fully engaged, it’s going to slip, and if it slips, it’s going to wear out faster and keep your bike from transferring its full power to the wheel.
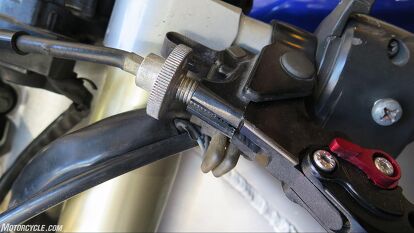
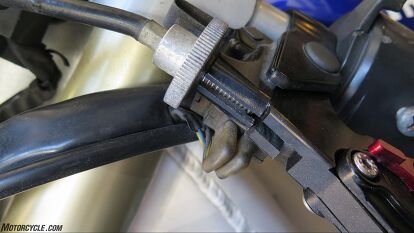
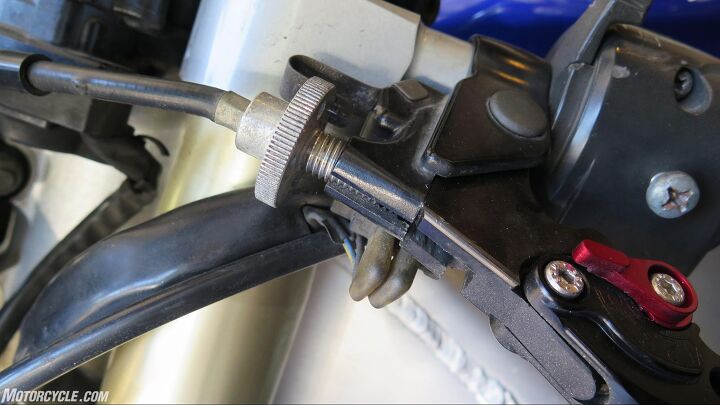
So, the cable sheath is the outside black vinyl part that the cable runs through. Never mind clockwise and counterclockwise and all that; all you need to know is that when you shorten the sheath via its adjusters, you’re effectively lengthening the cable inside, thereby providing more slack.
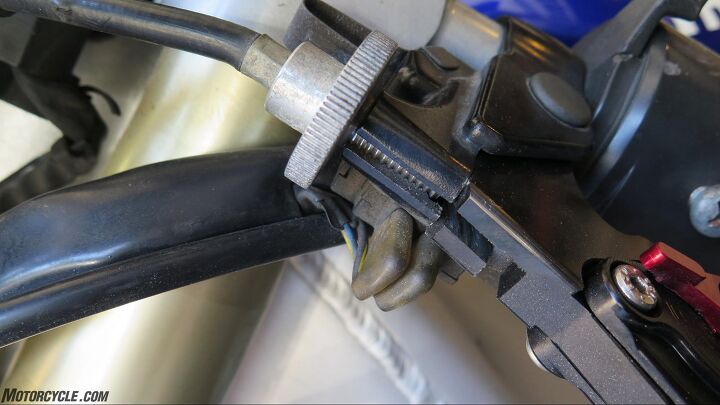
… hit the adjuster at the other end of the cable. On my R1, that’s down at the clutch, on the other side of the bike. Loosening the nut on the left with a 12mm wrench lets you pull the cable and sheath free. Then you can shorten the sheath a bunch by spinning the right nut with your fingers in the direction that lengthens the inner cable. Then you can stick the whole thing back where it belongs and snug it back up. Suddenly, we have renewed slack!

The same applies to your throttle cables, if your bike still has them: The fastest, smoothest rider I know, when presented with a new motorcycle, gets the slack out of them ASAP. Just about every new motorcycle has more than it should. Sometimes a lot of what feels like jerky throttle response is just too much slack. Somebody’s got to take it up. Why not you?
Shop for Galfer Clutch Lines here
We are committed to finding, researching, and recommending the best products. We earn commissions from purchases you make using the retail links in our product reviews. Learn more about how this works.
More by John Burns


Comments
Join the conversation
Excellent.Article. Thank you.
Do Slipper clutches wear out much more quickly than conventional ones?