


Portable Power: How To Install Powerlet Electrical Sockets


Only a few years ago, about the only thing that required electricity on your motorcycle was an electric vest. Now, with the proliferation of GPS, smartphones, and other power-hungry devices, you might find yourself needing to plug in while you’re out on a ride. Or perhaps you don’t get to ride your bike as much as you’d like to and need a way to connect to your smart charger. Accessory wiring company Powerlet has created wiring sockets that can be used to power just about anything you could want to mount on your bike. Powerlet’s systems range from simple bar mounts to bodywork mounts to custom brackets for a wide range of motorcycle models. Once you mount Powerlet’s socket on your motorcycle, simply plug in the appropriate adapter for your device.

When installing a Powerlet kit, you have two choices for how to wire them – both of which offer benefits and trade-offs. First, a constant-on setup is just what the name implies. By having unswitched access to your bike’s battery, you can hook it to your smart charger to maintain your battery’s health during periods of storage (although the best means of conditioning your battery is to ride your bike regularly). The drawback is if you leave something that draws power plugged in after shutting off your engine, that accessory, like a vampire, will suck your battery dry. Switched outlets resolve this issue, but they don’t allow for using a smart battery charger. Since switched sockets are much more complicated to install, I’ll cover them in a future article.
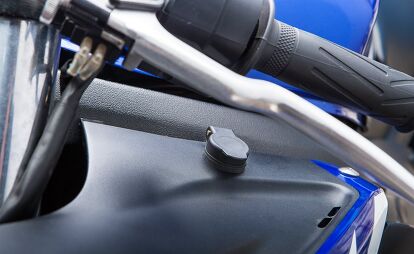
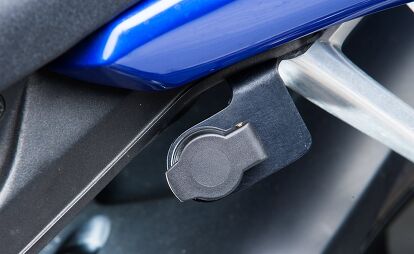
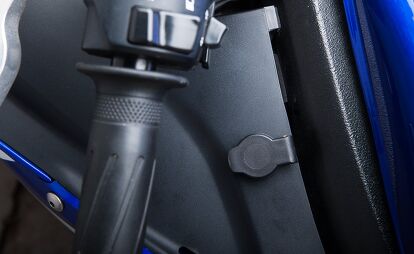
For this guide, I used my 2003 Yamaha R6. I placed an unswitched outlet on a Powerlet passenger peg mount to enable the use of an electric vest and a charger (since my poor bike spends much of its time sitting in the garage while I play with other motorcycles). On the dash panel, I’ve mounted a switched Powerlet socket to operate a GPS or charge my iPhone on the road.

Socket Placement
As with any electrical work on your motorcycle, begin by disconnecting the battery’s negative terminal. Since you’ll be attaching a wire to the positive battery terminal, go ahead and disconnect it, too. Remove any bodywork that will prevent you from running the wires to the point you’ve chosen for the plug. If you are using a handlebar or passenger peg mounting bracket, go ahead and loosely mount the bracket.
Those mounting the socket to bodywork have a few more steps ahead of them before the actual wiring begins. First, check that the location has enough clearance to route the wiring to the socket. If space is tight, the low-profile socket (part number PSO–007) needs only an an inch behind the plastic. (A surprising number of seemingly ideal locations lack the space behind the panel.) When choosing the location be sure to consider how far out a connector will sit when it’s plugged in. Standard Powerlet plugs protrude 1.75 in. above the socket. Right angle, low-profile plugs require only 0.75 in. clearance. When you’re verifying clearance, don’t forget to account for the spring loaded cover that must be open when the plug is inserted in the socket.
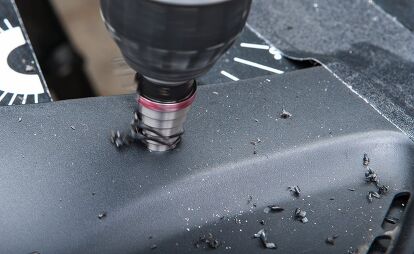
Using a grease pencil or a non-permanent pen, mark the center of the location for the socket. Triple check that the chosen location will accommodate the required clearances before you drill. Having to buy new bodywork because you drilled in the wrong place will ruin your day. Drill a pilot hole. Although Powerlet recommends a 11/16 in. hole saw, my experience says that an Unibit will cut a much neater opening. Mark the step above your stopping point on the Unibit so that you have a visual reference while you drill. The marker will come off with a little WD–40.
To make sure the socket doesn’t crack the plastic when tightened, place the cap and rubber washer on the outside of the bodywork. Locate the thin aluminum washer and the brass jam-nut on the inside. Assemble the parts finger tight and do a quick mounting check of the bodywork on the motorcycle. Make sure the angle of the wire tail leaving the socket points directly at the wiring harness. Sharp bends take up more room and can stress the connectors. When you’re satisfied, tighten down the jam-nut and secure it with a bit of silicone sealant. (Note: Loctite may damage plastic and should not be used.)
The Path to Power
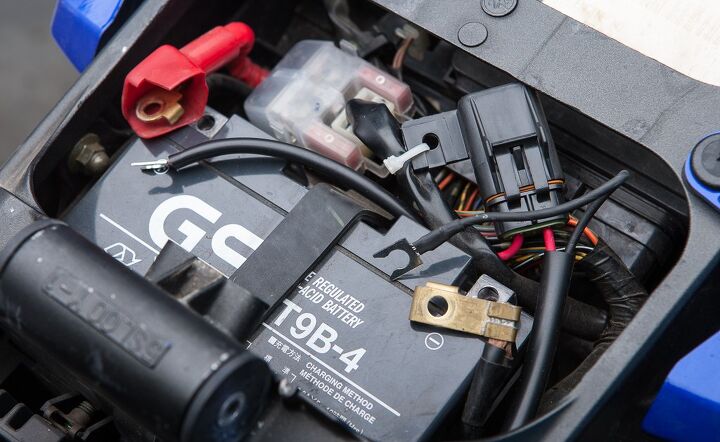
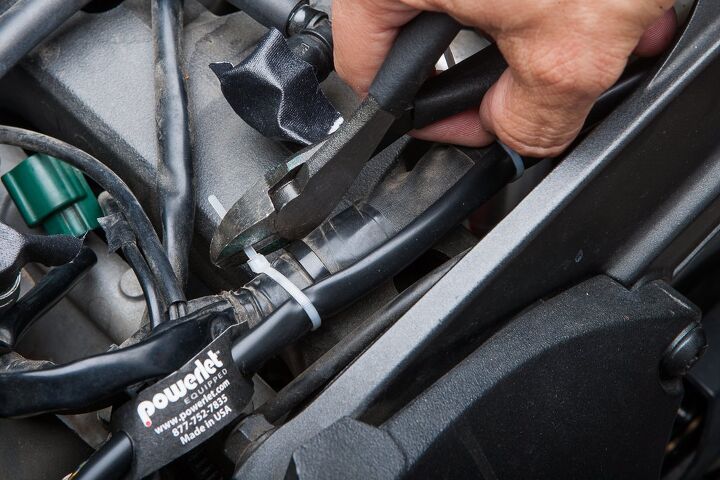
For constant unswitched power, begin routing your wires from the socket’s T-connector along the wiring harness to the battery. After you have the wires placed, trim off the excess to keep the battery compartment tidy. Zip-tie the wires to the bike’s wiring harness to keep them from rubbing against any sharp edge on the frame or engine that could cause a short. Plug the T-connector and mount the socket/bodywork. Install the included fuse and attach the red wire to the positive pole of the battery. Connect the black lead to either a chassis ground or to the negative post of the battery.

Before you do anything else, use a voltmeter to make sure you have the polarity of the wires correct. The center pin of the socket is positive and the exterior barrel is negative. If the polarity is reversed, you run the risk of ruining any electronics you plug into the socket. Now, reassemble your bike and enjoy your new electrical connections.

Like most of the best happenings in his life, Evans stumbled into his motojournalism career. While on his way to a planned life in academia, he applied for a job at a motorcycle magazine, thinking he’d get the opportunity to write some freelance articles. Instead, he was offered a full-time job in which he discovered he could actually get paid to ride other people’s motorcycles – and he’s never looked back. Over the 25 years he’s been in the motorcycle industry, Evans has written two books, 101 Sportbike Performance Projects and How to Modify Your Metric Cruiser, and has ridden just about every production motorcycle manufactured. Evans has a deep love of motorcycles and believes they are a force for good in the world.
More by Evans Brasfield


Comments
Join the conversation
Helpful article. Thanks for posting.