

MO Wrenching: How To Change Motorcycle Tires
A little elbow grease can save you money over the long-term


Why would anyone want to change their own tires? Isn’t it hard work that usually involves at least one bleeding knuckle? Don’t the tools cost a small fortune when you consider that shops only charge about 25 bucks for the service? Well, some riders don’t live within a few miles of a bike shop. And some folks, well, they’ve always got to do things themselves.
The good news is that, overworked sweat glands aside, changing tires is relatively easy – once you have the right tools. All you really need is a bead breaker, a set of tire irons, some dish soap, and a tire balancing stand.
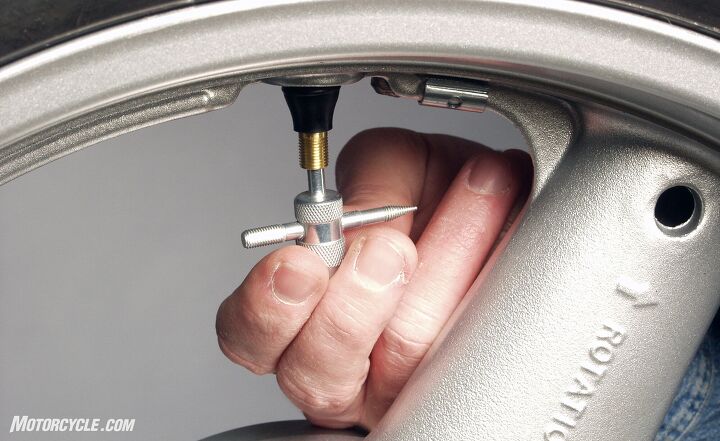
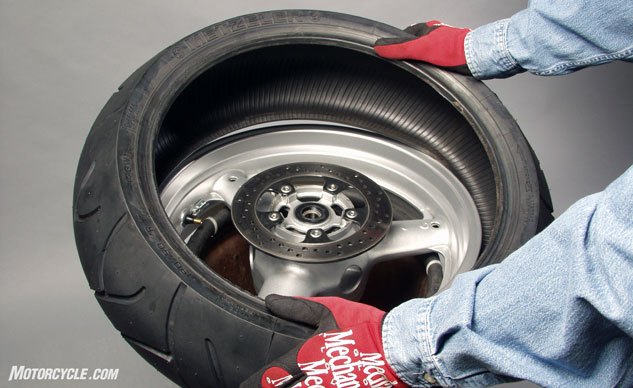
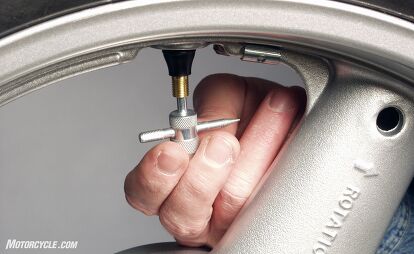
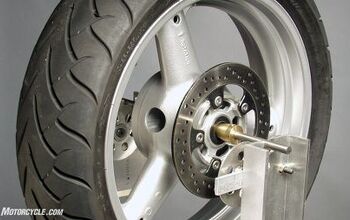
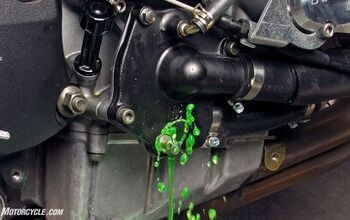
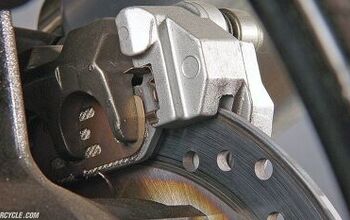
Begin with your bike on front and rear stands. Once you’ve removed a wheel, unscrew the valve core with a valve stem tool. After the tire has finished its lengthy sigh, place your wheel on an old tire or other work surface. Whatever support you use, you want to make sure the wheel is not resting on a brake disc while you’re working on the bead. Discs bend all too easily and are quite expensive.

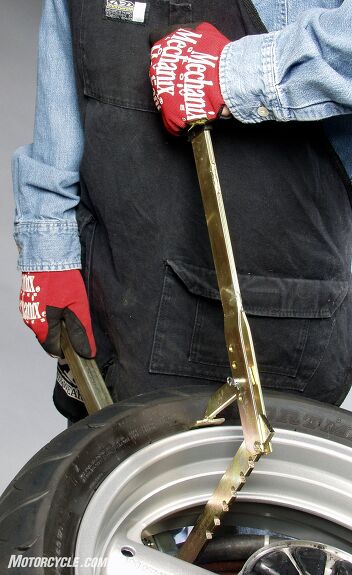
No matter what tool you have, breaking the bead requires some force. Expect to exert some effort to break the “interference fit” – engineering-speak meaning “hell-for-tight” – between the bead and the rim. Complicating matters is the stiffness designed into the bead. Strap on your biggest muscles and press down on the bead breaker until the bead slides to the center of the rim. You’ll know the bead has let go when it stops resisting. The rim center has a depression to allow the rest of the bead to loosen.
Starting at the section of tire bead already in the wheel center, work the bead loose by pressing your way around the tire with your hands. Once the entire bead is in the depression, flip the wheel and break the bead on the other side.

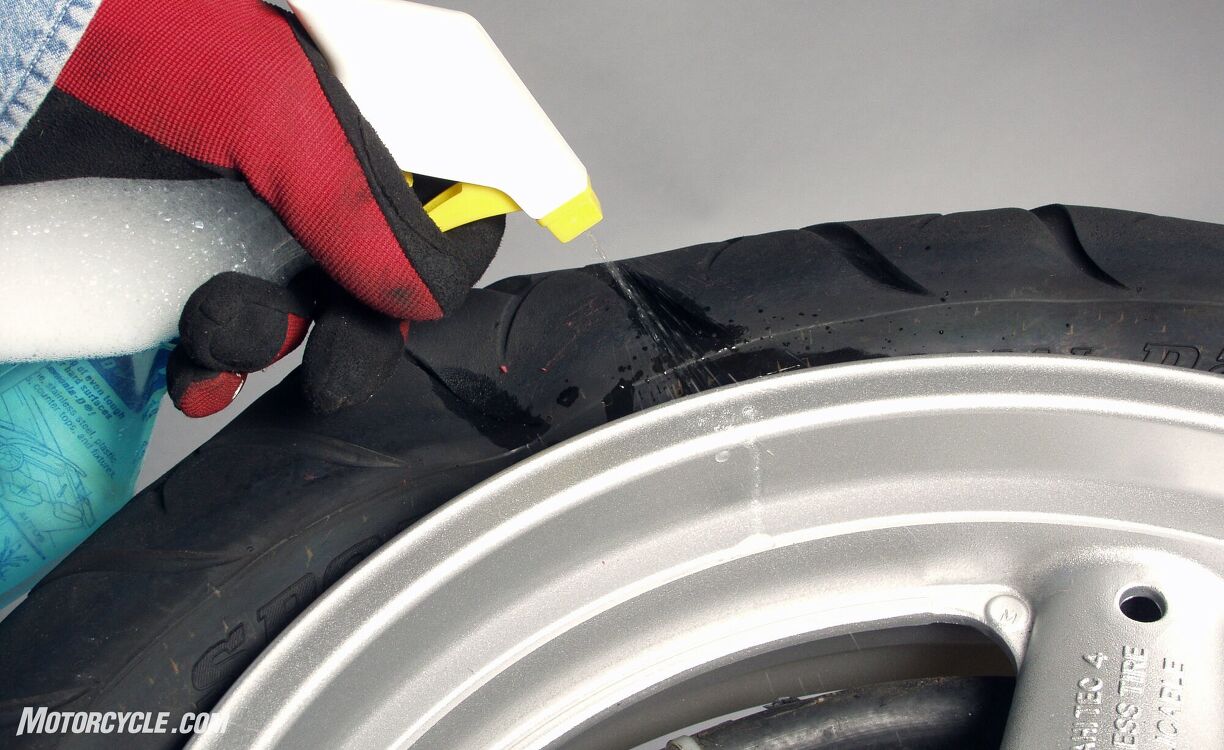
Your next chore will be lifting the bead over the lip of the rim. Lubrication makes this job infinitely easier, but don’t use anything that you can’t wipe away or air-dry. A spray bottle of Windex or diluted dish detergent works just fine. Spray the outer edge of the bead and the rim with enough fluid to cover the surface.

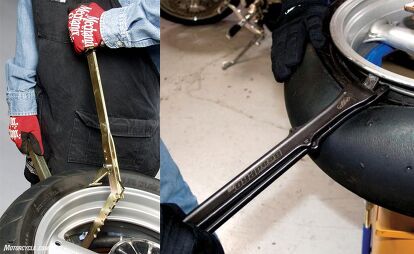
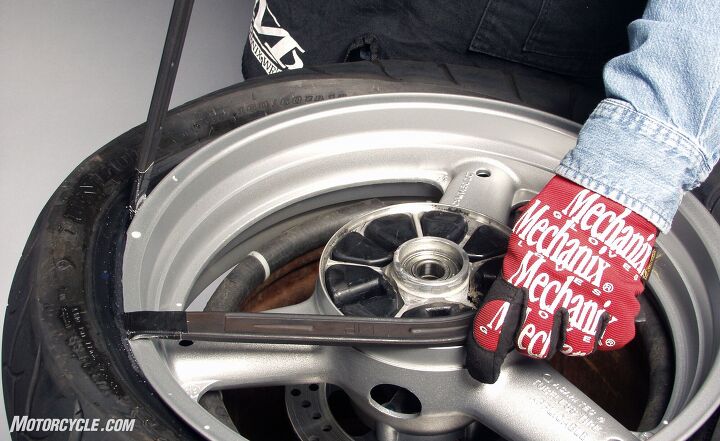
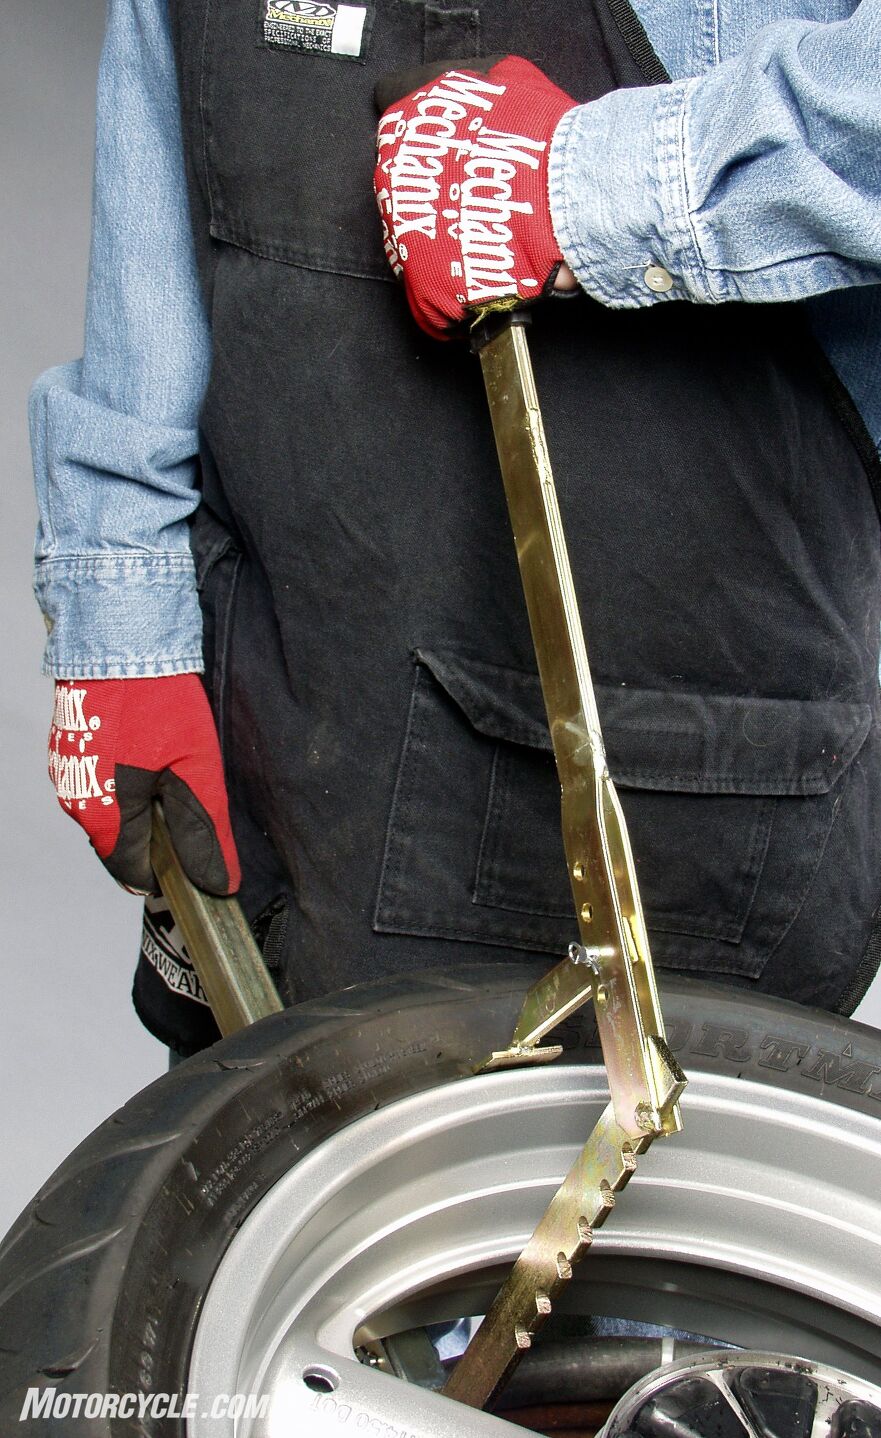
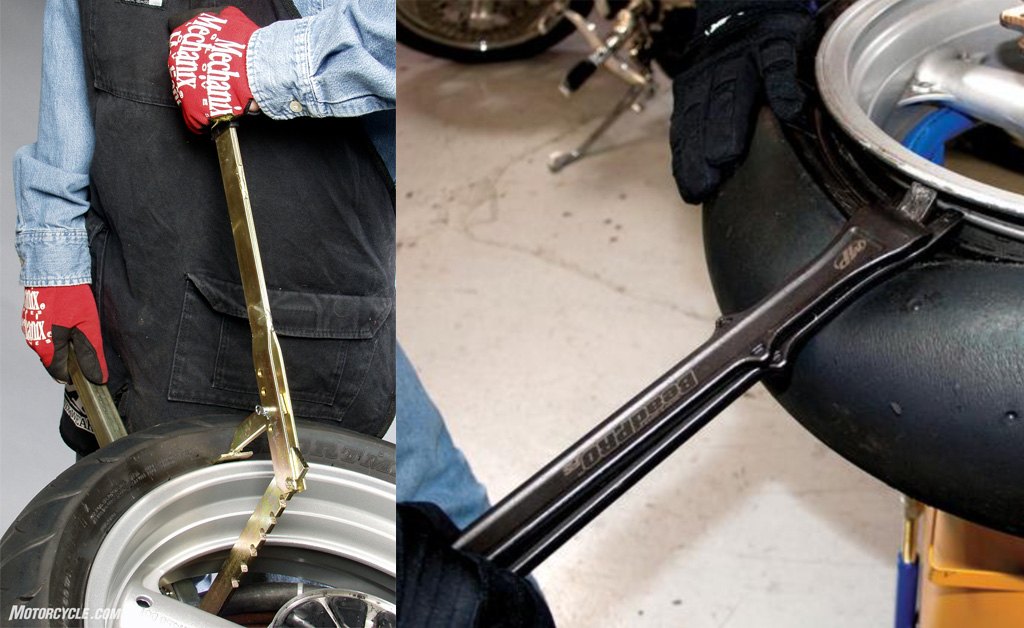
Next, you’re going to wedge a tire iron between your shiny rim and the rubber. If you’re worried about marring your rim’s finish, using rim protectors will help – but nothing can prevent rim damage if you pull an Incredible Hulk routine while operating the irons. Slip the edge of the tire iron under the bead, and using the rim as the fulcrum, carefully lever the bead over the lip. With your second – and possibly third – hand, make sure the rest of the bead (on both sides of the wheel) is still in the center rim depression. (Kneeling on the tire can also hold it in place.)
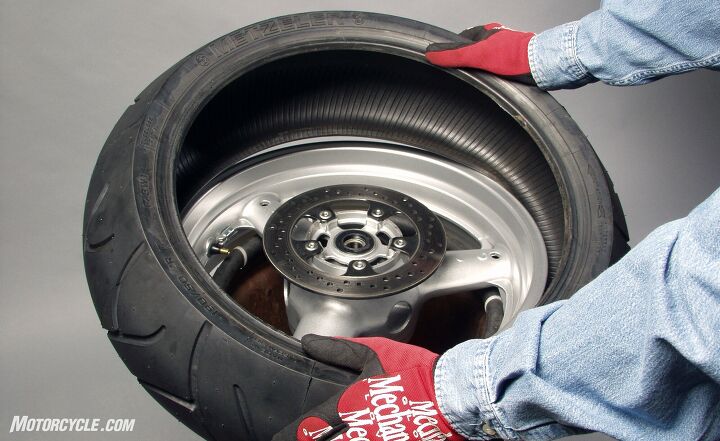
Taking your second tire iron, lift the bead over the rim a couple of inches from the first iron. Moving an inch or two at a time, work your way around the rim until the bead pops off the wheel. Turn the wheel over, and you should be able to push the second bead off the rim by hand. If you have trouble, give the bead an assist with one of the tire irons. Wipe off the excess lube from the wheel before mounting the new tire.
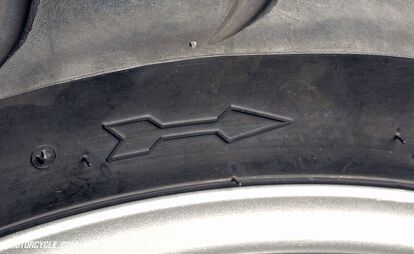
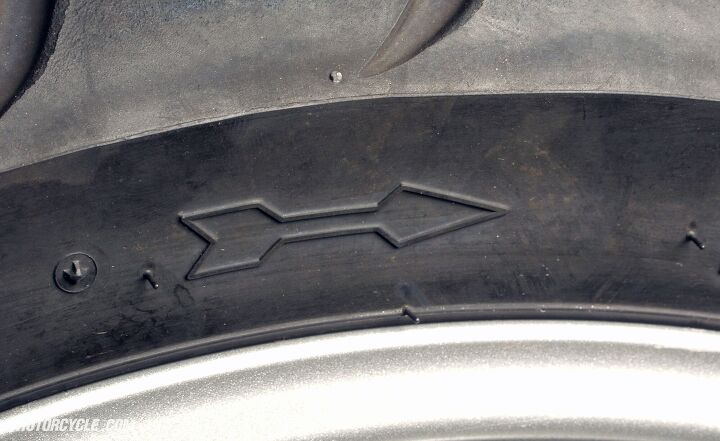
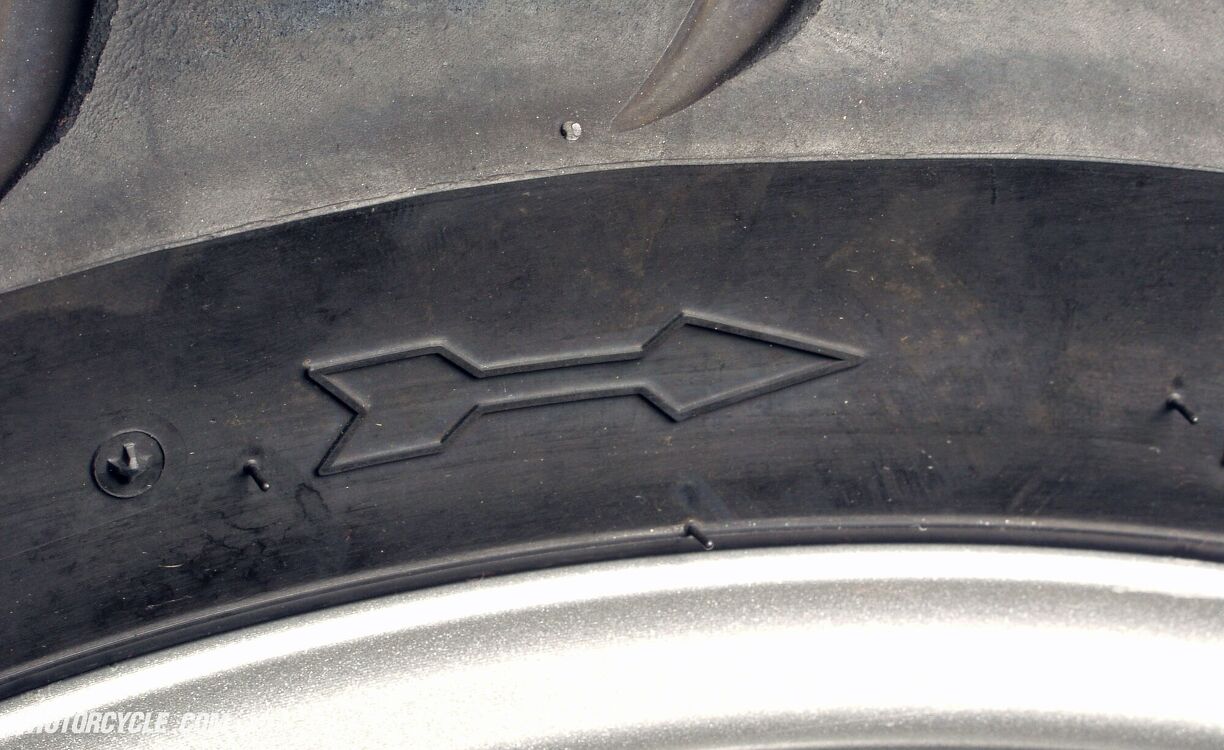
Check to make sure you place the tire on the wheel in the correct orientation for rotation. The tire will have an arrow indicating the correct direction. If your front discs are directional, they should have arrows, too. Spray the first bead you’ll slip onto the rim and line up the painted spot (the lightest point on the tire) with the valve stem.
Although you should be able to get the first bead over the rim most of the way by hand, the tire iron will get the last bit over. Now, lube the other bead, and while keeping the first bead in the rim’s center depression, work the second bead over the lip. Finish off with the tire irons, keeping the beads opposite the iron in the wheel’s center depression.
Screw the valve stem valve core back into place. If you have control over the maximum air pressure for the air supply, set it to no more than 40 psi to keep from accidentally over-inflating the tire while trying to seat the beads. You should hear each bead pop into place as you inflate the tire. Using an accurate air gauge, set the tire pressure.
Remember, you’ll need to balance your wheels before remounting them to your motorcycle.


Like most of the best happenings in his life, Evans stumbled into his motojournalism career. While on his way to a planned life in academia, he applied for a job at a motorcycle magazine, thinking he’d get the opportunity to write some freelance articles. Instead, he was offered a full-time job in which he discovered he could actually get paid to ride other people’s motorcycles – and he’s never looked back. Over the 25 years he’s been in the motorcycle industry, Evans has written two books, 101 Sportbike Performance Projects and How to Modify Your Metric Cruiser, and has ridden just about every production motorcycle manufactured. Evans has a deep love of motorcycles and believes they are a force for good in the world.
More by Evans Brasfield


Comments
Join the conversation
I usually set the bead by giving it a few squirts of soapy water and rapidly inflating the tube to 60 psi. It's pretty satisfying hearing the beads pop into place. Also the Ride-On tire balancing/sealing stuff works great.
I guess I'm lucky.
All I do is bring my two wheels to the corner garage where I get my cars fixed.
The mechanic mounts both tires and balances the rear which fits on regular car balancing machine for $20.
I balance the front myself when I get home and put them back on the bike.
At that price it's not worth sweating over a tire change for me.