

MO Wrenching: Brake Caliper Rebuild
Keep your brakes factory fresh
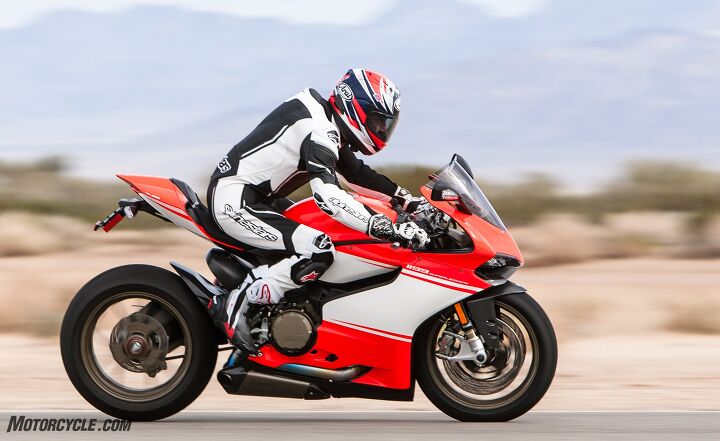


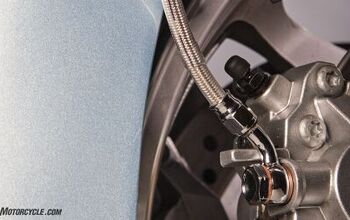
The photo above points out how important properly functioning brakes are to getting the most performance possible out of them. Brakes, however, are instrumental in more than riding quickly. They are necessary for your safety.
MO Wrenching: How To Bleed Your Brakes
MO Wrenching: How To Replace Brake Pads
Remember, way back in February (in this brake pad replacement article), when I told you to look for uneven wear on brake pads as a sign of sticky caliper pistons? Well, even if no pistons in the calipers are sticking, you should consider rebuilding a caliper if you can’t remove the brake dust deposits from a piston with solvent and a brush during your pad swap. Proper functioning of the brake system depends on pistons that move easily within their bores.
Calipers, no matter how many pistons they have, are broken into two categories: single-action and dual-action. Single-action calipers have pistons that only press from one side of the disc. Dual-action calipers squeeze the disc with pistons from both sides. Rebuilding these two kinds of binders follows exactly the same steps – you just do more on dual-action units.
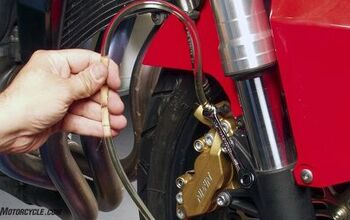
The rebuild starts with pressing the pistons out of the calipers. My preferred method is to drain the system, press the pistons into the bottom of their bores (to force out the brake fluid), and carefully blow the pistons out with compressed air. If you don’t have compressed air, you can use the hydraulic fluid and lever to achieve the same result. Unfortunately, this technique is terribly messy. Be sure to place a container to catch the fluid under the caliper. Follow the same procedures for restraining the pistons described below. And don’t forget latex gloves to protect your skin from the hydraulic fluid.
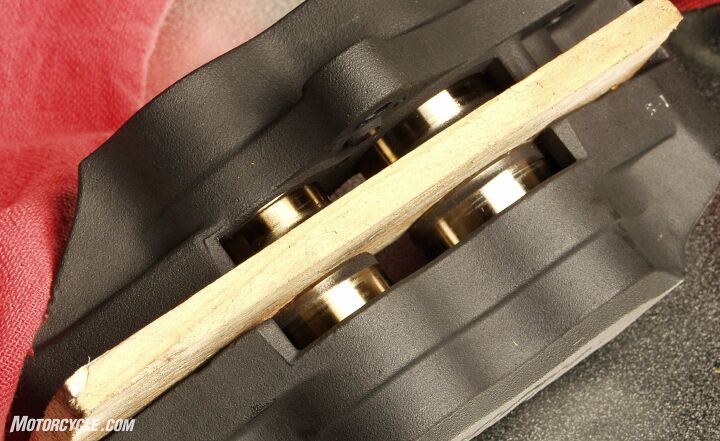
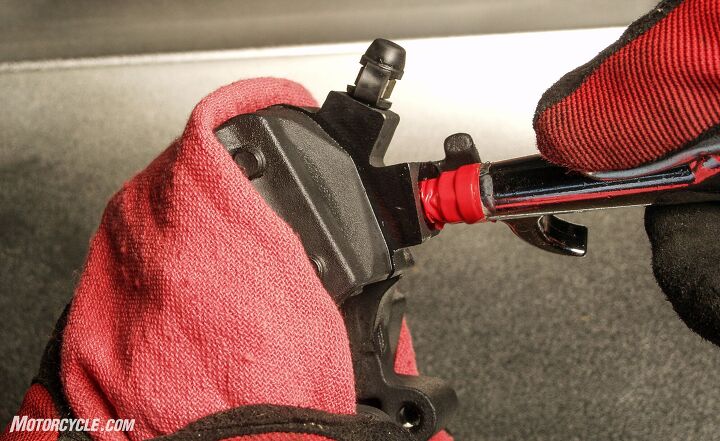
Begin the rebuild by draining the system and removing the caliper. If you’re leaving the rest of the system on the bike, you’ll want to wrap the line’s fitting with a rag and tape it in place to avoid a mess. Remove the pads, springs, clips, piston insulators, and any other hardware around the caliper’s pistons. It’s easiest to remove pistons from single-action calipers. For a one-piston, single-action caliper, place a rag between the piston and the bracket for the second brake pad. Carefully blow compressed air into the hole for the banjo fitting. Keep the air pressure low and your fingers clear of the piston! If the caliper has more than one piston, you will want to place a piece of wood, as well as the rag, into the caliper. This will keep one piston from popping out and leaving the other deeply recessed in its bore.
Similarly, one-piece, dual-action calipers should have their pistons blown out with a piece of wood in between the sets of pistons. The goal here is that the wood is thin enough to allow the pistons to fully extend, but not pop free. Two-piece, dual-action calipers can sometimes be unbolted, giving you better access to one set of pistons at a time. (Check your service manual before attempting this, as some manufacturers recommend against it.) Since you’d have to fashion a means of controlling the pistons as you blow them out of their bores, I’d recommend treating the calipers like one-piece units until you have the pistons extended.

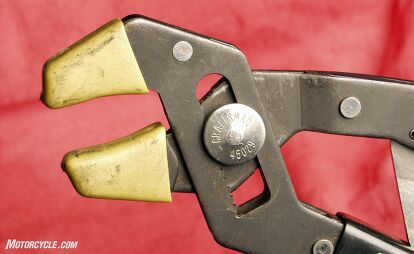
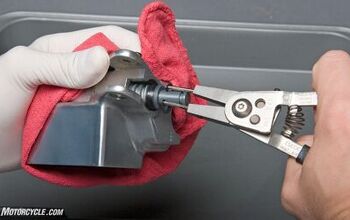
If you’re lucky, you’ll be able to pull the pistons free of their bores with your fingers. If not, use a set of “soft jaws” on a pair of pliers. These plastic covers will keep the metal of the pliers from touching the piston and scratching its surface while still giving you a remarkably strong grip on it.
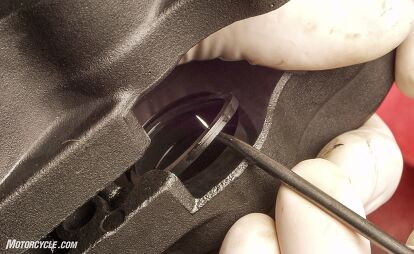
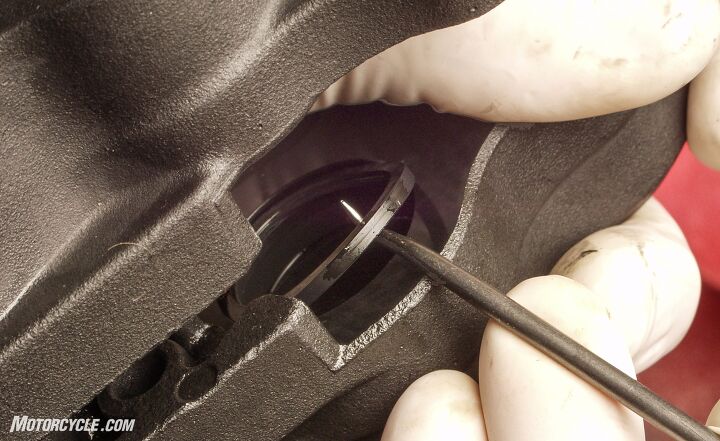
After the pistons are removed, use a pick to gently pry out the dust covers and inner seals. Be careful not to scratch the piston bores – although this is less vital than with the pistons. (Remember that, in calipers, the sealing rings are mounted in the bores and slide over the smooth surface of the piston.) Thoroughly clean the interior and exterior of the calipers and pistons with brake cleaner or other solvent. If the parts are particularly dirty, soak them for a few hours in parts cleaner. Remove any traces of the solvent and blow the parts dry, making sure that all fluid passages are clear.
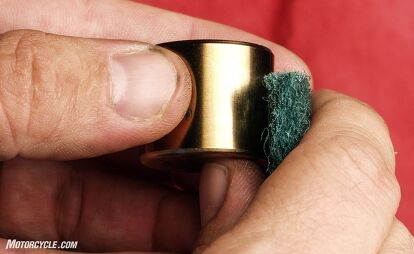
Inspect the pistons. If you find any rust or pitting, polish the surface with Scotchbrite until it is perfectly smooth. If the corrosion is too great, replace the piston. Similarly, buff away any pitting in the piston bores, and replace the caliper if you can’t make the interior look like new. Spray the parts with brake cleaner and blow them dry again.
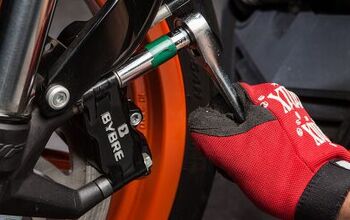
Although you don’t need to replace the O-ring piston seals unless they’re damaged, why would you go through all this trouble and not replace them? Install fresh seals and the dust seals by applying a coating of fresh brake fluid and slipping them into place. (Note: The dust seal is closest to the bore’s opening.) To avoid damaging the seals, don’t use any tools to install them – just your fingers. Apply a coat of brake fluid to the pistons and slide them all the way into their chambers. If you disassembled the caliper halves, install new O-rings and torque them together to factory specs.

Install any anti-rattle springs, clips, and other parts you removed from the caliper. On single-action calipers, apply a coating of high-temperature, water-resistant grease to the caliper holder shafts and the holder holes. If the boot and dust cover for the shaft is cracked, you should replace it. Now is also a good time to wrap the caliper bleed-valve threads with teflon tape to make bleeding the system easier.
Install fresh pads and bolt the caliper into place. Torque the banjo fitting and its fresh crush washers to factory spec. Bleed the lines, break in the new pads, and you’re done.
[This article was adapted from Evans Brasfield’s book 101 Sportbike Performance Projects. Learn more about it here. Read the MO review here.]

Like most of the best happenings in his life, Evans stumbled into his motojournalism career. While on his way to a planned life in academia, he applied for a job at a motorcycle magazine, thinking he’d get the opportunity to write some freelance articles. Instead, he was offered a full-time job in which he discovered he could actually get paid to ride other people’s motorcycles – and he’s never looked back. Over the 25 years he’s been in the motorcycle industry, Evans has written two books, 101 Sportbike Performance Projects and How to Modify Your Metric Cruiser, and has ridden just about every production motorcycle manufactured. Evans has a deep love of motorcycles and believes they are a force for good in the world.
More by Evans Brasfield


Comments
Join the conversation
Soft pliers, wood 10 mm , cleaning pads, dot 4, gloves, Torque wrench, seals, new pads (might as well) ..well there is Sunday. Evans does these articles so well i feel i must do it. Thank you . Clear concise instruction.
Funny thing is when I tried to get a rebuild kit for my Brembo's (used on Duc, Geese and Prilly's) they don't sell one. You have to buy a new caliper which is only $100 thankfully.