


MO Wrenching: Bleeding Brakes After Long-Term Storage
Bringing my old 1978 Shovelhead back to life with the help of a Clymer manual


Modern technology is great and all, but there was once a time when you couldn’t just Google something or watch a ‘How to’ video on YouTube demonstrating the proper technique to do whatever it was you were trying to do. There were books back then, and these places called libraries were full of them. Fortunately, printed, hard-copy books are still around, and there’s a certain variety of them called manuals that any motorcycle, or vehicle owner for that matter, must own to accompany whatever type of bike they have.
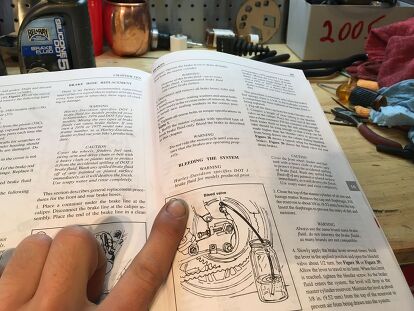
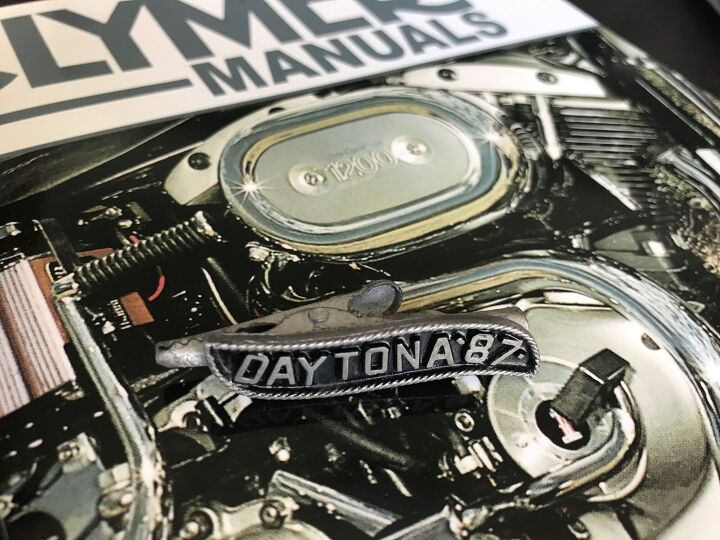
A Clymer manual is a great addition to your bookshelf or garage that will provide you with reliable information required to perform just about any task you can imagine. From simple routine maintenance, such as oil changes and brake service, to more complicated and extensive repairs involving engine or transmission disassembly, a Clymer manual has clear and concise, step-by-step procedures with detailed illustrations to help even the most novice mechanic service, troubleshoot and repair their motorcycle. Plus, a repair manual doesn’t need WiFi and it doesn’t mind getting a little oil or grease on it like a computer would.

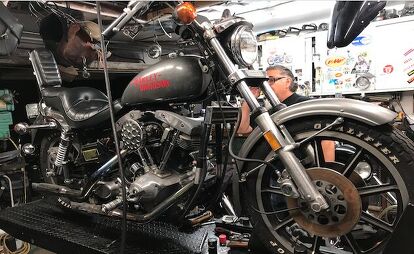
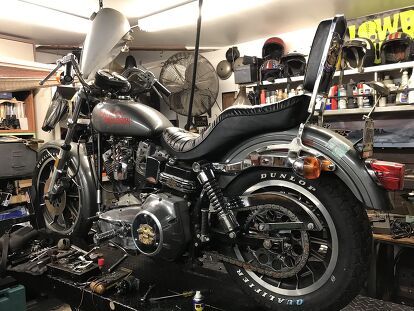
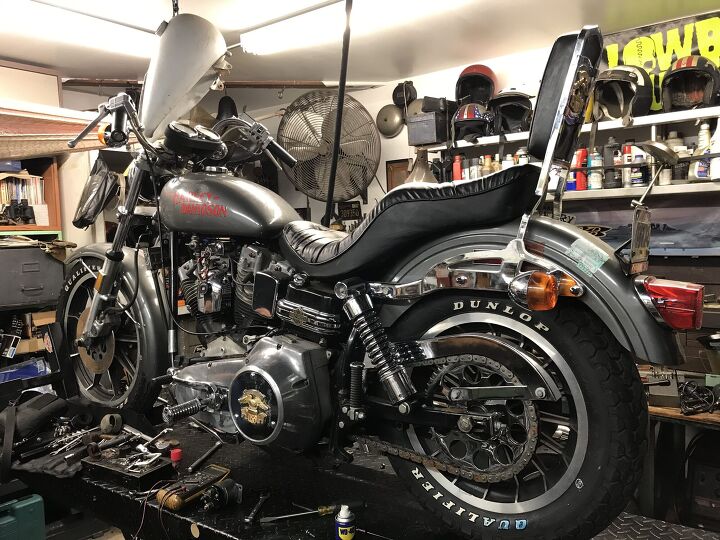
One of the many bikes I own is a 1978 Harley-Davidson FXS Low Rider, a motorcycle that was already a teenager long before the World Wide Web even became a real thing – Google wasn’t created until September of 1998 and YouTube not until February of 2005. So, as you can imagine, there’s not a whole lot that comes up when you search a ‘How to’ procedure for a 40-year-old Shovelhead. Also, there’s hundreds of Clymer manuals for various bikes of all makes and models, including yours – we can almost guarantee it.
The bike has been in the family since ’78, seen all the major shows, parties and rallies from Sturgis to Daytona and is mostly all stock, with the exception of a few changes and upgrades. I’ve owned the bike for about three years now, but it hasn’t been on the road since ’03. It’s been sitting back in Pennsylvania until about six months ago when I drove cross-country to bring it back with me to California. As you can imagine, charging the battery and hitting the starter wasn’t going to miraculously bring it back to life. It was going to require a little more than that.
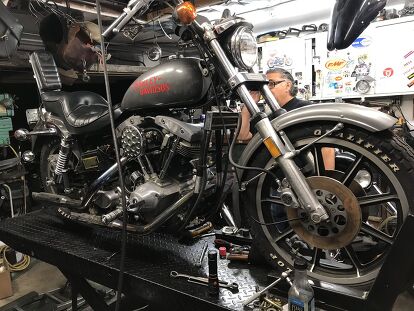
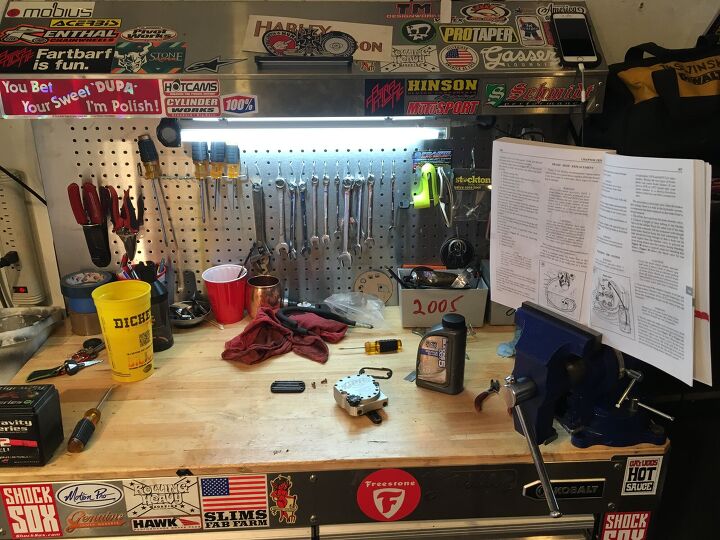
So, in my free time, I’ve been tinkering and slowly rubbing on it, addressing what I need to restore this thing back to its former glory. Helping me along in addition to my factory manual has been my Clymer manual. The first thing I did was wash and polish off all the grime that had accumulated over the years so I could have a clean slate to see what I’m working with.
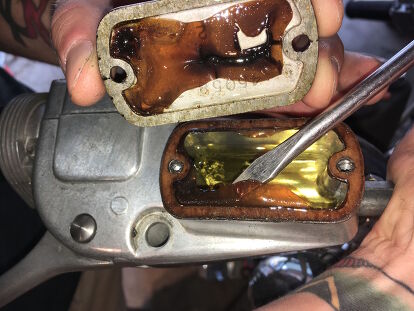
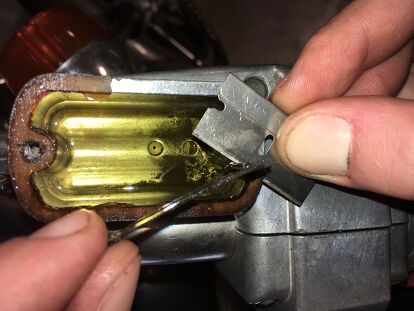
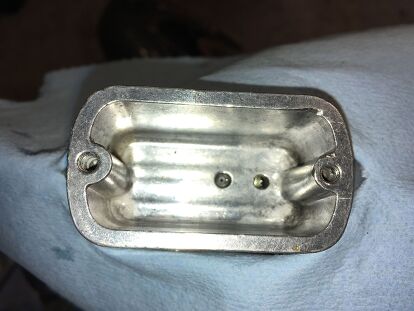
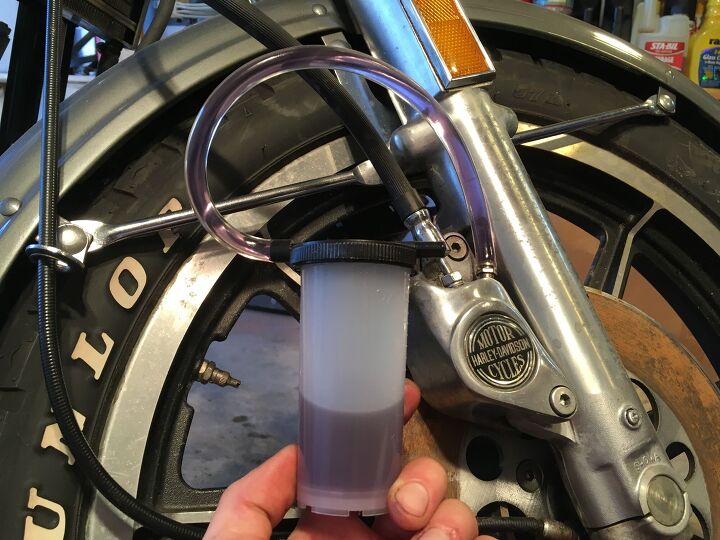
Getting the motor running has been my first priority, and while I’m still working on that and trying to figure out what’s up with the solenoid and why the starter isn’t engaging, I figured I’d go through and replace the fluids. So I started with flushing and bleeding the front brakes.
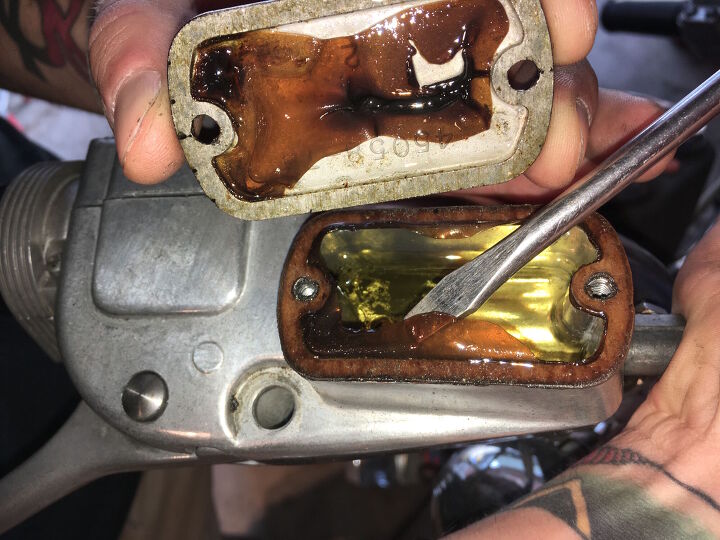

Brakes are arguably the most important system on any vehicle, so why not start there. Bleeding them and making sure you have a solid lever or pedal with no air in the closed system is vital to ensuring they work properly and as effectively as possible. Although there’s a couple different ways to do it, flushing and bleeding brakes is basically the same process no matter the type of bike. Being an older bike, the brakes (though disc) are pretty rudimentary and easy to work on, and so were the Clymer manual’s instructions.

Just because you think you know how to do something, no matter how simple, it’s never a bad idea to give the manual a read-through. More often then not, there might be one key step or trick that you may be unaware of that can be the deciding factor between a 15-minute quickie or a botched job that’ll cost you an hour or more. You don’t want to retrace your steps looking into the manual to see where you went wrong when you could have avoided it all in the first place. I’ve been there…
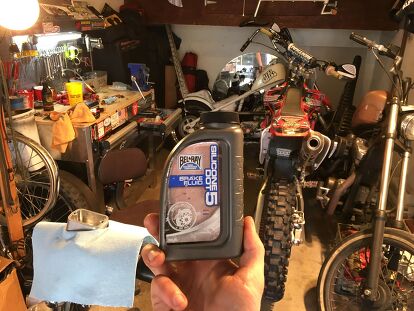
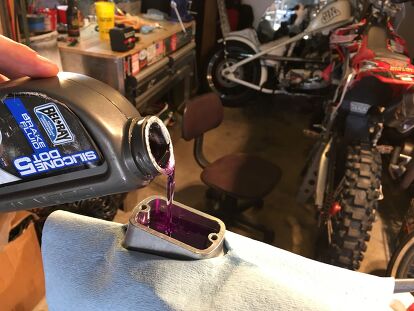
Because there was still fluid in the lines, I used the master cylinder push-through technique. Though, filling and bleeding dry lines is much easier and faster using a vacuum bleeder from the caliper side. The push-through technique is the one the manual suggested, and also the method I’m most familiar with, so that’s how I did it. If flushing or bleeding brakes is something completely new to you, or maybe you could use a refresher, we have a fully detailed explanation and ‘How to’ right here:


We live and we learn, and the next time is that much easier. My front brakes are now bled and it’s on to the rear, so whenever I get the motor to turn over, I know I can get it on the road and actually stop – well, maybe that should wait until I hit the front rotors with Scotch-Bright to get rid of the rust. One thing at a time, though, and this bike will be running and riding in no time. Sitting as long as it has, I will also eventually take the calipers apart to see how they look and replace the seals and brake pads. For now, changing the fluid is a good place to start without having to order parts. A master cylinder rebuild might be required down the line too, but I had a really solid lever, so I’ll cross that bridge when I get to it.
Riding motorcycles is obviously a ton of fun, but that’s only part of it. The relationship between you and your bike(s) goes beyond just the miles you share. Working on your bike brings a whole other level of intimacy to the relationship – after all, don’t you want to see what it looks like with its clothes off?
Additionally, a lot of riders have old bikes, bikes that not every shop can or will work on, so the more familiar you are with yours, the better. To top it all off, wrenching isn’t just about saving some money. Working on your own motorcycle is fun, rewarding, and even therapeutic, depending on who you ask. A manual like a Clymer will help any motorcyclist get to better know their motorcycle and become a better motorcyclist, and this isn’t us trying to push a product on you. It’s just plain old tips and advice from one motorcyclist to another. Restoring an old motorcycle adds new challenges to basic maintenance, and keeps things interesting.
I hope to do more posts like this one as I slowly-but-surely get my Shovel back on the road. Join me on this project. I’m sure we’ll all learn something in the process. Be safe, have fun and enjoy your motorcycles.
More by Brent Jaswinski


Comments
Join the conversation
I'm surprised you used DOT 5. I thought 5 required special seals designed for its use, while 3, 4, and 5.1 are the more common, older, variants. OTOH, doing some quick searching, I see some articles that claim special seals are not required, and some that claim otherwise.
Me, I've been using fresh containers of "Valvoline Synthetic DOT 3 & 4" for a couple of decades now, on my bikes.
That's a nice looking Shovelhead. It's surprisingly stock aside from the gas tank. It's also the perfect bike to build a series of how-to guide on. My '77 FXS provided endless opportunities for repairs.