

Installation of Bub Enterprises "Bad Dog" Pipes
You finally did it! You finally mustered up the right mixture of patience, money and insanity to take home a Milwaukee Big Twin, and man is it beautiful. You feel like the king of the world when you're riding, Hog heaven and all that. But wait, there's just one problem: That 600-plus pounds of macho American iron just doesn't sound right. Sure, it has that distinctive (and maybe soon to be trademarked) potato-potato-potato lope and a nice low rumble, but come on, it's too damn quiet. And you know those stock staggered dualies are holding back those 80 cubic inches from really hauling you down the road. What you need is a new set of pipes!
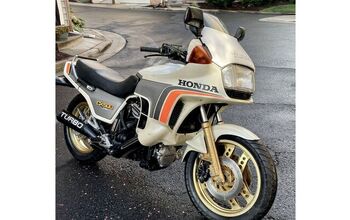
Impressions: I too felt the need to uncork a few more ponies and a more authoritative voice for my Dyna Glide Convertible. My search for a suitable replacement soon led to Dennis Manning of Bub Enterprises. Dennis has been involved in virtually every serious land-speed record attempt for the last 25 years, and knows a thing or two about Harley exhausts.
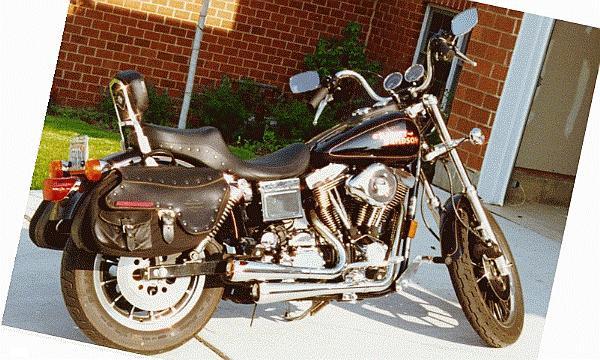
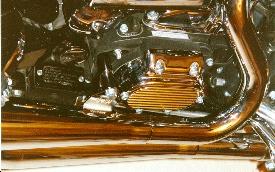
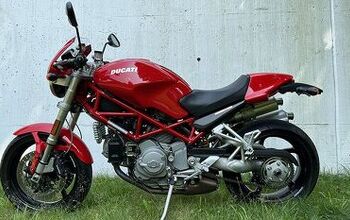
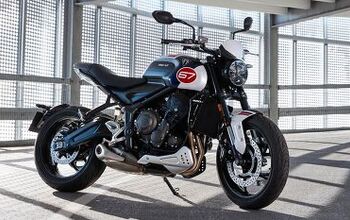
Bub's provided a set of their Bad Dog mufflers which have a gradual taper ending in positively sexy header pipes. Build quality is excellent with top-notch chrome and smooth, even welds.
"But what about the sound," you ask? Man-o-man, you won't believe what those stock pipes were holding back when you hear how loud your sled is now. A low and throaty roar that is solid and powerful bellows forth from the Dyna's exhaust. Although they aren't painfully loud like straight pipes, they might be too noisy for some people. With a little practice you'll learn how to run in stealth mode through neighborhoods you don't want to annoy.
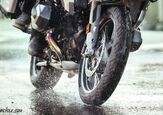
One drawback to these pipes is that the front pipe sits lower than stock, which may cause grinding during aggressive cornering or two-up riding. Softails have only 5.47 inches of clearance so owners of those bikes might want to consider this before purchasing the Bubs.
Another factor to keep in mind before buying pipes is whether or not you want to mess around with jetting. Bub claimed we could bolt the pipes on with no carb mods, but you'll probably want to make a few simple jetting changes to take advantage of the increased exhaust flow. For this review we performed a standard CV carb hop-up by rejetting and installing a high-flow air filter. Dynojet has a popular kit or you can make your own with a couple of drill bits and the following H-D parts:
27094-88 Main needle ('88 XLH part) 27116-88 Main jet (#165) 27170-89 Pilot or "Low speed" jet (#45)Results: Pipes alone won't create an asphalt ripper. As these results show, improvements were modest but the power curve has been smoothed considerably. What opening up the pipes and air filter really offers is better feel with no peaks, valleys or flat spots. That means nice smooth acceleration and predictable response.

Installation: All the parts you'll need for installation are included with the pipes and are shown to the right. The kit also includes a sheet of instructions that tended to be somewhat cryptic. A pro could probably do the job in under 30 minutes, but give yourself a couple of hours. First step is to get your tools ready -- here's what you'll need:
big screwdriver (1/4") 9/16" combination wrench socket wrench with the following: 1/2", 1/2" deep, 7/16", 3/16" hex-head sockets 3" and 7" socket extensions large vise grips (for snap rings) small vise grips (for center mounting clamp) flashlight 3 - 4 Newcastle Brown ales.Instructions begin with the rather vague message of: "Remove your old system completely, including all brackets, snap rings and flanges." That's all it says -- you're left to figure out how on your own. Luckily, it's not that tough. Remove all heat shields, pipe mounting bolts and the two lower mounting brackets (whose location varies from model to model). The rear bracket is easily accessed.
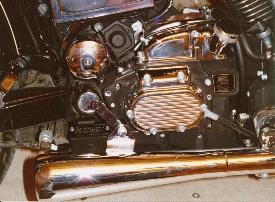
Once you get both brackets off and you have the head nuts removed, the whole exhaust system comes off as one unit. Use the big vise grips to remove the snap rings located at the head-end of each pipe but be careful not to deform them because they will be re-used later. Also collect the two "flanges" that were used to mount the pipes to the heads.
Now use a flashlight to see what's left in the exhaust ports. Old gaskets are a tight aluminum mesh that crushes when installed, so you must reach into the port with your fingers and pull that whole mess out. When you're finished the port should look like a clean metal hole. Next install the "Genuine James Gaskets" provided by the kit, which isn't easy as the gaskets barely fit into the port and you have to be careful not to mash or deform them.
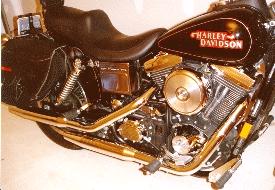
Bub pipes install a bit differently from the OEM set as the front pipe uses the same front mounting point, but a different bracket, and both pipes share a rear mounting bracket connected to the transmission. Slide the small front mounting bracket provided onto the front pipe before installing the flanges and snap rings on both pipes.
Installation of the front mounting bracket is tricky as the clamp mounts inboard of the rear brake pedal and uses a nut, bolt, several washers and a lock washer. You also have to hold the front pipe in position while you do it. I wound up using a small vise grip to hold the clamp and washers in place while threading the nut. I eventually got it, but it took several attempts and a lot of cursing.
Another procedure the instructions never mention is tightening the flanges to the head, but we'd recommend doing it. You should tighten the flange for each pipe before tightening its bracket to ensure a tight seal between pipe and head. You'll need to completely secure the front pipe (flange and both brackets) before you can start with the rear pipe. This is because the front pipe's rear bracket bolt is covered by the rear pipe. Rear pipe installation was trouble-free.
More by Don Crafts, Chicago Desk Editor


Comments
Join the conversation